Are you still vexed by the scan to computer is no longer activated error? It is a common error while using HP smart for a printer. How to fix scan to computer is no longer activated? Let’s explore the troubleshooting methods together with MiniTool.
It is troublesome that your printer cannot work properly due to many errors such as printer not activated error 30 and the one discussed here. The scan to computer is no longer activated error often occurs when using HP smart app for a printer.

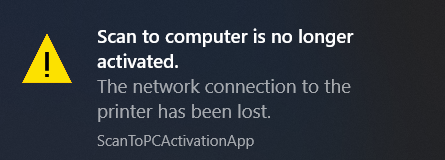
A great many users try to get rid of it but still cannot scan to computer anymore. This error message pops up as “Scan to computer is no longer activated. The network connection to the printer has been lost”. This error often results from the connection of your internet and printer. In many cases, the corrupted or outdated printer driver is also responsible for the error.
Now, let’s see how to fix scan to computer is no longer activated.
Fix 1. Check the Connection of Your Internet and Printer
As it’s suggested from the pop-up error message, the HP smart cannot scan from this printer issue may be caused by the Internet connection. Here you can try resetting your Internet router to fix the error. For that:
Step 1. Disconnect the internet router from the socket.
Step 2. Press the Power button on the back of your router for about 15 seconds.
Step 3. Then re-plug the router into the socket and press the Power button to restart it.
Now, try using the printer and check if the scan to computer error is fixed or not.
This error can be caused by the improper connection between the printer and the computer. If you are using the printer via a USB cable, make sure you connect it to the computer properly.
Fix 2. Reinstall the Printer Driver
If the printer driver gets corrupted or outdated, it is very likely that you will encounter the HP scanner not working issue. To get rid of the vexing error, you can try reinstalling the printer driver.
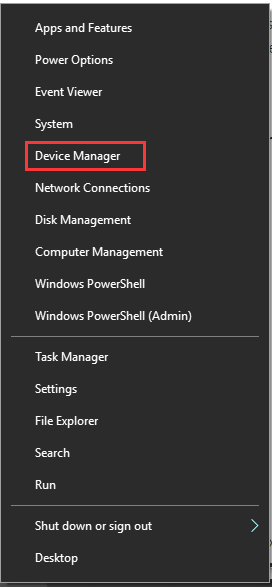
Step 1. Right-click the Start menu and select Device Manager from the context menu.

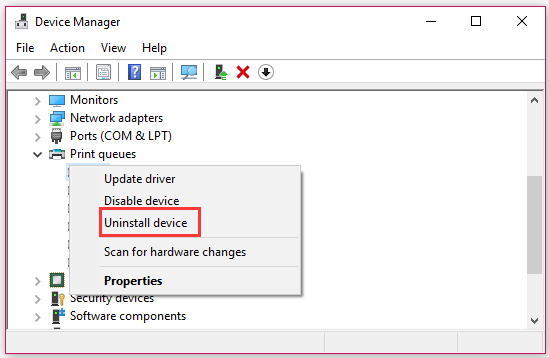
Step 2. In the pop-up window, navigate to the Print queues category and expand it, and then right-click the affected printer driver and select Uninstall device.

Step 3. Click on the Uninstall button to confirm and follow the on-screen prompts to complete this operation.
Step 4. Restart your computer and your Windows will reinstall the printer driver automatically. Alternatively, you can download the latest printer driver from the manufacturer’s website and reinstall it to your computer manually.
Fix 3. Disable the ScanToPCActivationAPP Process in Task Manager
If the scan to computer error still pops up, you can follow the steps below to disable the ScanToPCActivationApp process in Task Manager. Here’s how:
Step 1. Right-click the toolbar at the bottom of your computer and select Task Manager from the context menu.
Step 2. In the Processes tab, find and right-click the ScanToPCActivationApp process and select End task.
Step 3. Navigate to the Startup tab, right-click the ScanToPCActivationApp, and select Disable.
Fix 4 Deactivate the Scan to Computer Feature
If all the above fails to work, you have to consider disabling the Scan to computer feature by the following steps:
Step 1. Double click on the Printer icon on your desktop.
Step 2. Click on the manage scan to computer button on the pop-up screen.
Step 3. Uncheck the box for Automatically start Scan to Computer and click on the Disable button.


User Comments :