Can the SSD in a PS5 Be Upgraded?
PS5 is the latest home video game console developed by Sony Interactive Entertainment. It comes with a custom-built internal SSD of 825 GB (667 GB available), which has a 12-channel interface, achieving a raw throughput of 5.5 GB/s.
However, this internal SSD is not user-serviceable, since its flash memory chips and controller are built into the PlayStation 5’s motherboard. On the other hand, you also don’t need to upgrade this SSD because it is faster than most SSDs on the market.
Why Do You Need the PS5 SSD Upgrade?
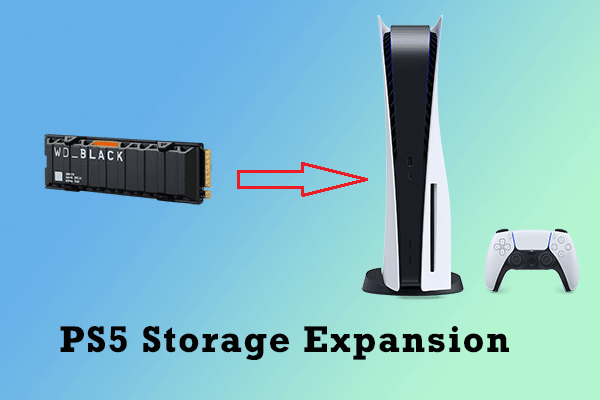
In most cases, when it comes to the PS5 SSD upgrade, we refer to the PS5 internal storage expansion. PS5 allows users to expand its storage by adding an internal M.2 SSD and an external drive.
The function of the M.2 SSD is the same as that of the PS5 built-in SSD. Users can download and play PS4 and PS5 games on the M.2 SSD. As for the external drive, it only allows users to download and play PS4 games. To play PS5 games, users must move them to the internal SSDs.
Therefore, you may want to perform the PS5 hard drive upgrade since the PS5 built-in SSD has a space of only 667 GB while modern games’ file size becomes larger and larger.
Best SSD for PS5
What SSD is best for PS5 SSD upgrade? You can choose one from the following items.
Note: To add an M.2 SSD to PS5, the M.2 SSD should meet the following requirements: 250GB – 4TB storage, 2230/2242/2260/2280/22110 form factor, 5,500MB/s read speed or faster, and PCI-Express Gen4x4 M Key interface.
- WD Black SN850X: 1TB, 2TB, and 4TB are available. TLC 3D NAND SSD with 7,300MB/s read speed and 6,350MB/s write speed.
- Samsung 990 Pro: 1TB and 2TB are available. TLC 3D NAND SSD with 7,450MB/s read speed and 6,900MB/s write speed.
- Corsair MP600 Pro LPX: 500GB, 1TB, 2TB, and 4TB are available. TLC 3D NAND SSD with 7,100MB/s read speed and 6,800MB/s write speed (note that 500GB and 1TB have slower write speeds).
- Seagate FireCuda 530: 500GB, 1TB, 2TB, and 4TB are available. TLC 3D NAND SSD with 7,300MB/s read speed and 6,900MB/s write speed (note that 500GB and 1TB have slower write speeds).
- Sabrent Rocket 4 Plus: 1TB, 2TB, and 4TB are available. TLC 3D NAND SSD with 7,100MB/s read speed and 6,600MB/s write speed.
Do not use an M.2 SSD without a heat-dissipation mechanism, such as a heat sink or heat transfer sheet. If your M.2 SSD doesn’t come with these parts, you need to purchase them separately.
How to Install SSD in PS5
After choosing the best SSD for PS5, you need to do the PS5 hard drive upgrade. Here is the guide on how to install SSD in PS5.
Step 1: Turn off your PS5 console and remove all cables and devices from your PS5 console. Then, wait a while for your PS5 console to cool down.
Step 2: Remove the Back Faceplate of the PS5.
- Position your PS5 console so that the PS logo is facing down and the power button is facing away from you.
- Use your right hand to grip the edge of the bottom-right corner and your left hand to grip the edge of the top-left corner of the cover.
- Gently lift the cover up with your right hand.
- Slide the cover off with your left thumb while using the fingers of your left hand to stabilize your PS5 console.
- After removing the PS5 back cover, you will see the following scene.
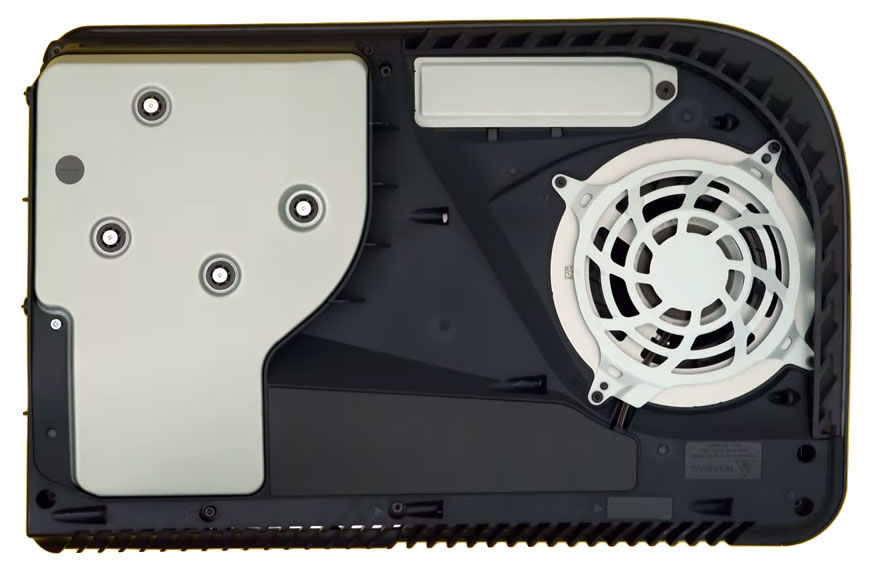
Step 3: As you can see, there is a long rectangular cover over the expansion slot, secured with one screw at the top. Remove the screw from the expansion slot cover and then remove the cover. Then, you will see the following scene.
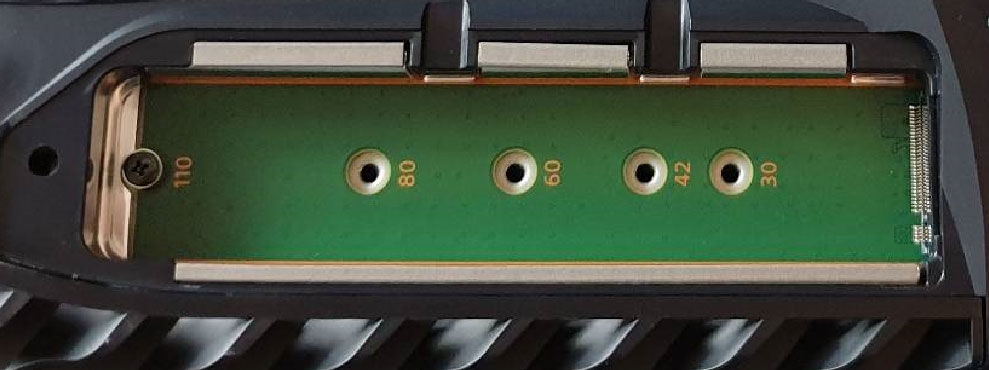
Step 4: Insert the M.2 SSD and fasten it.
- As you can see, there is a screw on the slot. Remove it and its spacer.
- Place the spacer into the groove corresponding to the size of your M.2 SSD (2230/2242/2260/2280/22110).
- Hold the edge of your M.2 SSD, align it with the notch on the expansion connector, and then starting from diagonally upwards, firmly insert it all the way in.
- Ensure the M.2 SSD circuit board is resting flush on the spacer, without obstruction from your cooling structure.
- Tilt your M.2 SSD down and fasten it to the spacer with the screw.
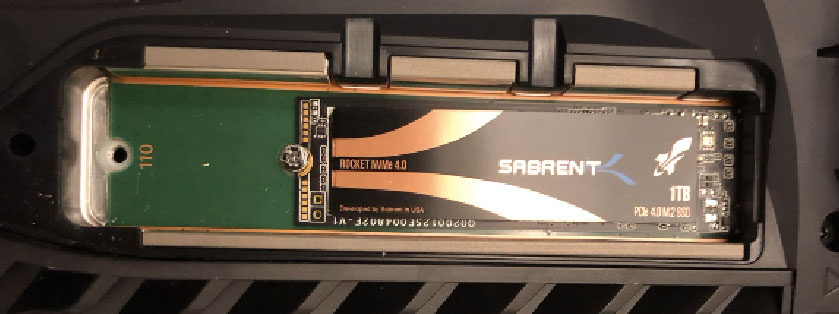
Step 5: Attach the expansion slot cover and fasten the screw. Replace the PS5 console cover. Connect the AC power cord, cables, and base, and then turn on the power. When your PS5 console turns on, the formatting guide appears. Follow the on-screen instructions and format your M.2 SSD.
After that, you can install games into the M.2 SSD or move games to this SSD.
How to Use PS5 SSD on a PC
If you want to use the PS5 SSD on your PC for some reason. The following content may help you. PS consoles use a file system that is not recognized by Windows. If you install the PS5 SSD into the PC, the PC won’t recognize partitions on the SSD. In addition, they are a little weird in Disk Management.
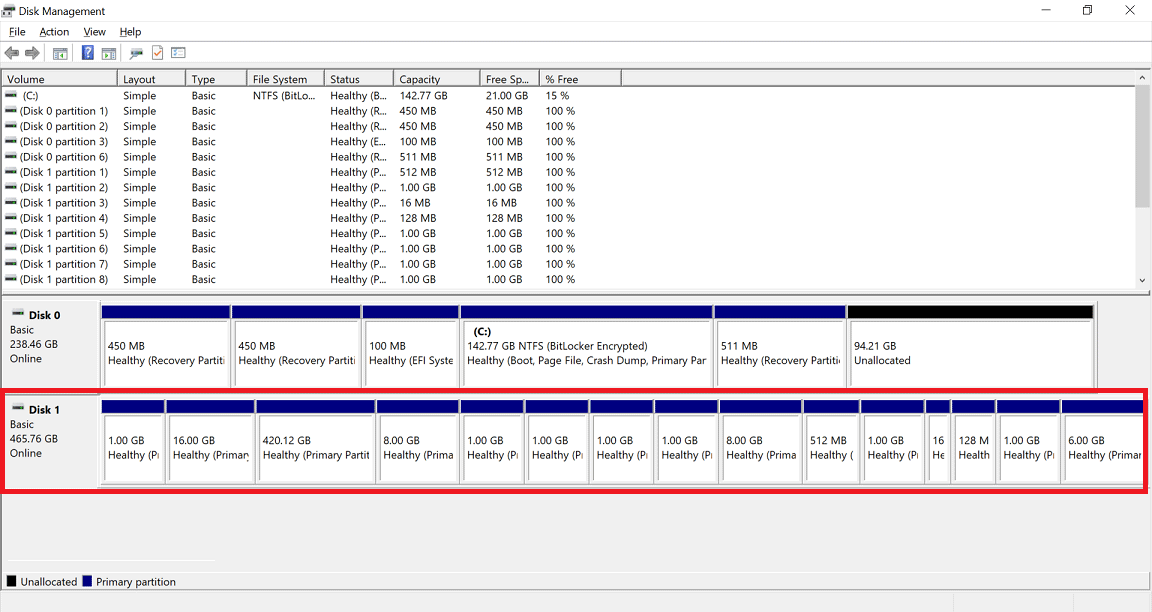
If this problem is not solved, the SSD won’t be used by Windows. To solve this issue, you can use MiniTool Partition Wizard. It can delete all these weird partitions with a few clicks. Here is the guide:
MiniTool Partition Wizard FreeClick to Download100%Clean & Safe
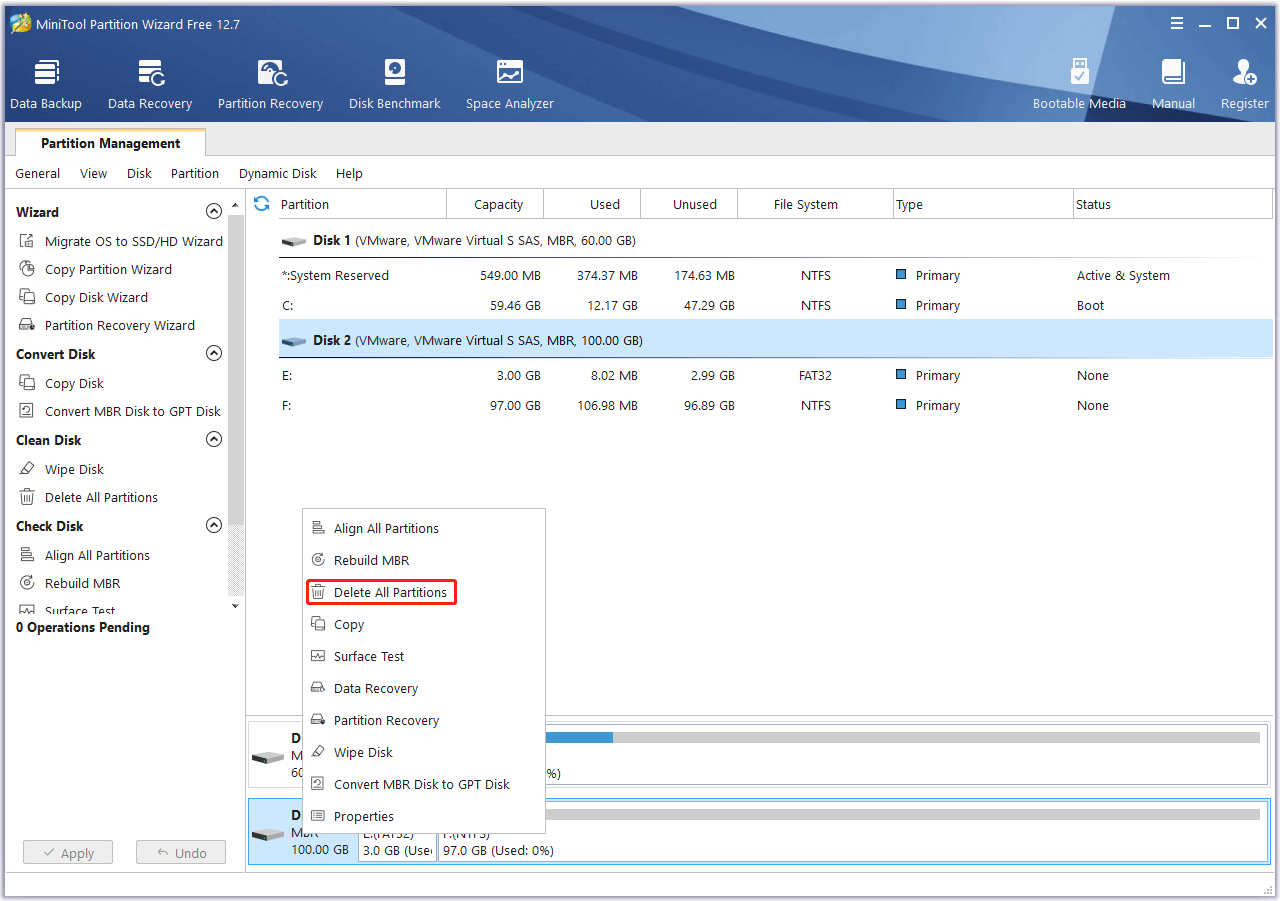
Step 1: Free download MiniTool Partition Wizard. Launch it and go to its main interface. Then, right-click the PS5 SSD and choose Delete All Partitions. Click Yes to confirm the operation.
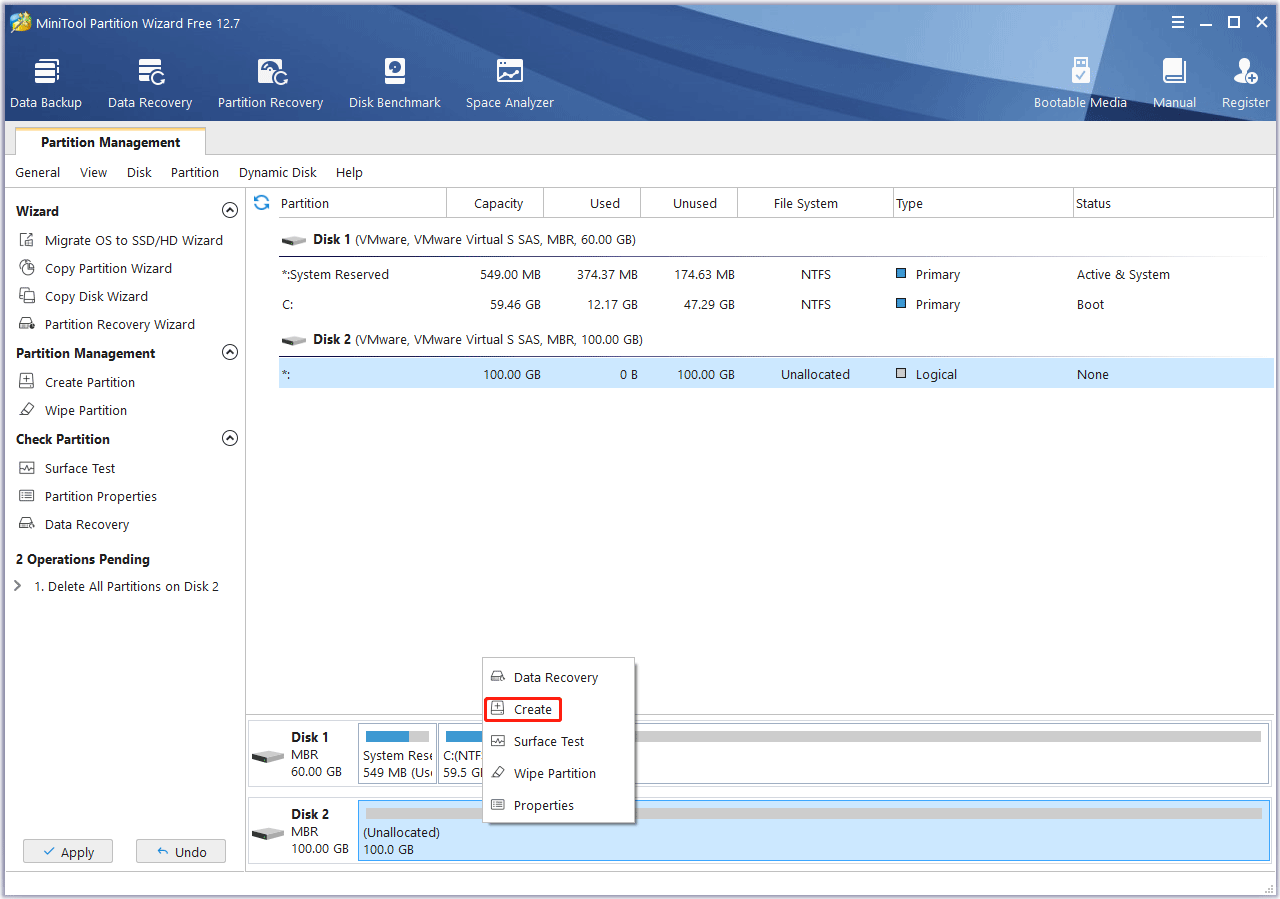
Step 2: Right-click the Unallocated space and choose Create. Then, follow the wizard to create a new partition. You can keep all as the default value and click OK.
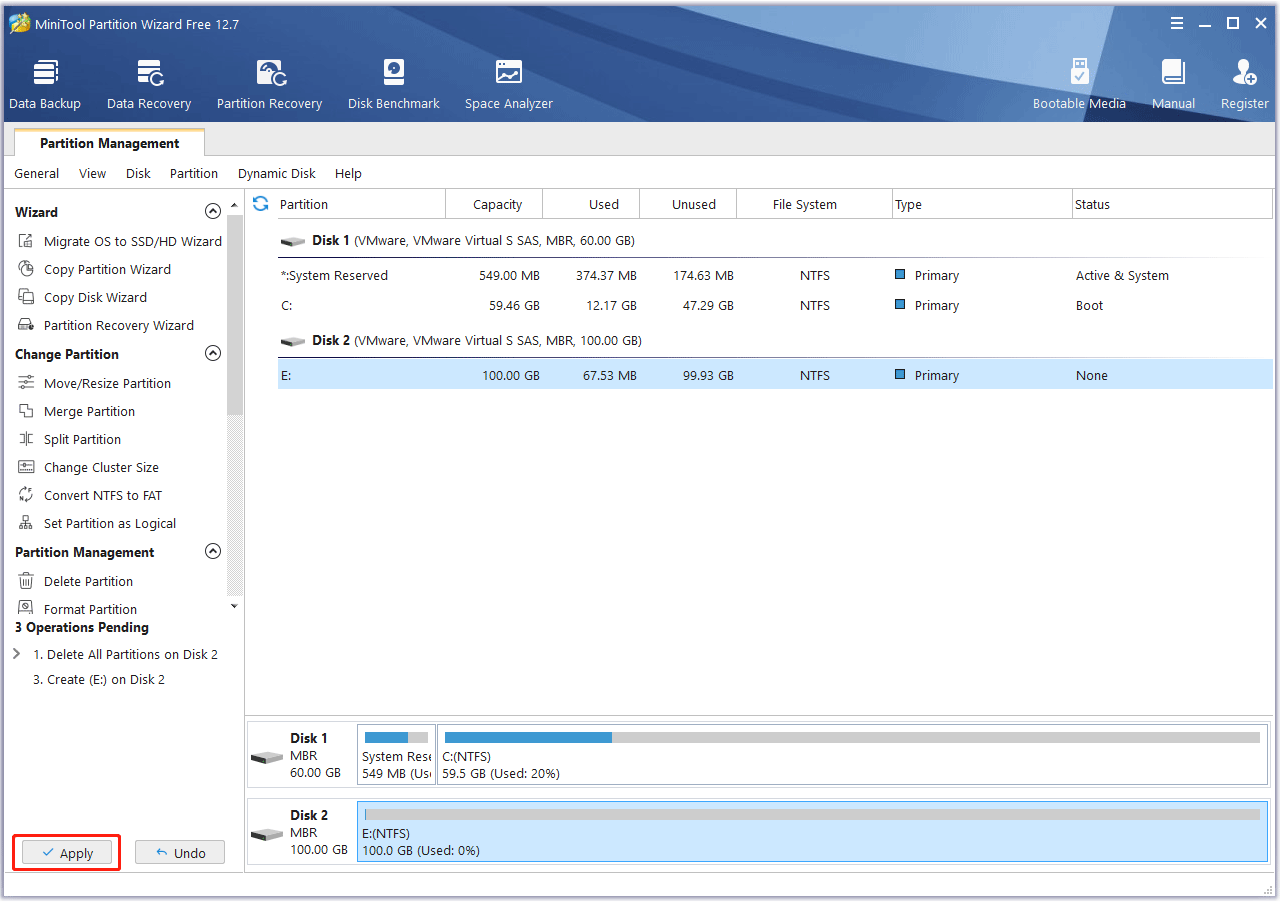
Step 3: Click the Apply button to execute the above pending operations.
Bottom Line
Is this post useful to you? Do you have other ideas about the PS5 SSD upgrade? Share them with us in the following comment zone. In addition, if you encounter problems when using MiniTool Partition Wizard, please feel free to contact us via [email protected]. We will get back to you as soon as possible.

User Comments :