Some Windows 10 users might receive the error message “A problem prevented the document from being scanned” when trying to scan a document with a connected scanner. When this happens, how to fix this problem? This post from MiniTool Partition Wizard offers you 4 solutions.
Microsoft has integrated many tools (including a scanning tool) into the operating system so that Windows 10 users will no longer need third-party applications. However, some users are encountering an error “A problem prevented the document from being scanned” when using the scanning tool.
So, how to fix a problem prevented the document from being scanned Windows 10? Scroll down to know more detail.
Method 1: Remove and Then Add the Printer
If you encounter this scan problem, the simplest way to fix the error is to remove and then add the printer. How to do that? The steps are as follows:
Step 1: Open Settings, and then click Devices.
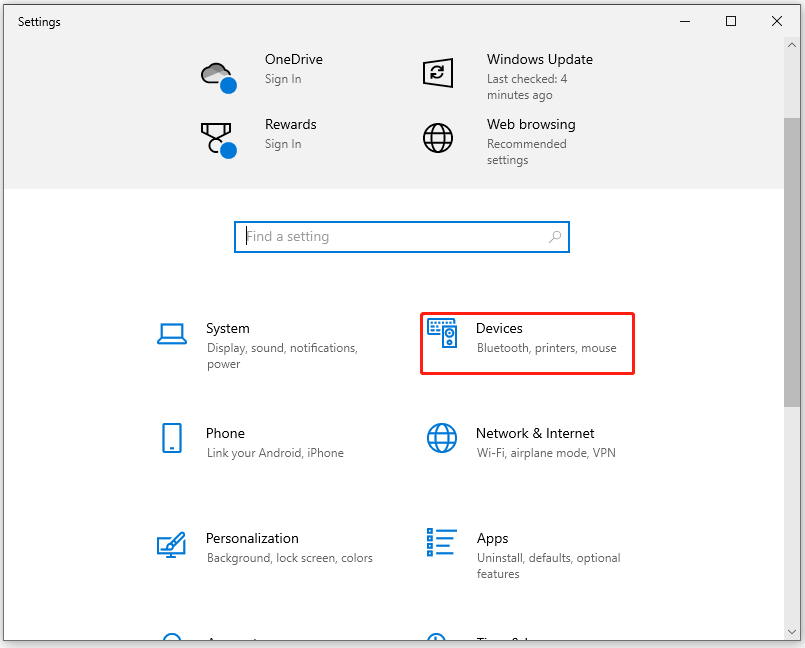
Step 2: Choose Printers & scanners. Click the device that you have problems with, and then click Remove device. (A new window will pop up, please click Yes.)
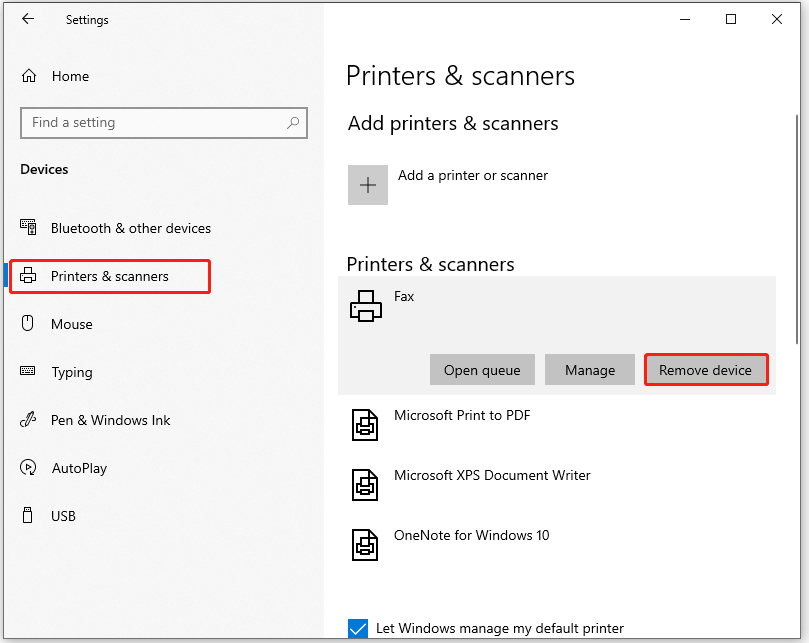
Step 3: On the same page, click Add a printer or scanner. When the printer is detected, click Add device.
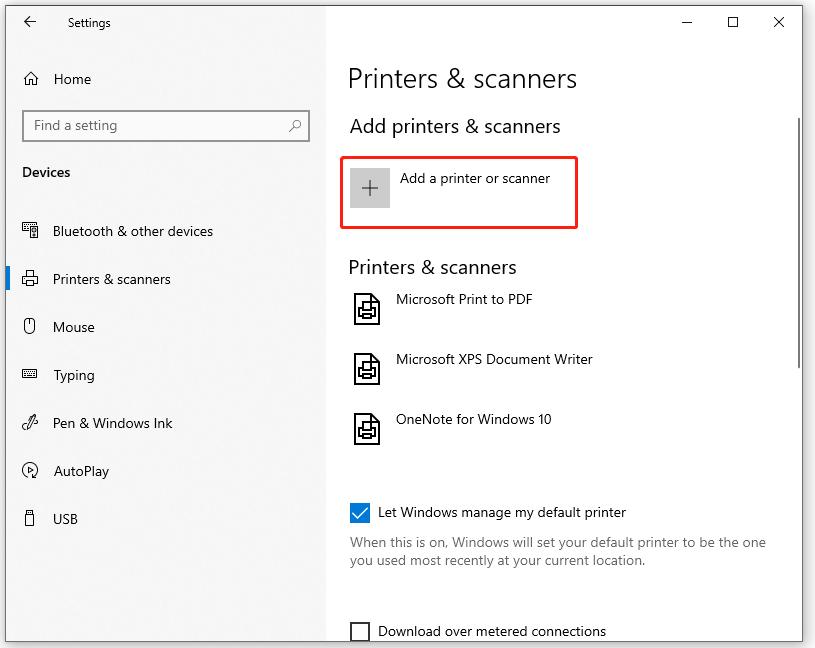
After adding the device successfully, you can try to scan the documents.
Method 2: Restart the Windows Image Acquisition (WIA) Service
If the Windows Image Acquisition service is not running or is stuck in a limbo state, users may also encounter a problem prevented the document from being scanned Windows 10. Follow the below steps to solve this scan problem:
Step 1: Press the Win + S on the keyboard. Type services in the search box, and then press Enter.
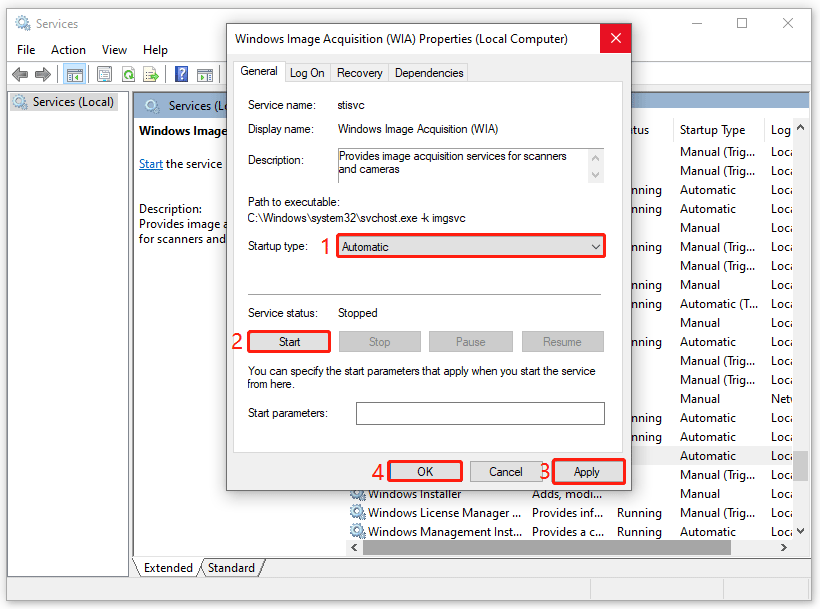
Step 2: A new window will open, and you need to find Windows Image Acquisition. Right-click it, and then click Properties.
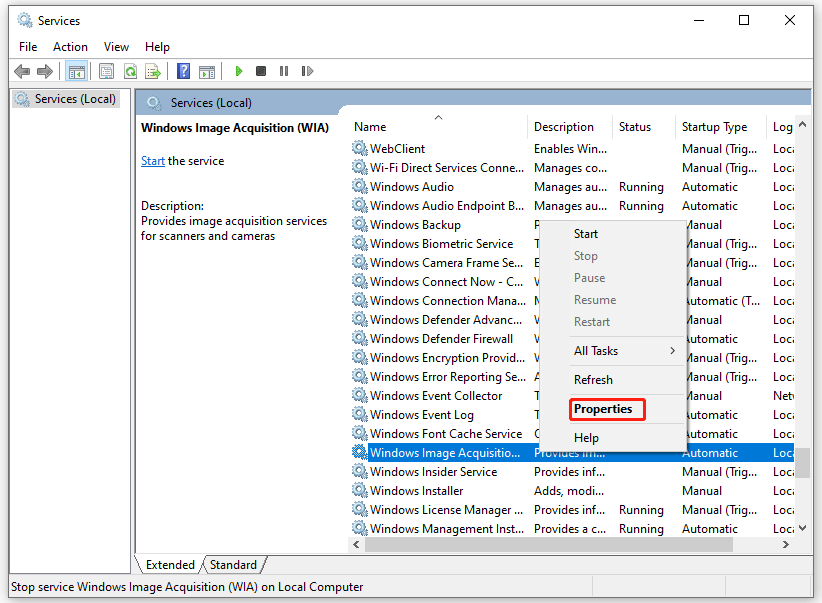
Step 3: Change the Startup type to Automatic, and click the Start button. Then, click Apply and finally click OK.
You Need A WIA Driver to Use This Device: How to Fix
Method 3: Run the Printer Troubleshooter
If the first method doesn’t work, the second method to fix a problem prevented the document from being scanned is to run Windows Printer troubleshooter. Here is a quick guide:
Step 1: Click the Start button, and then click the Settings button to open settings.
Step 2: In the Settings page, choose Update & Security.
Step 3: Click Troubleshoot in the left pane, and then click Additional troubleshoot.
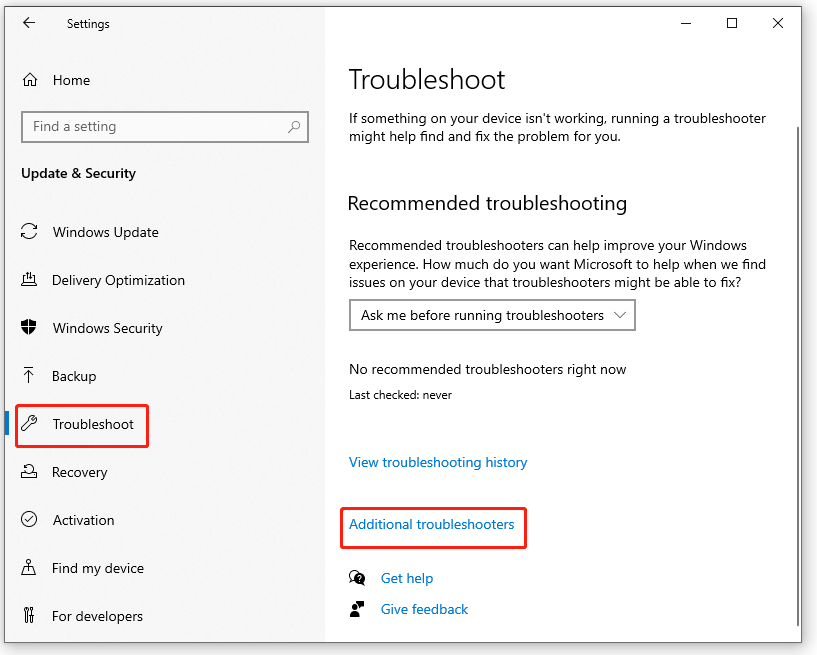
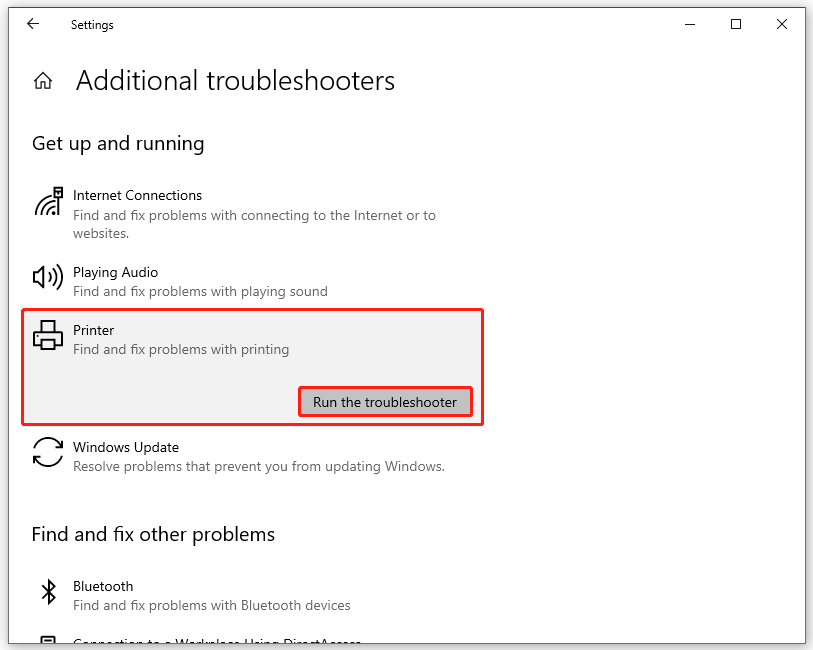
Step 4: Click Printer and then click Run the troubleshooter.
Step 5: Wait until the initial scan is complete. Then, click Apply this fix.
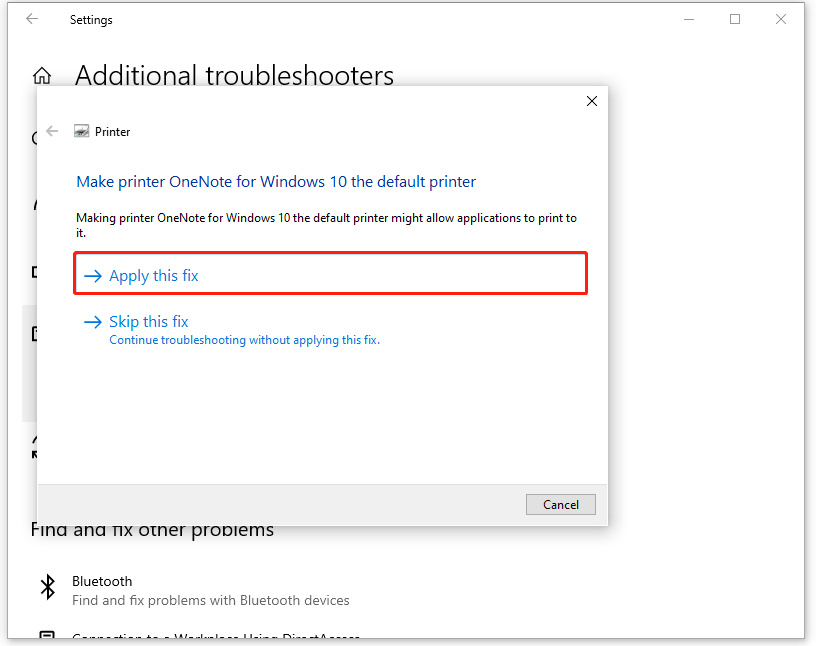
After applying the fix, restart the computer to see if the problem is fixed.
Method 4: Reinstall the Printer Driver
The last method to fix a problem prevented the document from being scanned Windows 10 is to reinstall the printer driver. Here is how to do that.
Step 1: Go to the device manufacturer’s website and download the latest driver.
Step 2: Press Win + X on the keyboard, and choose Device Manager.
Step 3: Double-click the Printer queues. Then, right-click the problematic device and choose Uninstall.
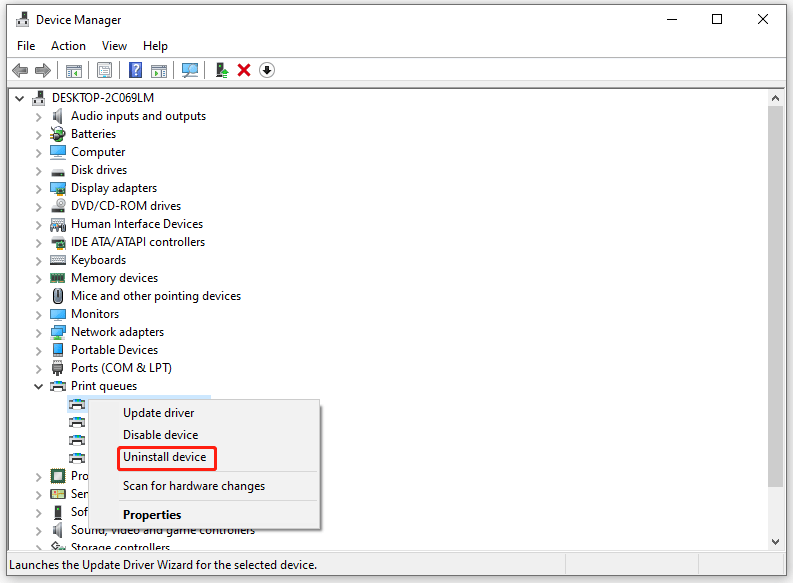
Step 3: Now you should reinstall the driver that you downloaded earlier.
Step 4: After reinstalling the driver, you need to add the printer or scanner. (Please follow step 3 in method 1 to do that.)
Now your printer is ready for use now, and you can try scanning.
That’s all about how to fix a problem prevented the document from being scanned Windows 10. Do you have any questions about this topic? Please leave them in the comment zone and we will try to answer them as soon as possible.

User Comments :