The PowerShell script is a collection of commands that can be used to change system settings and do other tasks. However, many users don’t know how to run PowerShell script on Windows 10. Don’t worry! MiniTool will walk you through a full guide to do that.
Windows PowerShell is a command-line shell that enables you to run commands in the scripting environment. If you want to run a PowerShell script, you need to create a script file first. PowerShell script is saved in a text file by using the .ps1 extension.
However, you may receive the error message “cannot be loaded because running script is disabled on this system” when double-clicking the .ps1 file. To run PowerShell script successfully, you can keep reading the following context.
How to Create PowerShell Script on Windows 10
First of all, you need to create PowerShell scripts files. It can be created by using the Notepad. Alternatively, you can use ISE (Integrated Scripting Environment) that is a built-in tool in the preinstalled environment. Here’s how:
Method 1. Create a PowerShell Script File with Notepad
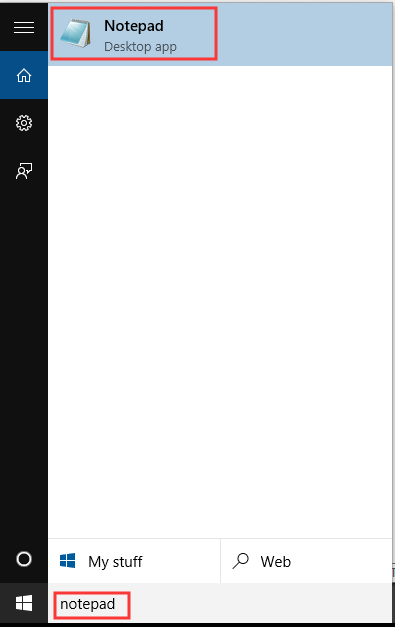
Step 1. Type notepad in the search box and click the Notepad on the top result.
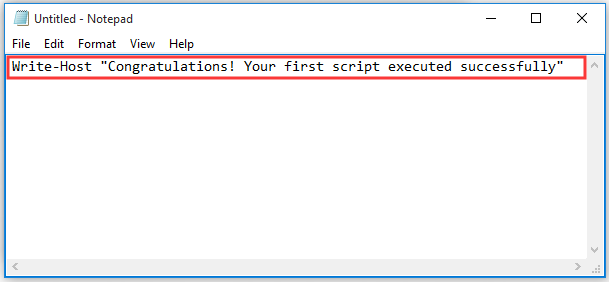
Step 2. Now you can write a new script on the context file. For example, copy and paste Write-Host “Congratulations! Your first script executed successfully” into the context file.
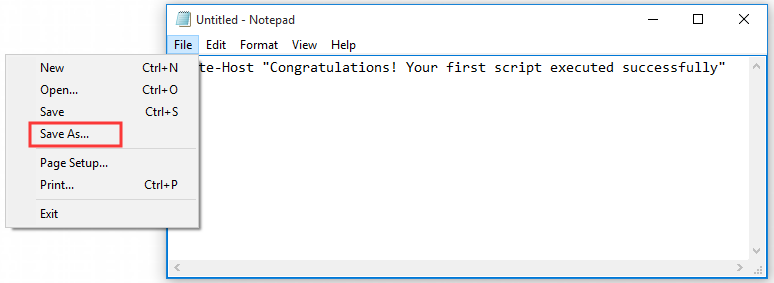
Step 3. Then click on the File menu on the upper left corner and click the Save as button.
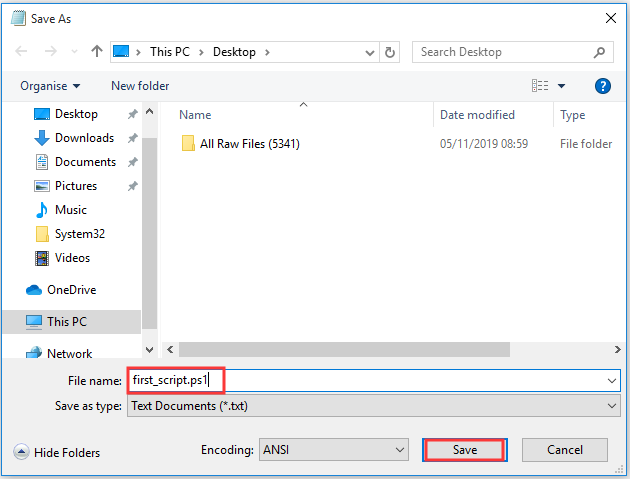
Step 4. Select a location where t you want to save the file and type a new name for the script file followed by the end of .ps1 such as first_script.ps1. After that, click on the Save button.
Method 2. Create a PowerShell Script File with Integrated Scripting Environment
In addition, you can use the Windows built-in tool ISE to create a script file. This method is relatively complex, please read the following part carefully.
Step 1. Type Windows PowerShell ISE in the search box, and then right-click the top result and select Run as administrator option.
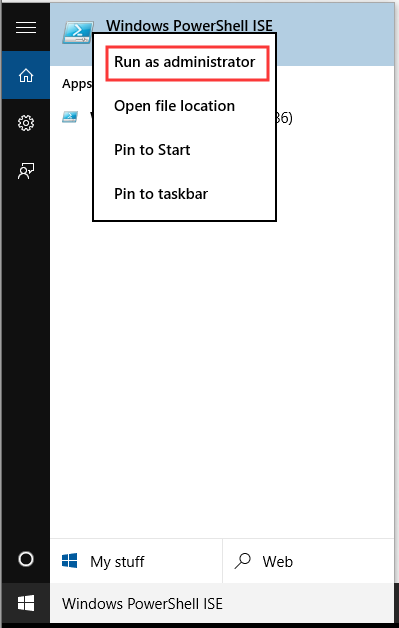
Step 2. Press Ctrl + N keys on the keyboard to create a new empty .ps1 file.
Step 3. In the new empty file, type or paste a new script file that you want to run. For example, we write Write-Host “Congratulations! Your first script executed successfully”.
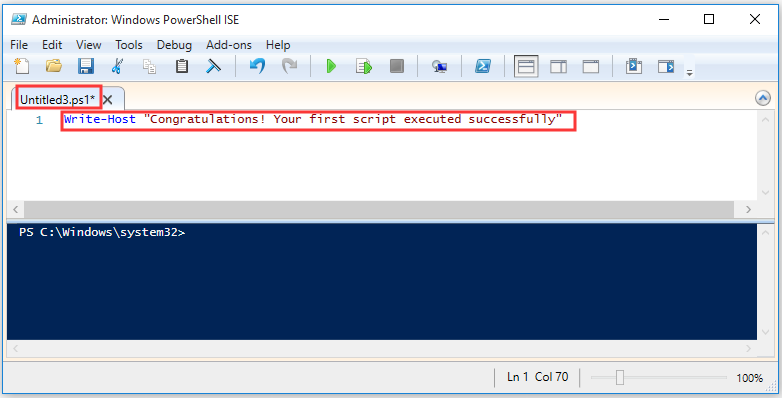
Step 4. Press Ctrl + S keys on the keyboard to save the script file.
Step 5. In the file explorer, select a location that you want to save in and rename it followed by the end of .ps1. After that, click on the Save button.
After you create the script file using Notepad or PowerShell ISE, it should be ready to run. However, it will fail to work by default, because the default PowerShell settings will always prevent any script from executing.
How to Run PowerShell Script on Windows 10
Now, you may wonder how to run a PowerShell script on Windows 10. To run PowerShell scripts on Windows 10, you need to change the execution policy. Here’s how to do that:
Step 1. Type PowerShell in the search box, and then right-click the top result and select Run as administrator option.
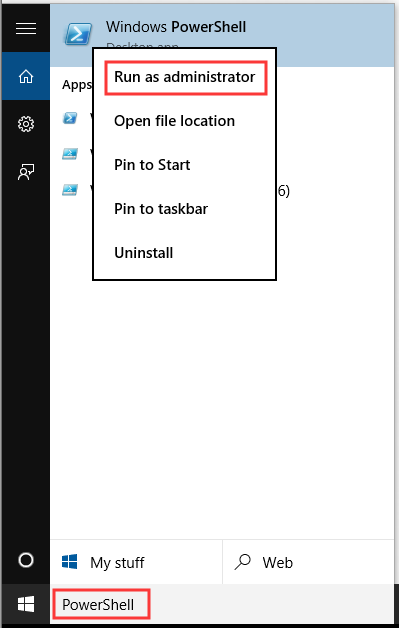
Step 2. Type the Set-ExecutionPolicy RemoteSigned command in the window and press Enter.
Step 3. Type A and hit Enter.
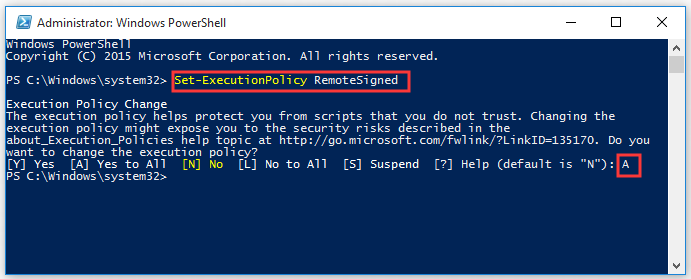
Step 4. Then type & “C:PATHTOSCRIPTfirst_script.ps1 command and hit Enter to run the PowerShell scripts.
After you complete all the above steps, you should run PowerShell scripts smoothly and see the outputs.


User Comments :