What is the difference between an USB photo stick and a flash drive? This article will focus on functionality, capacity, appearance, supported devices/systems as well as how to make use of them with the help of MiniTool Partition Wizard.
Like other kinds of files (documents, texts, charts, PDFs, etc.), photos and videos are easy to lose due to variety of hardware and software accidents like fire, water, drop, etc. physical damage as well as virus, hijack, malware, ransomware, etc. invisible destroying. Therefore, it is of great necessity to make a backup of the import photos & videos. You can easily do the backup work with a photo stick.
What is a Photo Stick? – The Photo Stick Reviews
A photo stick is a flash-drive-shape device containing software that can search through your folders for photos/videos and save a backup of them to its storage. There is no need for installing an extra backup tool and the backup process of the default software is simple; just plug the stick into your machine and click to start.
What Is the Difference Between a Photo Stick and a Flash Drive: Functionality
The biggest difference between a photo stick and a flash drive is their functions. As a storage device, the main function of a flash drive is to save data, no matter photos/pictures/images/graphics, videos/movies or audios/music, program files, documentation, etc. It is used as an extra storage or data transfer device for computers. Besides, a USB flash drive can also be created as a bootable media to boot up crashed machines.
While for a photo stick, it is more like a flash drive with the specialized purpose of backing up and saving backed up photos, videos & maybe some other files. To be exact, if you really want to take a photo stick for other usages like storing other types of data or being created as a bootable stick, it is also possible.
Photo Stick vs Flash Drive: Capacity
In general, both photo sticks and flash drives have a variety of storage capacities and the capacities the photo sticks are larger than those of the flash drives. The common capacities of a flash drive are 8GB, 16GB, 32GB, 64GB and 128GB. Yet, the popular capacities of the photo sticks can be 1TB (1000GB), 512GB, 256GB, 128GB, 64GB and 8GB.
Why the capacity of a photo stick is larger than a USB flash drive? There are two reasons. On the one hand, since the photo stick is used for saving photos and videos that are usually large files, the storage device should be large enough. On the other hand, the built-in backup application will occupy a certain amount of space in a photo stick. Thus, to ensure enough storage to save the imaged pictures and videos, manufacturers usually equip them with large capacities.
What Is the Difference Between a Flash Drive and a Photo Stick: Applied Device/System
As you all know, in common situations, a flash drive is compatible with all computers including desktops, laptops, notebooks as well as tablets. As for operating systems, it supports Windows, Mac and Linux.
As for photo sticks, they support all the devices and OS that are supported by flash drives. Besides, the photo sticks can also be applied to mobile phones, cell phones or cellular phones. Therefore, photo sticks are also compatible with iOS and Android operating systems.
Flash Drive vs Photo Stick: Appearance
It is mentioned in the above content that a photo stick is just a flash-drive-shape device. That is, the photo stick looks very similar to a USB flash drive. The biggest difference is the data transfer port. Usually, there is only one USB-A port for connecting the USB flash drive and computers.
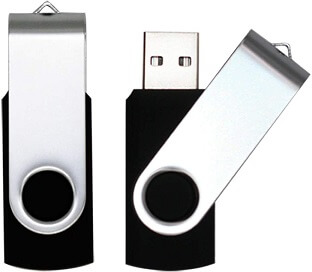
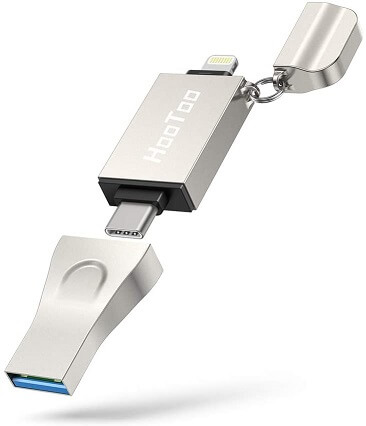
While for a photo stick, there are at least two ports with one for connecting the photo stick to a mobile phone and the other for connecting the photo stick to a computer. For those photo memory sticks that are compatible with both iPhones and Android phones, there are three or four ports (with a type-C port).
What Is the Difference Between a Photo Stick and a Flash Drive: How to Make Use of Them
Finally, let’s talk about how to make use of these two little storage devices.
Make Use of a Flash Drive
For a USB flash drive, to take it for saving data, just insert it into one USB port on your computer. Then, there should be a pop-up message telling that an external USB drive is plugged in or similar words, and you can get access to it from that message window. Or, if there is no such reminder, you can directly go to Windows Explorer and open the device. Then, you can store or back up any data to it just by copying and pasting.
If yours is a new flash disk or you are not satisfied with the current format of your USB drive, you can format/reformat it with MiniTool Partition Wizard, which is a professional and reliable hard disk partition management software. Yet, formatting a disk will destroy or overwrite all the data on it. So, make sure there are no import files on the flash drive before wiping it. Or, just move crucial data to another safe place or make a backup of them with MiniTool Shadow Maker.
Step 1. Connect your USB disk to your computer.
Step 2. Download, install and launch Partition Wizard on the machine. Do not install the program on the flash drive.
MiniTool Partition Wizard DemoClick to Download100%Clean & Safe
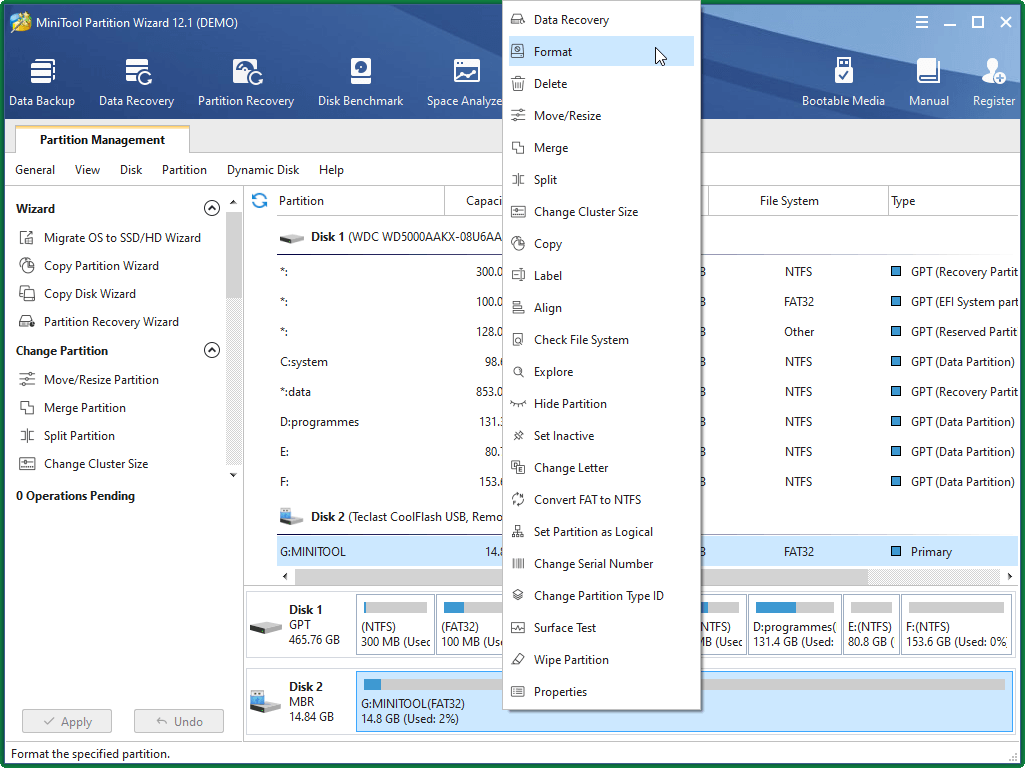
Step 3. Click on the partition of the flash disk and select Format.
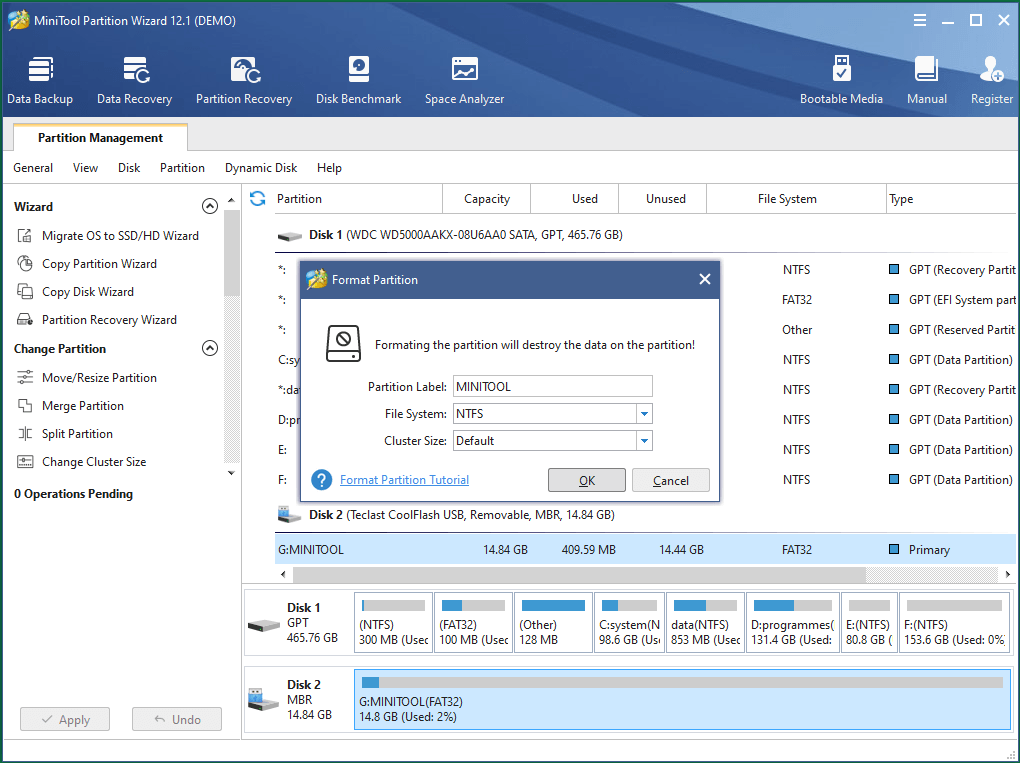
Step 4. Specify the Partition Label, File System as well as Cluster Size of the flash drive and click OK. Partition label is customized; available file systems are NTFS, FAT32, exFAT, EXT2, EXT3, EXT4 and Linux Swap; available cluster sizes are default, 512 bytes, 1 KB, 2 KB, 4 KB, 8 KB, 16 KB, 32 KB and 64 KB.
Step 5. Preview the changes of target flash drive partition and click Apply to save the changes.
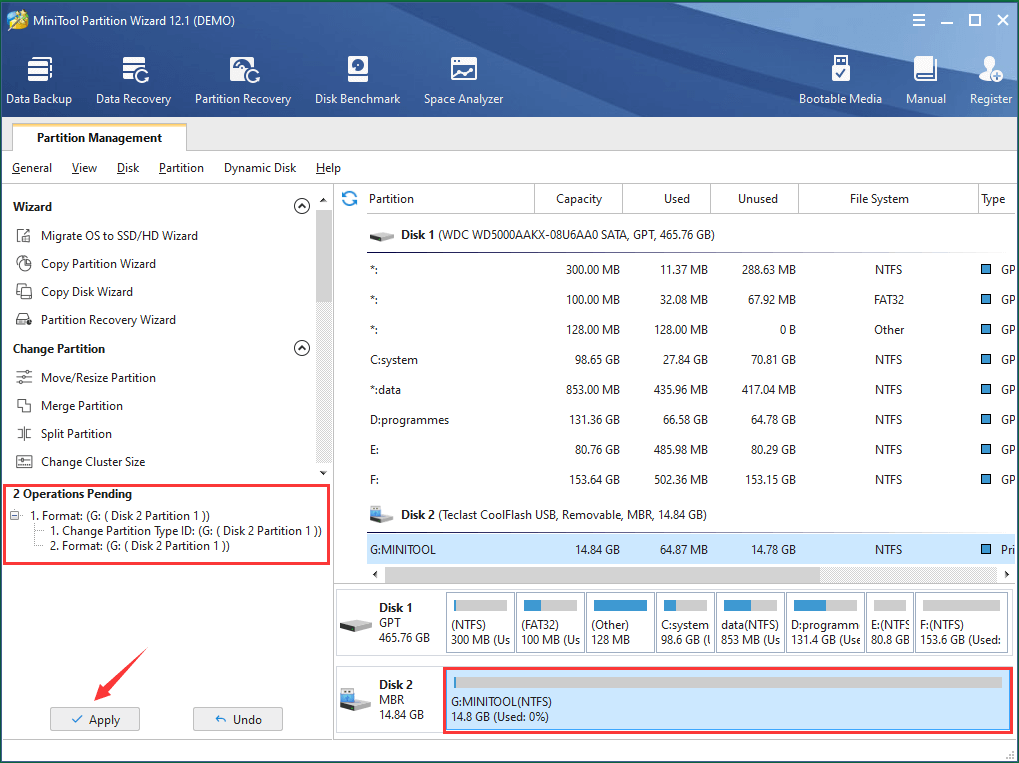
If there are more than one partitions on the flash disk, just repeat the above steps and format them one by one. Yet, usually, there is only a single partition for a USB flash drive.
Furthermore, if you want to make your flash drive as a bootable device, you can continue to rely on MiniTool Partition Wizard.
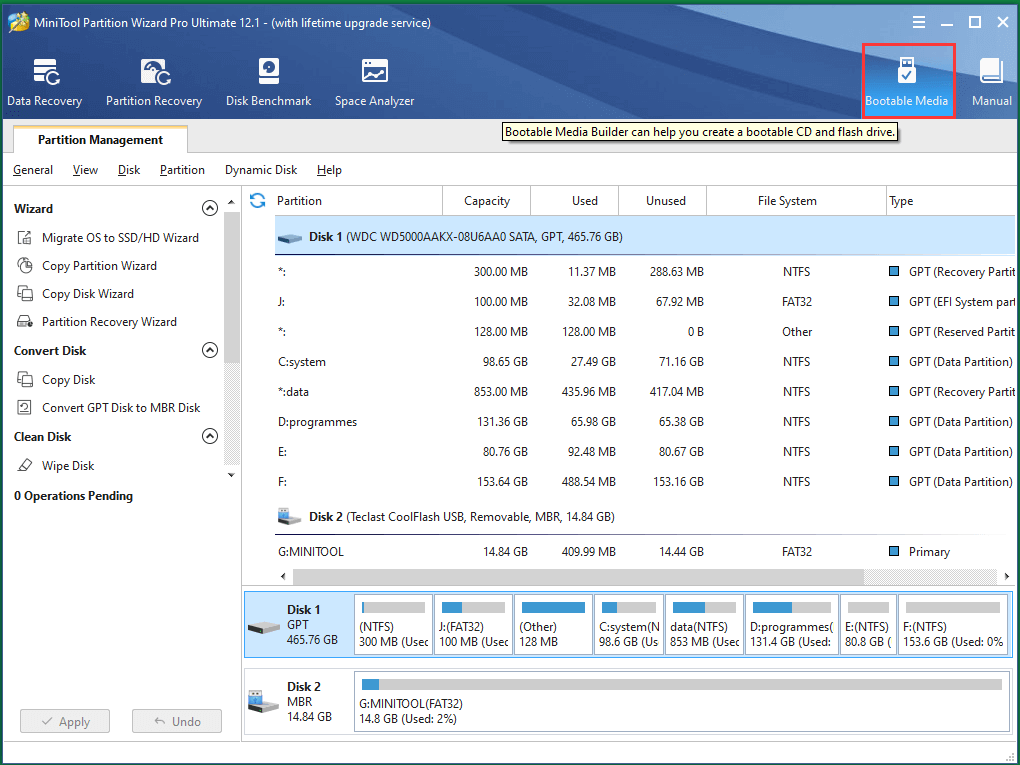
Step 1. In the main UI of the partition tool, click Bootable Media on the upper right.
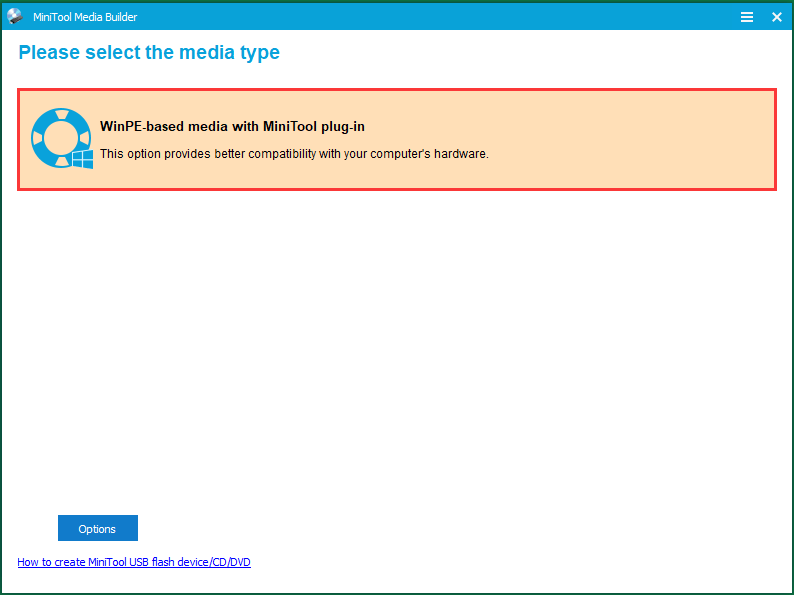
Step 2. In the popup, just select WinPE-based media with MiniTool plug-in.
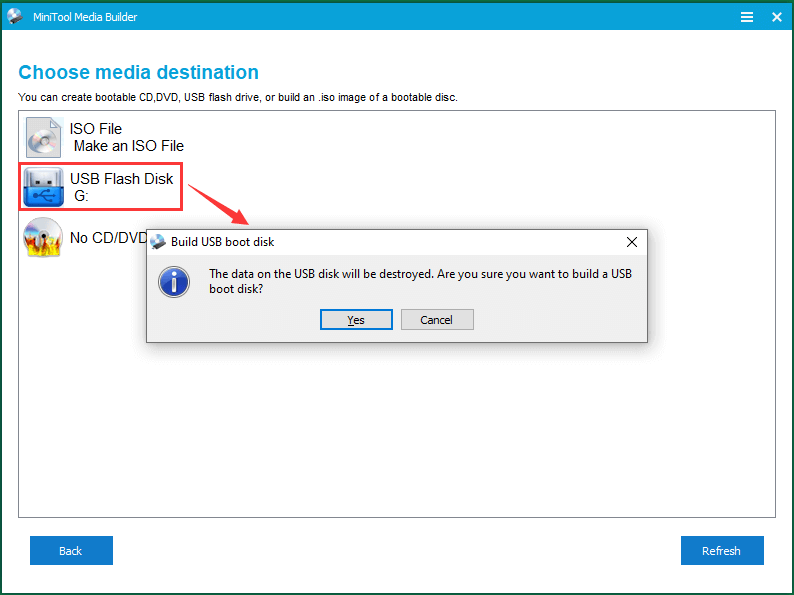
Step 3. In the next window, select USB Flash Disk and confirm the warning by clicking Yes.
Step 4. Then, it will start to create a bootable USB drive. When it is done, click Finish to exit the application.
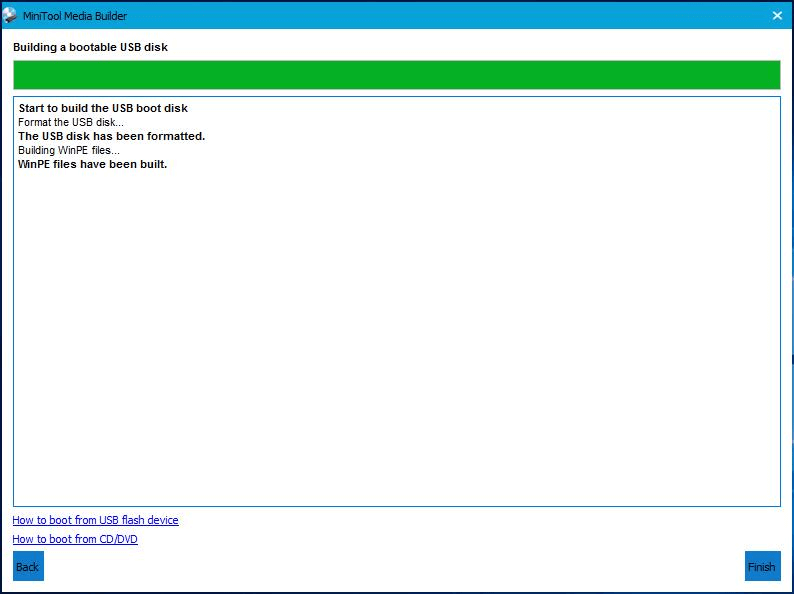
Step 5. Finally, safely Eject the bootable USB drive from your computer.
Now, you can use this bootable flash drive to boot up any crashed computers. Just insert it into the target machine, power the machine on and enter into the boot menu, then choose to boot from the USB drive. When the crashed computer boots up, you can do any fix or maintenance to it such as back up all the data on the internal local disk to an external hard drive with the Copy Disk feature of the plug-in MiniTool Partition Wizard.
How to Make Use of a Photo Stick
Here, it will take a famous photo stick ThePhotoStick (best photo stick) for example to show you how a photo stick works. As for other kinds of photo sticks, they are similar to ThePhotoStick on operations.
Step 1. Plug the photo stick into a USB port on your desktop or laptop.
Step 2. Then, the computer will automatically recognize the stick and issue a window allowing you to run the stick. If not, you can go to Windows Explorer, find the photo stick and double-click the Photostick software to run it.
Step 3. Click the Go button on the software interface. Then, it will begin to search the folders on your machine, find photos/videos within the folders and save a copy of those photos and videos in its own storage.
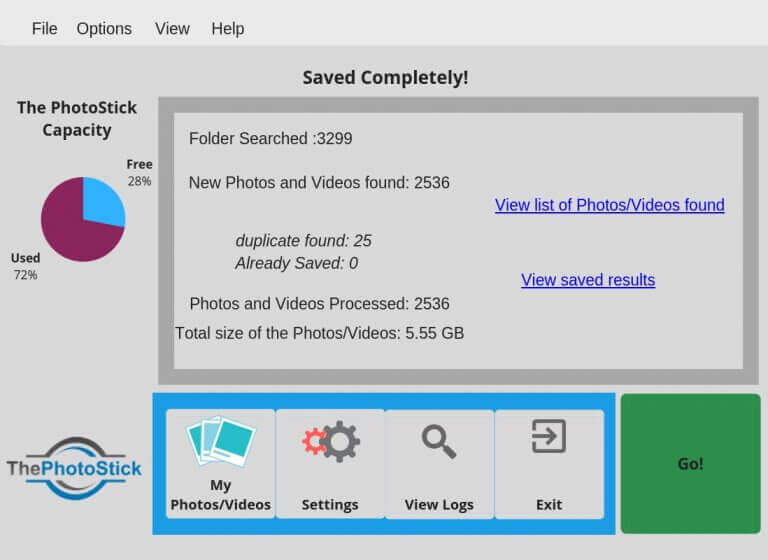
Step 4. Eject the photostick from your computer or just leave it connected to the machine.
If you get a new photo stick or just don’t want your current photo stick as a backup device anymore, you can reuse it as a common flash drive by reformatting it with MiniTool Partition Wizard following the user guide above.

User Comments :