Many NVIDIA graphics adapter users reported the NVIDIA Control Panel missing issue on their Windows PC. Have you ever encountered the same issue? How to fix NVIDIA control panel missing? Don't worry. This post from MiniTool will show you some effective solutions.
You may be bothered by NVIDIA Control Panel missing issue now. if you don’t know how to fix NVIDIA Control Panel missing Windows 10, you can take the following solutions as reference.
Solution 1. Restart NVIDIA Services
You can try restarting the NVIDIA services to fix the NVIDIA Control Panel missing Windows 10 issue. If you don’t know how to disable NVIDIA services on Windows 10, you can follow the steps below to have a try.
Step 1. Press Windows + R keys together on your keyboard launch the Run dialog box on your PC.
Step 2. Type services.msc in the Run dialog box and hit Enter.
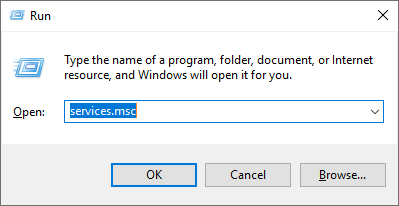
Step 3. In the the Services window, look for services that are related with NVIDIA.
Step 4. Right-click each NVIDIA service and click the Restart button from the pop-up menu.
Step 5. If there is a NVIDIA service not running, right click the service and click on Start.
After that, open NVIDIA Control Panel and check if the NVIDIA Control Panel missing issue gets fixed. If this cannot help you, try the next method.
Solution 2. Unhide Your NVIDIA Control Panel
It is possible that your Control Panel is hidden by Windows after running a Windows update. And sometimes, some software can also change the graphic settings, leading to NVIDIA Control Panel missing on Windows 10.
In this case, if you can’t find NVIDIA Control Panel, you can unhide your NVIDIA Control Panel in Windows Control Panel. If you don’t know the detailed steps, you can follow the steps below.
Step 1. Type Control in the Windows 10 Cortana search and click the best match Control Panel to open it.
Step 2. On the upper right of the window, set View by Large icons.
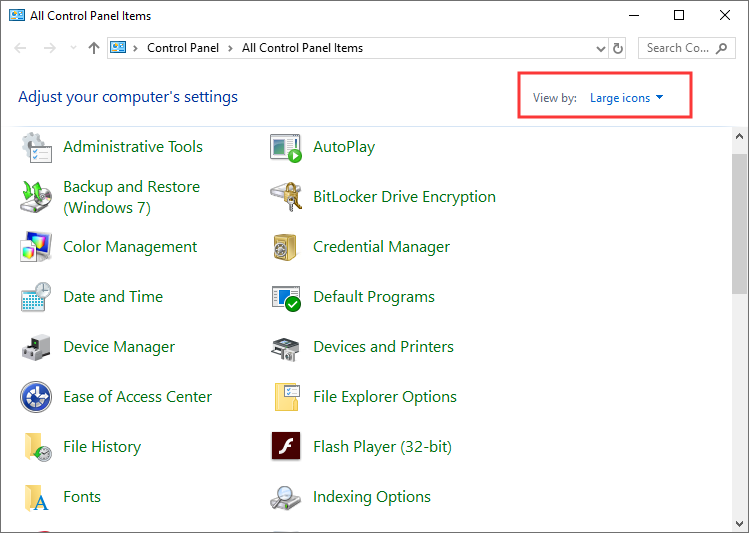
Step 3. Choose NVIDIA Control Panel.
Step 4. In NVIDIA Control Panel, click Desktop, and then check Add Desktop Context Menu.
Then check if your NVIDIA Control Panel missing issue has resolved. If not, here’s another method for you.
Solution 3. Update NVIDIA Graphics Driver
The NVIDIA Control Panel missing Windows 10 issue could be caused by the corrupted driver on your PC. If it is caused by a driver problem, you can follow the steps below to update the NVIDIA Graphics Driver.
Here are detailed steps.
Step 1. Right-click Windows Start menu and choose Device Manager from the menu.
Step 2. Then look for the Display adapters option and expand it.
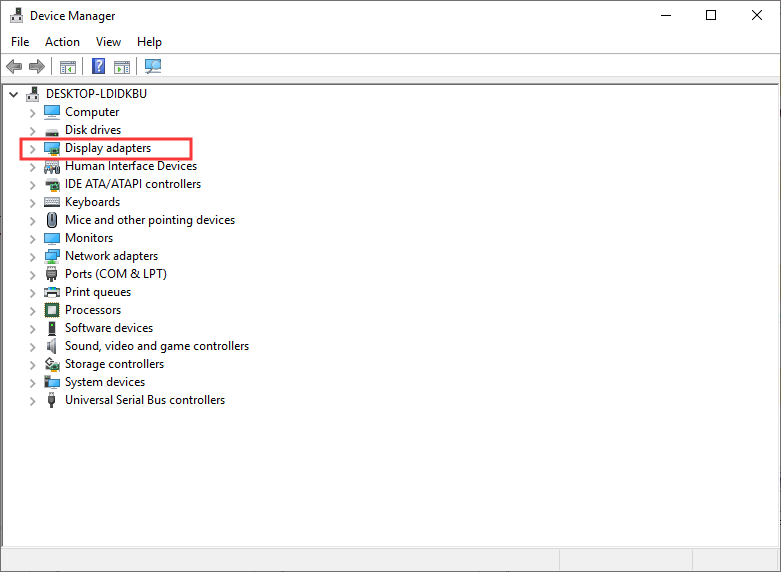
Step 3. Right-click on the NVIDIA graphics card driver and choose Update driver.
Step 4. Then choose Search automatically for updated driver software option to automatically look for a driver update.
Step 5. If there is a driver update available, you can follow the prompts to update it.
If no driver update available on your PC or updating the driver is not working, you can try the next method.
Solution 4. Reinstall NVIDIA Graphics Driver
If updating to the latest driver cannot help you get rid of NVIDIA Control Panel missing issue, you can try reinstalling NVIDIA Graphics driver. The following will show you how to reinstall NVIDIA Graphics driver.
Step 1. Right-click Windows Start menu and choose Device Manager from the menu.
Step 2. Then look for the Display adapters option and expand it.
Step 3. Right-click on the NVIDIA graphics card driver and choose the Uninstall device option.
Step 4. Click Uninstall on the pop-up window to confirm your operation.
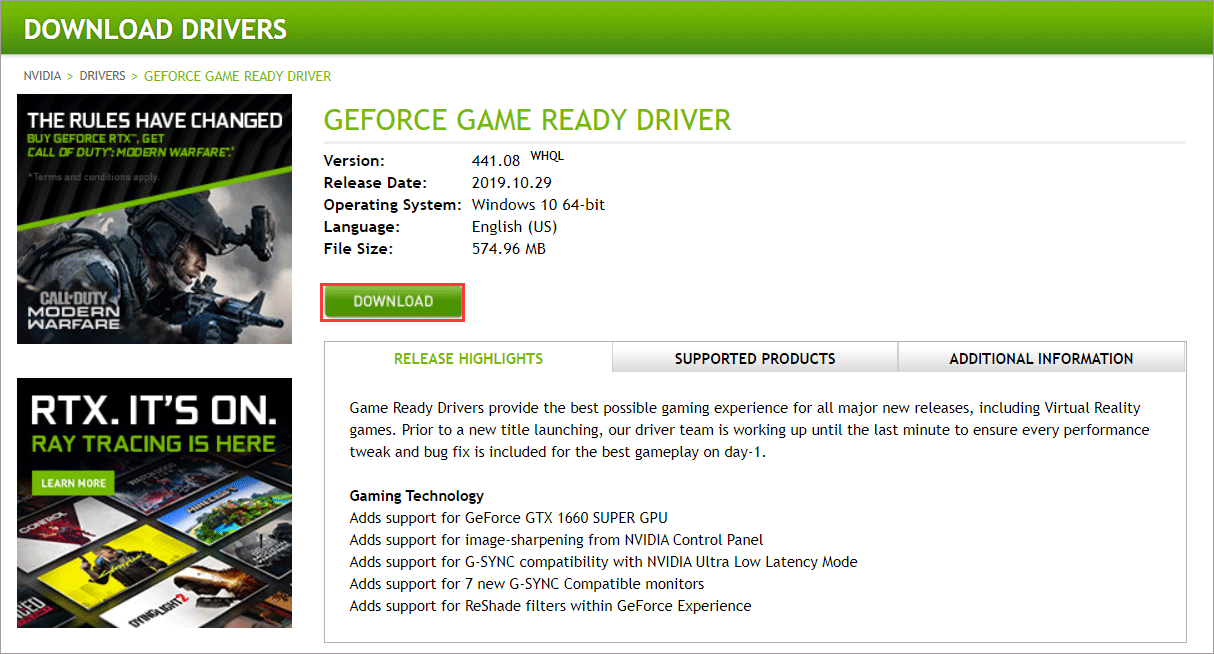
Step 5. Go to NVIDIA driver download page. Choose the exact model of your Graphics Card from the drop-down menus and then hit the Search button.
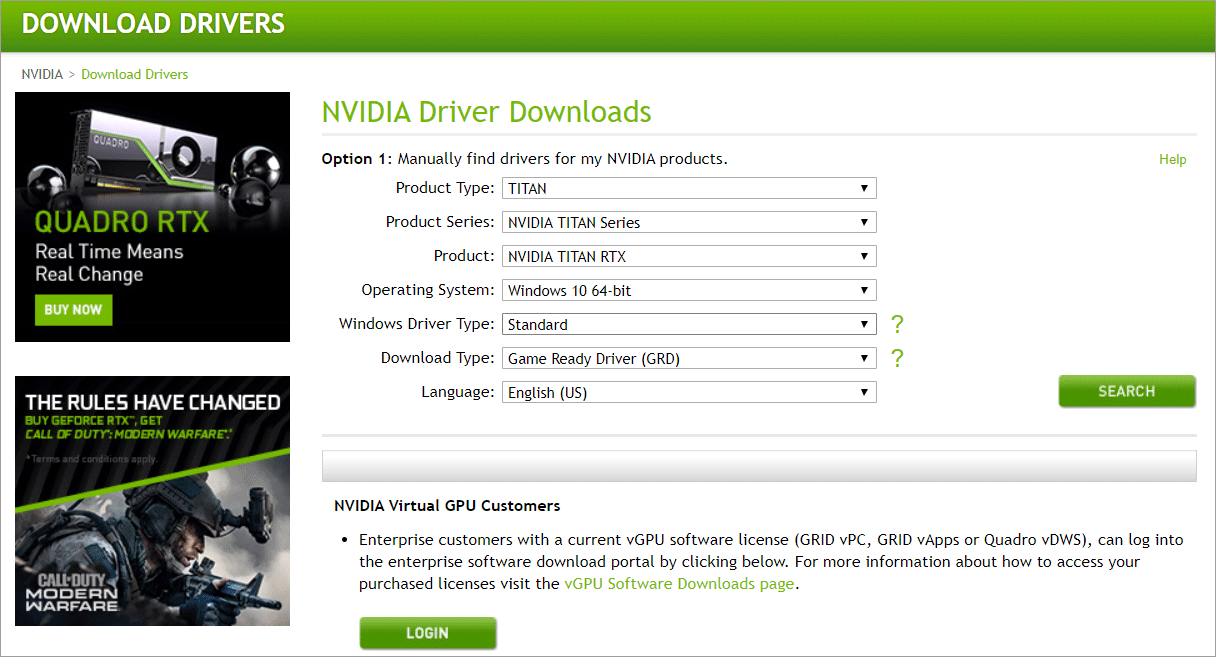
Step 6. Then click the Download button to get the latest release of the driver for your graphics card.
Conclusion
After reading this post, have you fixed the NVIDIA Control Panel missing issue on your PC? Which method works for you? If you have better solutions, please don’t hesitate to share it with us.

User Comments :