What Is the Notepad Compare Plugin
Notepad++ is a widely popular free text editor and source editor used on Microsoft Windows. With the Notepad Compare plugin, users can compare two files easily and quickly. For example, if you want to compare a programming file with 2 different versions, this plugin can help you find the differences and mark them with different colors.
How does the Compare plugin work? Notepad++ compare two files through the lines. When you compare two files in Notepad++, you will notice some symbols or icons that have different meanings and are marked with different colors. Here we summarize them as follows:
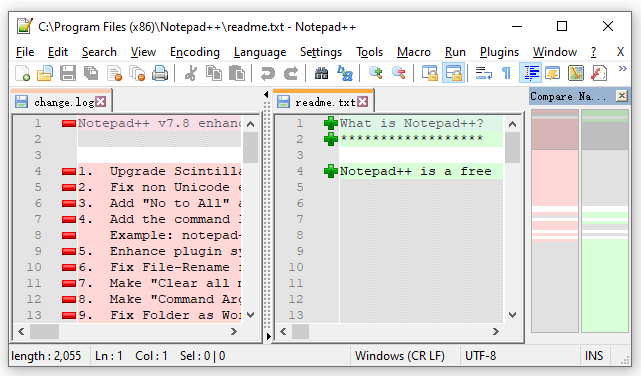
- Added (+): This plus icon comes with green color. It shows the lines that exist in the new file and not in the old file.
- Deleted (-): This icon is marked as red color. It shows the lines that are only present in the old file but do not exist in the new file.
- Changed (≠): This icon usually comes in different colors (red and yellow). It shows most of the similar lines, but some changes will be highlighted in a different color.
- Moved: It shows the stream that appears once in another file but in a different location.
Now, you should have an overall understanding of the plugin. How to add the Compare plugin in Notepad++? Let’s keep reading.
Configure the Notepad++ Compare Plugin
The compare plugin does a great job of displaying the differences, but it is not available by default in Notepad++. To use it, you need to download and install it manually via the Plugin Manager. If you don’t have the Plugin Manager installed on your computer, you can click here to download and install it.
Now, let’s see how to add the Notepad Compare plugin.
Step 1. Doble clicks the Notepad++ shortcut on your desktop to enter its main interface. Also, you can search for Notepad++ through the Windows search bar.
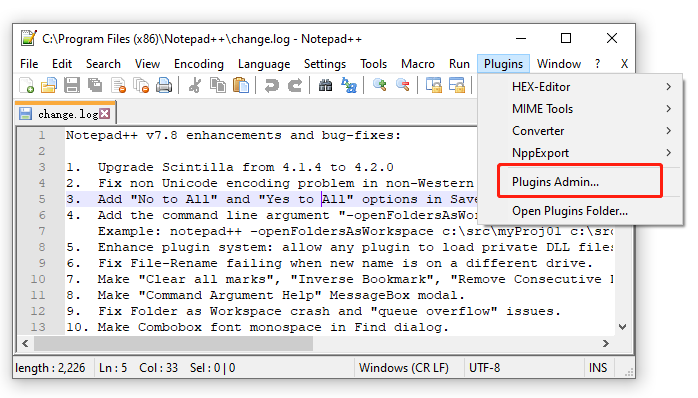
Step 2. Click on the Plugins option in the top menu and select Plugins Admin from the context menu.
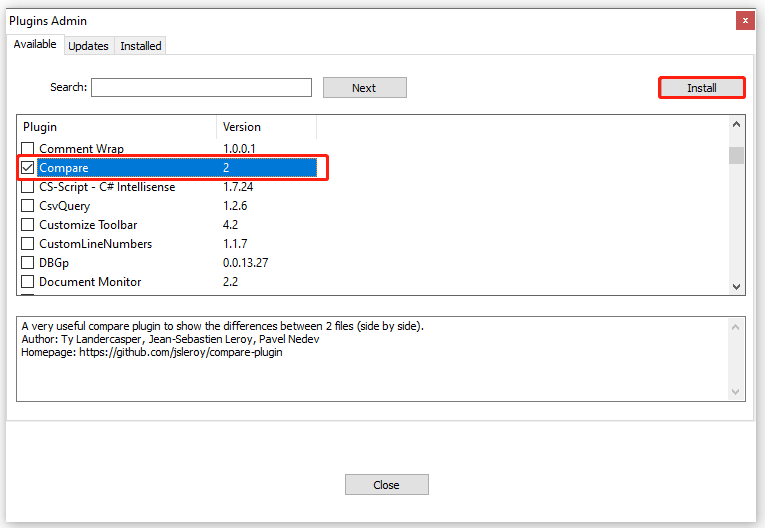
Step 3. Scroll down the list of plugins, and then tick the checkbox next to Compare and click on Install. Alternatively, you can type compare in the Search box and click on Next to find the plugin quickly.
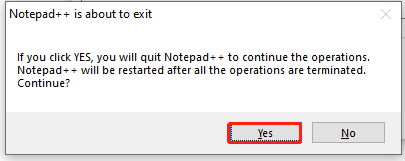
Step 4. Now, click on Yes when you are prompted to execute this action. Then you will be asked to restart the Notepad++ to install the Compare plugin.
Now, the Notepad Compare plugin should be installed successfully. To compare files in Notepad++, move down to the following part.
Make Notepad++ Compare Two Files
How to make Notepad++ compare files? After you have installed the plugin, you can follow the guide below:
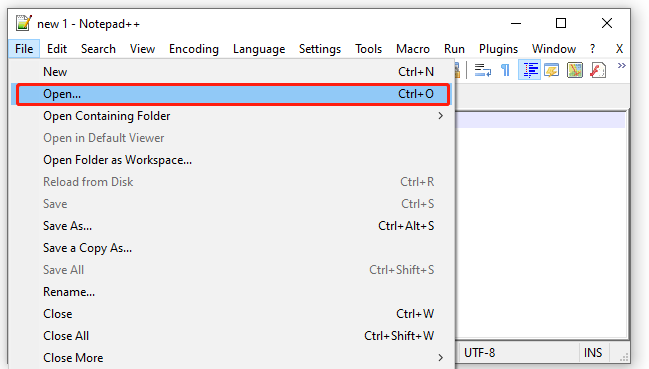
Step 1. To make Notepad++ compare 2 files, you can click on the File option on the top menu and select Open. Then select the 2 files you want to compare.
Step 2. Click on the Plugins menu and select Compare from the context menu, and then click on Compare from the sub-menu.
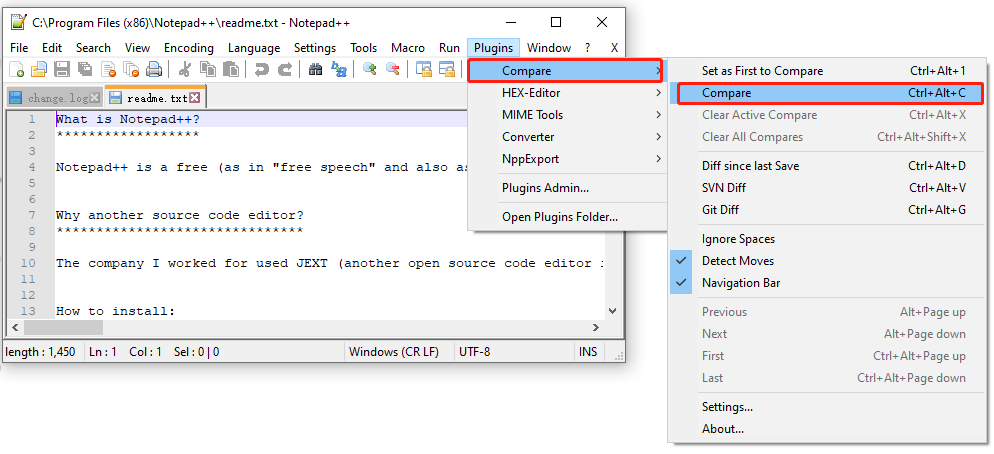
Step 3. Now, it will compare the 2 files instantly and show you the differences between them.
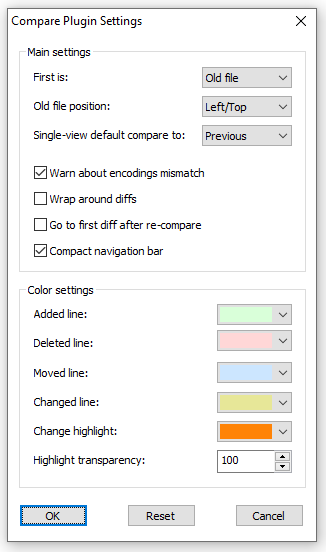
If you want to configure more options for the Notepad++ compare two files, you can also click on Plugins > Compare > Settings, and then further configure the Compare settings. For instance, you can change the colors for different lines.
How to compare files in Notepad++? All the detailed steps have been illustrated. Have a try now!

![Notepad++ Hex Editor Download and Install (x86) [Full Guide]](https://images.minitool.com/partitionwizard.com/images/uploads/2021/11/notepad-hex-editor-download-install-thumbnail.jpg)

User Comments :