“Not enough memory to open this page” is a common error in Google Chrome. In this post, 6 solutions to this error are displayed by MiniTool and you can easily fix this problem with them.
Google Chrome should be among the top browsers for Windows users. However, some issues of Google Chrome have been reported and “Not enough memory to open this page” error is one of them.
This error might also be accompanied by another error message – Google Chrome ran out of memory while trying to display this page. You will get no warnings or hints before receiving this error. The reasons for the appearance of the error are various, but you can fix it with the following solutions.
Solution 1: Update Your Chrome To 64-Bit
At first, you should make sure that your Google Chrome is of 64-bit version which is designed to use more memory.
Step 1: Open your Google Chrome.
Step 2: Click the three-dot icon and choose Help > About Google Chrome.
Step 3: Then you will see the current version of your Chrome in the new page. If there is 64-bit followed by the version number, you can ignore this solution and jump to the next one. If there is no 64-bit or there is 32-bit followed, just go to the official website to download the 64-bit version.
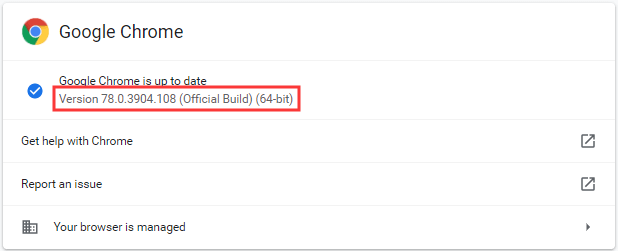
After that, open your 64-bit version Google Chrome to see if the problem is resolved.
Solution 2: Close Page Tabs and Disable Browser Extensions
When this error appears, there will be another message suggesting “Try closing other tabs or programs to free up memory.” So, you can try closing page tabs and disabling browser extensions as suggested to fix this error.
Step 1: Close all other open page tabs in Chrome.
Step 2: Open three-dot menu and go to More tools > Extensions.
Step 3: You will get a new page where all the extensions are listed. Just click the switch button to disable all of them.
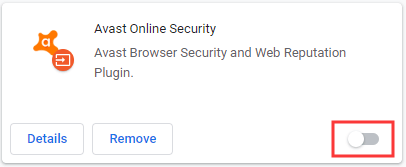
Now, restart your Google Chrome and open the page that didn’t open before to check if the error is fixed.
Solution 3: Expand Page Filing
When your system runs out of RAM, expanding page filing can increases the hard drive space allocated for virtual memory, which might ensure there is enough RAM for Google Chrome to display pages.
Here is how to expand page filing in Windows 10.
Step 1: Search advanced system settings in your Cortana and click View advanced system settings from the results.
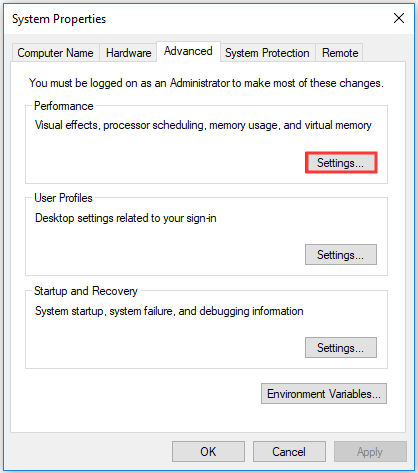
Step 2: You will directly go to the Advanced tab of System properties window. Click Settings button in Performance section.
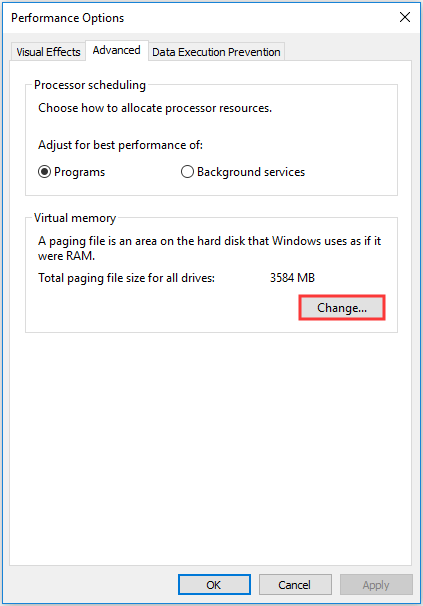
Step 3: In the Performance Options window, switch to Advanced tab and click Change.
Step 4: When you get the following window, uncheck Automatically manage paging file size for all drives and check Custom size.
Step 5: Enter a figure in the Initial size box referring to the Recommended and Currently allocated values shown at the bottom of the window, and enter the same or a larger number in the Maximum size box.
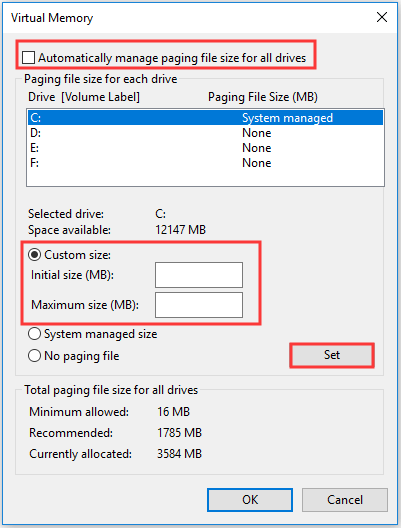
Step 6: Now click the Set button and then click OK to close the window.
Solution 4: Clear Chrome’s Cache
In most cases, the page display errors in Google Chrome can be fixed by clearing cache. To do that, just follow the steps displayed below.
Step 1: In three-dot menu, click More tool and then Clear browsing data.
Step 2: In the pop-up window, check Cookies and other site data and Cached images and files. Then, set the Time range as All time.
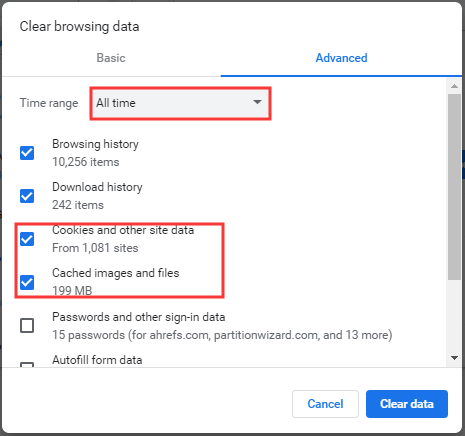
Step 3: Click Clear data button.
Then, you can restart your Chrome to see if the error still exists.
Solution 5: Disable Hardware Acceleration
The hardware acceleration can also lead to “Not enough memory to open this page” error in Google Chrome. So, you can try disabling hardware acceleration to fix it.
Step 1: Copy and paste chrome://settings/ in the address bar and press Enter to open Chrome’s Settings.
Step 2: Go to Advanced > System.
Step 3: In System section, toggle off the Use hardware acceleration when available option.

After that, you can restart Google Chrome and the error should have been fixed.
Solution 6: Create A New User Profile
Corrupted user profile is another reason for “Not enough memory to open this page” error. In this case, you can fix it by renaming the Default folder of Google Chrome.
Step 1: Press Windows + R to invoke Run window.
Step 2: Input %LOCALAPPDATA%GoogleChromeUser Data in the empty box and click OK.
Step 3: Locate the Default folder. Right-click it and choose Rename from the context menu.
Step 4: Rename the folder to Old Default and press Enter.
Step 5: Now restart your Google Chrome and a new Default folder will be created automatically.
In this way, you should be able to browse the website on Google Chrome normally.


User Comments :