A great many users are confused about the .NET Framework Repair Tool. In this post, MiniTool will explain the definition, system requirements, and supported Framework version in detail. It also shows you how to download/install/use the .NET Framework Repair Tool.
Sometimes you may encounter various errors and issues like Net Framework unhandled exception error and Windows update error 643 when the .NET Framework installation gets corrupted or damaged. Under these situations, you need a tool to repair the NET Framework. Here comes the Microsoft NET Framework Repair Tool.
Microsoft NET Framework Repair Tool Overview
Before you start the Microsoft .NET Framework Repair Tool, it’s important to have an overall under standing of this tool to avoid any failures.
What Is .NET Framework Repair Tool
Microsoft .NET Framework Repair Tool is a practical windows program that can detect and repair issues related to the .NET Framework setup or updates. If you encounter some errors due to NET Framework corruption, this tool can help you fix them.
With the NET Repair Tool, you can apply some common fixes or repair the corrupted installation of all supported .NET Framework versions. In addition, this tool also supported command-line usage together with more advanced options based on the user interface.
The latest .NET Framework Repair Tool version 1.4 has been published on March, 26, 2020. It only takes up 1.2 MB disk space so that you don’t have to worry about the high disk usage problem. But this tool is not available for all operating system and NET Framework versions.
What Does NET Framework Repair Tool Support
At present, the NET Repair Tool only supports Microsoft .NET Framework 4.8, 4.7.2, 4.7.1, 4.6.2, 4.6.1, 4.5, 4.5.1, 4.5.2, 4.0, and 3.5 SP1. So, you’d better check the .NET Framework version on you PC before downloading the NET Framework cleanup Tool.
Besides, Microsoft .NET Framework Repair Tool is available in English only. Although its supported operating systems are Windows 7/Vista, Windows Server 2008, Windows Server 2008 R2, and Windows Server 2003, the tool can be installed and run on Windows 10 when we test it.
Microsoft NET Framework Repair Tool Download and Install for Windows
Now, you should have an overall understanding of the NET Framework Tool. Let’s see how to download and install it on your Windows PC.
Step 1.Click here to visit the official Microsoft .NET Framework Repair Tool, and then click on Download and select a location to save the download package.
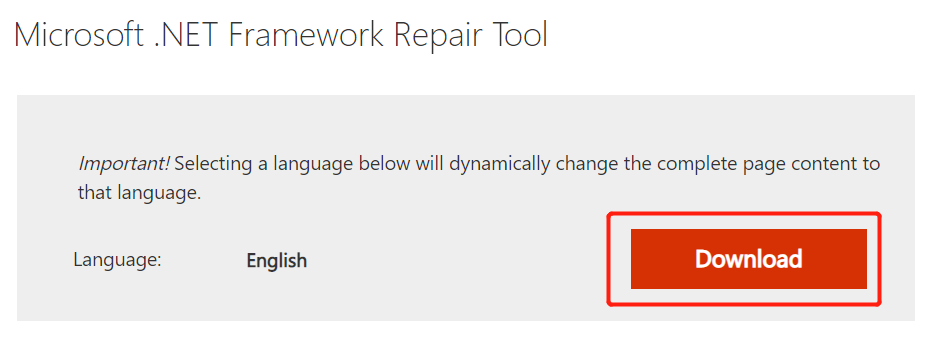
Step 2. Double click the NetFxRepairTool.exefile and click on Yes to run the setup.
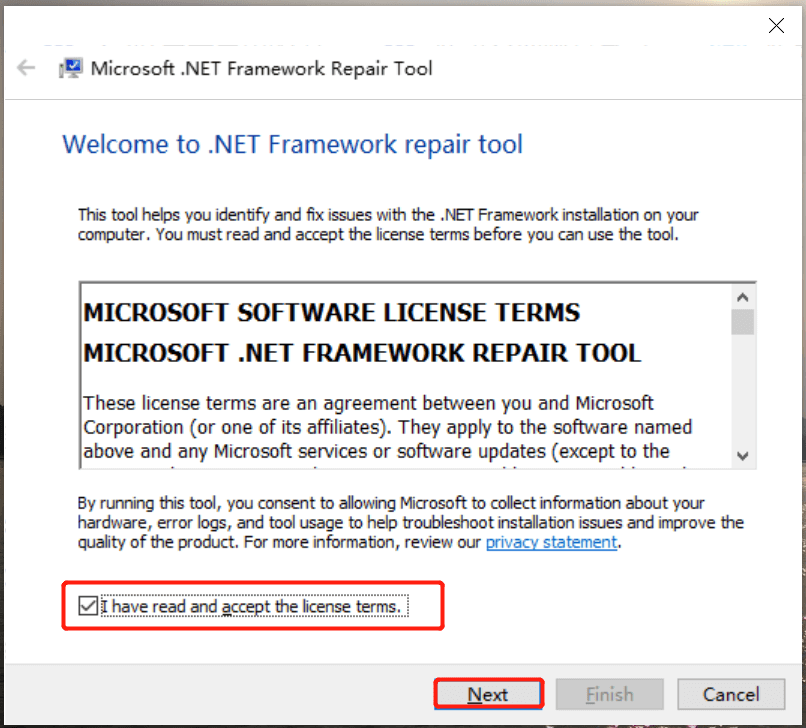
Step 3. Tick the checkbox next to I have read and accept the license terms and click on Next.
The installing process may vary on different Windows systems. So, make sure to follow the on-screen prompts to complete the NET Framework cleanup Tool installation.
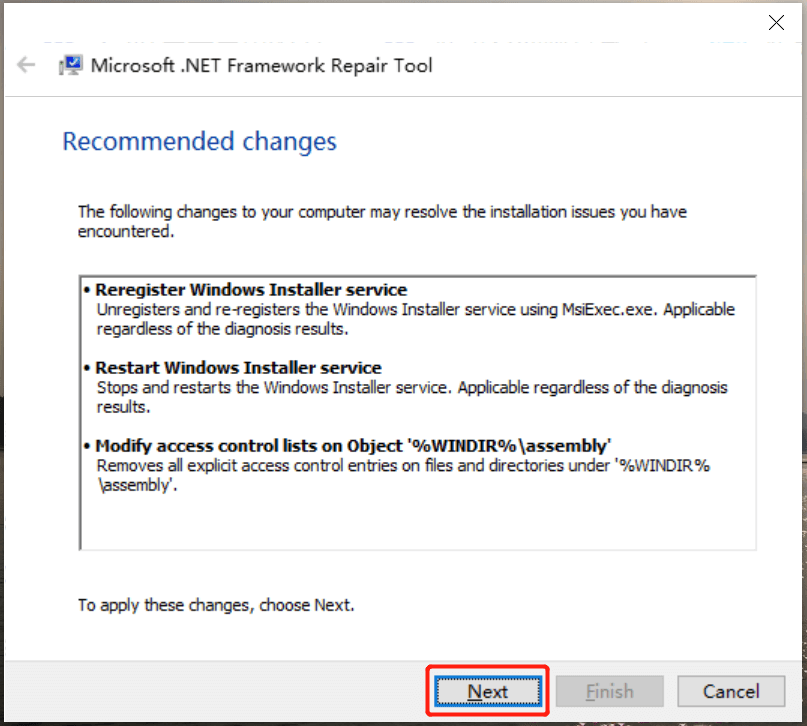
Step 3. You should see the Recommended changes that may resolve the installation issues you have encountered. To apply these changes, click on Next.
Step 4. If the instillation is complete, click on Finish. If it doesn’t fix the issue, you can click on Next to further explore extra troubleshooting methods.
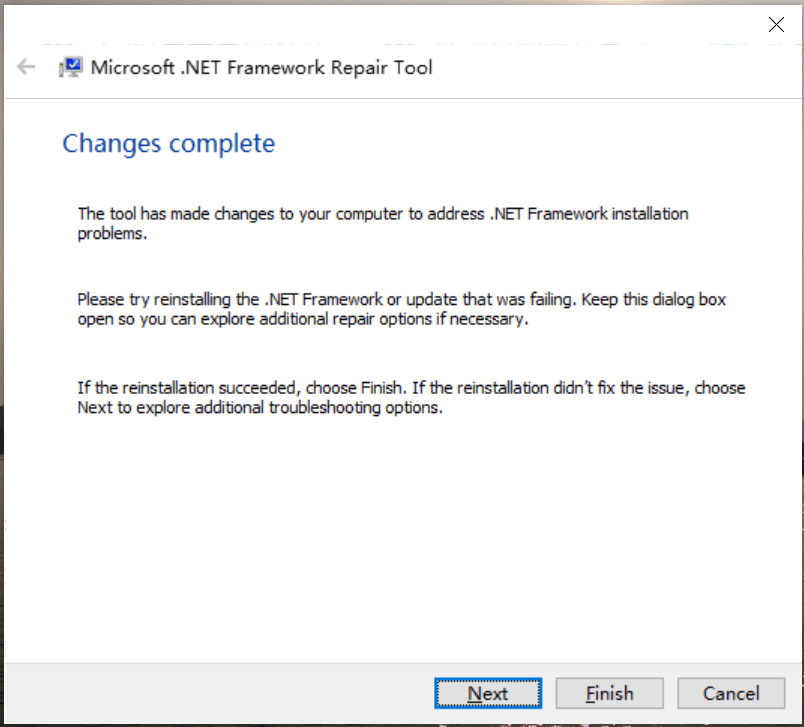
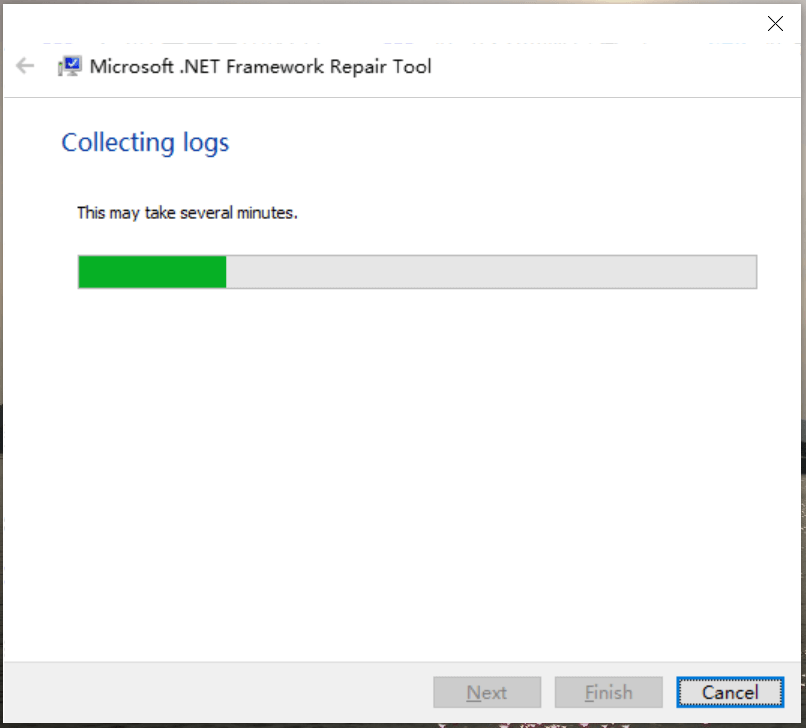
Step 5. If you select Next in Step 4, this tool will continue collecting logs that causes the issue. Once done, click on Finish.
How to Repair the .NET Framework
After you install the repair tool, you can start repairing NET Framework on your computer. If you don’t know how to do that, you can refer to the following guide.
Step 1. Open Control Panel and click on Programs and Features.
Step 2. In the Programs and Features window, search Microsoft .NET Framework. Then right click the corrupt NET Framework version and select Repair.
Step 3. Click on Yes/Next in the UAC window to start repairing NET Framework. Once done, you can restart your PC and check if the issue gets solved.


User Comments :