BSOD is a common issue, and Ndu.sys is one. What does this issue mean? How to fix the issue? If you have these questions, then follow the guide from MiniTool Partition Wizard to find its meaning and fixing methods.
What does Ndu.sys mean? How to fix Ndu.sys? Start exploring!
What Is Ndu.sys?
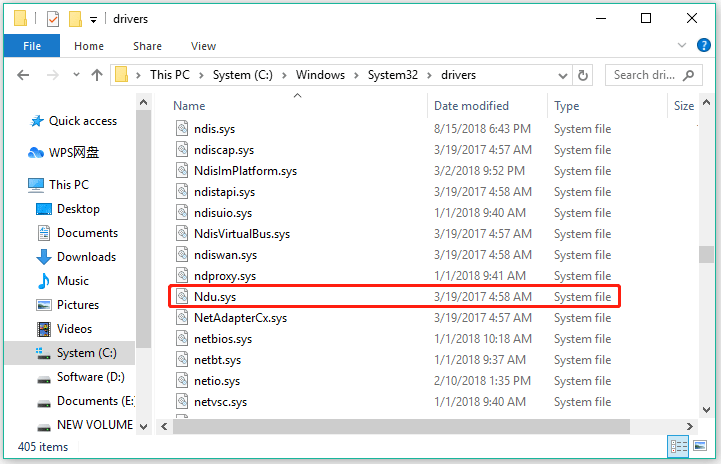
Go to the path: C:WindowsSystem32drivers, and you will find a file labeled Ndu.sys. It is the Windows Data Usage Monitoring Driver file and the important part of Windows.

This file rarely causes problems. However, lots of people ran into Ndu.sys BSOD. Here is an example from Microsoft Community:
Hello. I bought a Lenovo ideapad330 in 2018 and about two weeks ago started getting BSOD shutdowns, almost all noting Ndu.sys problem and an event 41 errors (in Event Viewer) …
Why does Ndu.sys BSOD appear? As above said, Ndu.sys is the Windows Network Data Usage Monitoring Driver, so the issue is related to outdated or corrupted network drivers.
Well, how to fix Ndu.sys? If the Ndu.sys BDOS persists on your computer screen after a restating, then you can try updating network card drivers through Device Manager. If this doesn’t work, you need to apply other fixing methods.
Solutions to Ndu.sys BSOD
Here are four solutions to Ndu.sys BSOD stop code. Before carrying out them, please enable Safe Mode with networking.
# 1: Update the Network Driver
Try updating your network card driver to fix Ndu.sys stop code.
Step 1: Open Device Manager.
Step 2: On the Device Manager window, expand the Network adapters category.
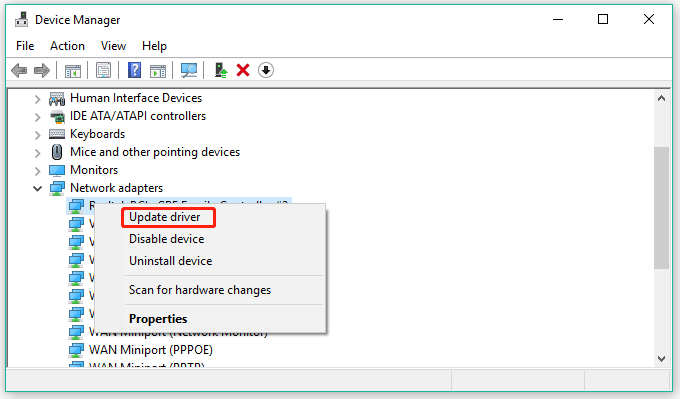
Step 3: Right-click the device and choose the Update driver option.

Step 4: Choose the Search automatically for updated driver software option.
Step 5: Follow the on-screen instructions to complete driver updating.
Step 6: Repeat the above operations until all network drivers are updated to their latest versions.
After updating all network drivers, you can check if the Ndu.sys stop code is removed. If it persists, try the following fixing methods.
# 2: Run the BSOD Troubleshooter
BSOD is a common and frequent issue on Windows 10. So, Microsoft adds the tool called BSOD troubleshooter to help you solve BSOD like fltmgr.sys, Ndu.sys, and so on. Give it a try.
Step 1: Right-click the Windows icon on the taskbar and then choose the Settings option.
Step 2: Click the Update & Security setting on the Settings window.
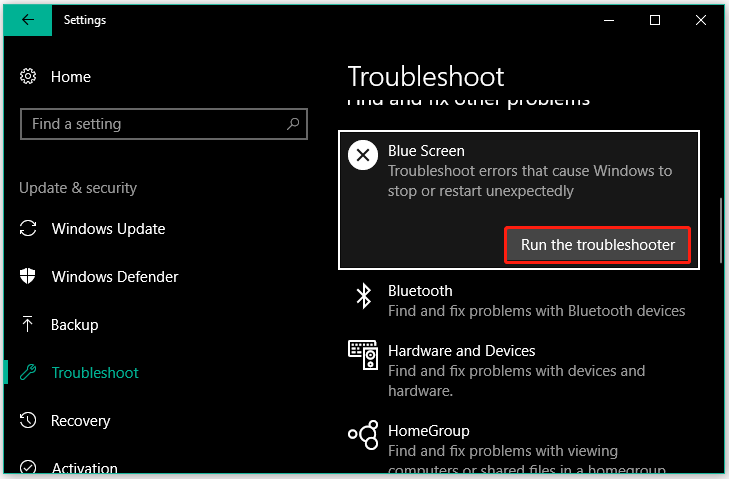
Step 3: On the left side of the current window, switch to the Troubleshoot tab. Then, find Blue Screen, click it, and click the Run the troubleshooter button.

When the troubleshooter finishes the task, you can check if the blue screen error goes away.
# 3: Rename the Ndu.sys File
Step 1: Go to the path “C:WindowsSystem32drivers” to find the Ndu.sys file.
Step 2: Right-click the file and choose the Rename option. Then, rename it as Ndu.sys1.
Step 3: Find the Windows.old folder in your C drive and then find the System32 folder inside it.
Step 4: Find the Drivers folder again and then locate the Ndu.sys file inside it.
Step 5: Copy the file and paste it into the Drivers folder of the current upgraded Windows 10 install.
Step 6: Close File Explorer and then reboot your computer.
On boot, check if the Ndu.sys stop code persists.
# 4: Desert the Current Windows 10
If the issue persists, you can consider deserting the current Windows 10, which means resetting Windows 10 or clean installing Windows 10.
- To reset Windows 10, please refer to How To Factory Reset Windows 10: Full Guide.
- To clean install Windows 10, please refer to How to Install Windows 10 on a New Hard Drive (with Pictures).
Bottom Line
Do you get rid of the Ndu.sys stop code? If yes, that’s great. If you have any questions about the provided solutions, please leave them in the comment zone.
Certainly, if you have other useful solutions to the issue, please share them with us. Thanks in advance.

User Comments :