Your Logitech Wireless mouse may stop working sometimes, which causes inconvenience. How to fix Logitech mouse not working issue on your PC? Don't worry. This post from MiniTool has summarized some top solutions.
Many users have complained that their Logitech wireless mouse is not working on their PC. And they don’t know how to fix the issue.
Some people ask: why is my Logitech mouse not working? How to fix it? Well, there are many reasons for the Logitech mouse not working issue, such as, a low battery, an importer USB port and corrupt or outdated USB drivers.
How to Logitech mouse not working on Windows PC? After analyzing several posts on how to fix Logitech mouse not working issue. I have summarized some top solutions that work for almost all users. If you don’t know how to fix Logitech mouse scroll not working issue, try the following solutions one by one.
Solution 1. Remove the Receiver and Batteries
Removing the wireless receiver and the batteries is the top-rated effective solution. You can remove the unifying receiver and batteries for a few seconds and replug those components back in. Then check if the Logitech mouse not working issue gets resolved.
This is proven to be the most effective method to fix the Logitech wireless mouse not working issue. However, if this fix doesn’t work for you, try the next solution.
Solution 2. Change USB port
Sometimes, Logitech mouse not working is associated with the USB port that you used to connect the receiver. You can try connecting the receiver to other USB slots on your computer.
After unplugging the receiver from the USB port and plugging it to another USB port, you can check if helps to fix the Logitech wireless mouse not working issue. You’d better try two different USB ports on your computer.
If you are still unable to get rid of the Logitech mouse not working issue on Windows 10 after trying all USB slots, you need to move down to the next solution.
Solution 3. Uninstall and Reinstall the Mouse Driver
Normally, when you connect your mouse to your computer, Windows will install the driver for the mouse automatically. So you can use the mouse without extra steps such as installing the driver. However, the thing is, sometimes the driver can get corrupted or encounter other problems. In this case, you are unable to use your mouse.
If this is the reason for your Logitech wireless mouse not working issue, you can follow the steps below to uninstall the mouse driver and reinstall it on your PC.
Since you are not able to use the mouse on your computer, you perform the operation via your keyboard. Here are the detailed steps:
Step 1. Press Windows +R keys on your keyboard at the same time to bring up the Run dialog box.
Step 2. Use your keyboard to type devmgmt.msc in the Run dialog box and hit the Enter key to open Device Manager.
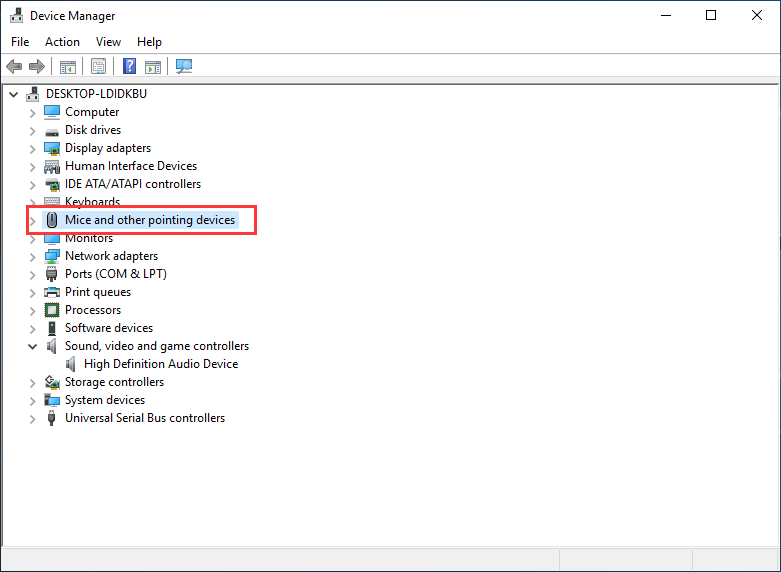
Step 3. Press the Tab key to go to the device list and use the arrow key to locate the Mice and other pointing devices category.

Step 4. Press Alt key and the right arrow key together to expand the category. You should find the Logitech mouse in this category.
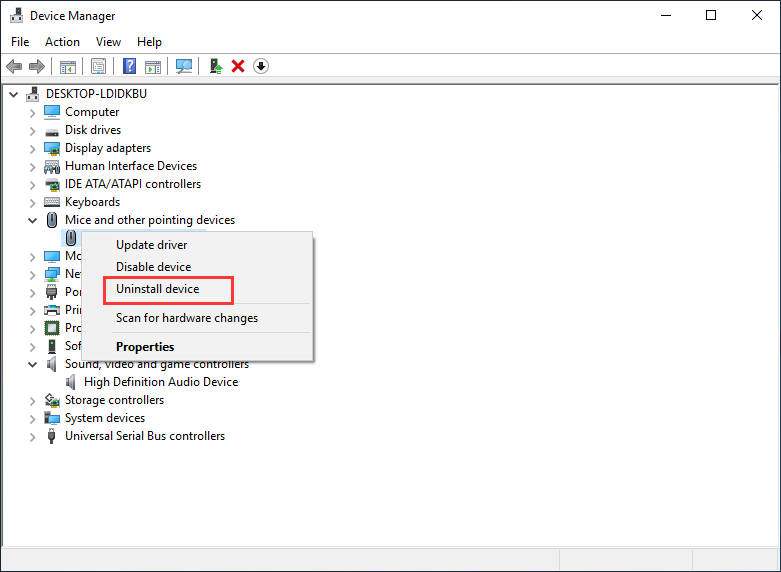
Step 5. Then you can use the Up and Down arrow keys to select the Logitech mouse device, then press Shift + F10 keys to open the context menu.
Step 6. Use the Up and Down arrow keys to select Uninstall device from the menu. Then follow the prompts to uninstall the mouse driver.

Step 7. Then back to your desktop, press Alt +F4 keys together and then the Shutdown dialog will pop up. Use the arrow keys on the keyboard to select the Restart option and hit Enter.
You may be interested in this post: How to (Remotely) Shut Down Windows 10 with CMD Command Line
After restarting your computer, Windows will automatically install the default driver for the mouse. Then check to see if Logitech mouse not working issue gets resolved.
Now you should know how to fix the Logitech mouse not working issue. Which method works for you? Do you have better solutions? We are glad to have you share it with us.


User Comments :