Have you ever received the “there was a problem starting c:\windows\system32\logilda.dll” error message? Do you know how to fix the error? Possible causes and corresponding fixes will be talked about in this post of MiniTool. You can get some ideas through the text.
What Causes Logilda.dll Error
Logilda.dll error will occur on Windows 10 laptops, desktop computers as well as tablets in various formats. For instance, there was a problem starting logilda.dll, there was a problem starting c:windowssystem32logilda.dll or the specified module could not be found.
It is reported that users always receive the “there was a problem starting c:windowssystem32logilda.dll” error message each time they boot their Windows PCs, especially after installing Windows 10 1903 version.
You may be also interested in this: Windows 10 Night Light Not Working? Here Are Fixes
The Logitech Download Assistant is the main factor for the logilda.dll Windows 10 error. This assistant belongs to Logitech mouse, which is one of the most frequently used mice.
If there was a problem starting logilda.dll, it could indicate either the file is not installed correctly or is located in a wrong location due to Windows Update. Now, you can read the following fixes to solve the error.
Fix 1: Delete the Logitech Download Assistant Registry Key
As the Logitech Download Assistant can cause the error, delete it to fix the issue. Here are steps.
Step 1: Open Registry Editor as admin.
Step 2: Navigate to the final destination by following the path: HKEY_LOCAL_MACHINE SOFTWARE Microsoft Windows CurrentVersion Run
Step 3: Find the Logitech Assistant Download file, and then right click it and select Delete.
Fix 2: Reinstall Mouse Device Drivers
Although the logilda.dll error probably is caused by the installed Logitech program on the PC, the error is triggered by the mouse installation driver actually that is known to all people. To fix this, follow the path:
Step 1: Right click the Start button, and then select Device Manager.
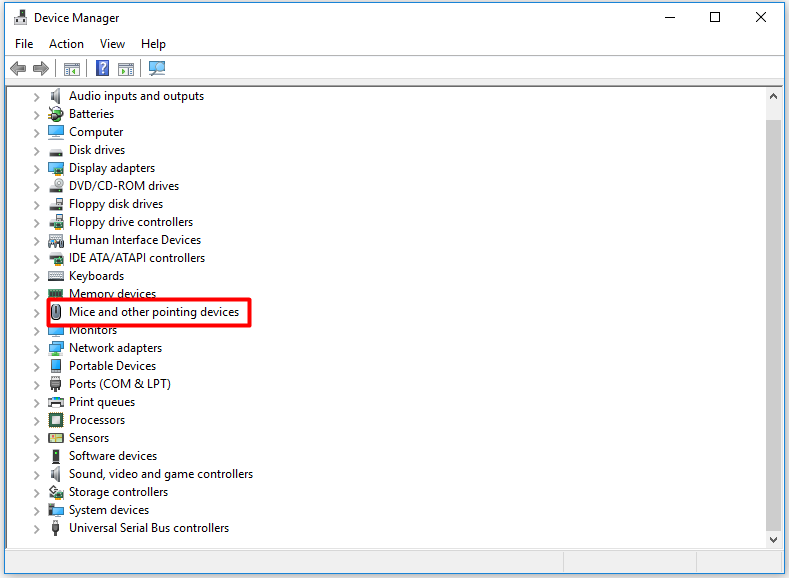
Step 2: Find Mice and other pointing devices among the list. Double click the option to expand it.

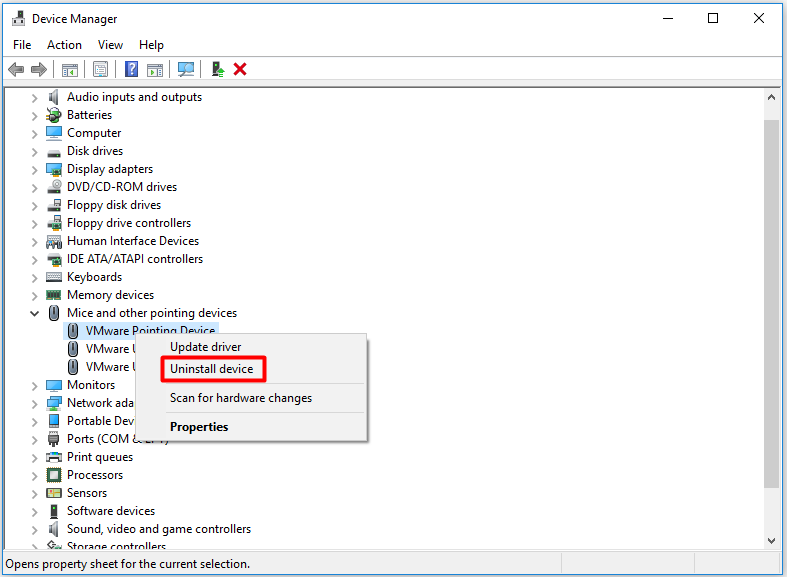
Step 3: Right click your mouse name, and then choose Uninstall Device.

Then reboot Windows 10 PC and reinstall your mouse device driver by following the above steps.
Fix 3: Disable Logilda.dll from Windows Startup via Task Manager
You can try disabling logilda.dll from Windows Startup via Task Manager to fix the logilda.dll error. After that, Logitech Download Assistant won’t run during the startup process to check for the newly released Logitech update.
That’s the only sacrifice of this measure, but it wouldn’t do a damage for your PC. Here’s how to do.
Step 1: Press Ctrl, Shift and Esc keys to open Task Manager. Then allow the permission in the pop-up window.
Step 2: Navigate to Startup tab. Right click Logitech Download Assistant, and then select Disable.
Step 3: Then restart your computer and check whether the error is fixed or not.
Top recommendation: 5 Reliable Solutions to the Path Not Found C Boot Issue
Fix 4: Install the Latest Windows Update
On the one hand, Windows 10 updates continuously to provide users with better experience. On the other hand, it boasts some patches to fix the errors with the previous versions including any file error.
When the logilda.dll Windows 10 error occurs, try installing the latest Windows 10 Update to fix it. You can finish the installation in the Settings > Windows Update > Check for update.
Make sure that your computer has connected to the power source. The installation process may take you more than one hour.

User Comments :