Windows Subsystem for Linux (WSL) is a feature on Windows 10. It creates a lightweight environment which allows you to install and run its supported versions of Linux, and you don’t have to set up a virtual machine or employ another computer.
Without further ado, let’s see how to install WSL and make it usable in Windows 10.
Move 1: Enable Windows Subsystem for Linux Feature
Before you install Windows Subsystem for Linux on Windows 10, you have to make sure that Windows Subsystem for Linux feature has been enabled. You can enable it using either Windows PowerShell or Settings.
Use Windows PowerShell
Step 1: Press Windows + X to open Start menu.
Step 2: Select Windows PowerShell (Admin) from the menu to open the tool as administrator.
Step 3: Input the following command and press Enter key to enable this optional feature:
Enable-WindowsOptionalFeature -Online -FeatureName Microsoft-Windows-Subsystem-Linux

Step 4: Then, inputY and press Enter to restart your computer to complete the operation.
Use Control Panel
Step 1: Open Control Panel and navigate to Programs > Programs and Features.
Step 2: In the left pane, click Turn Windows features on or off.
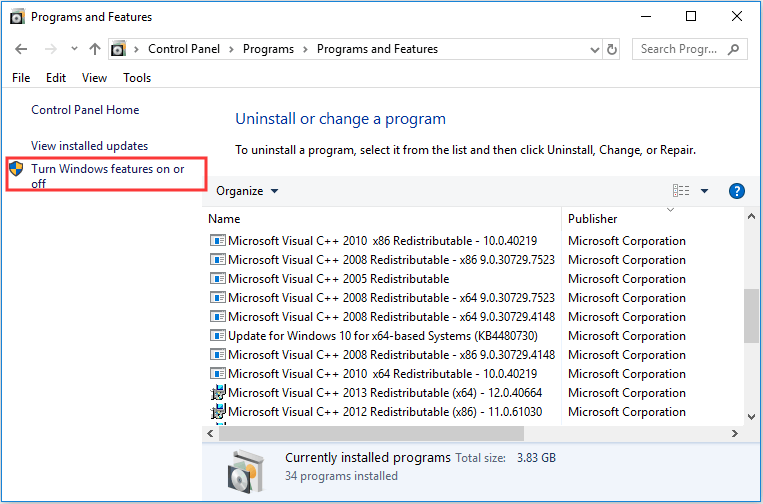
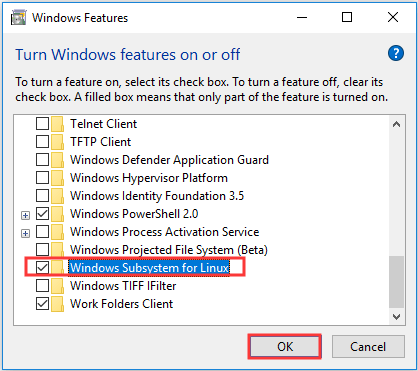
Step 3: In the pop-up window, scroll down to locate Windows Subsystem for Linux. Check this option and click OK button.
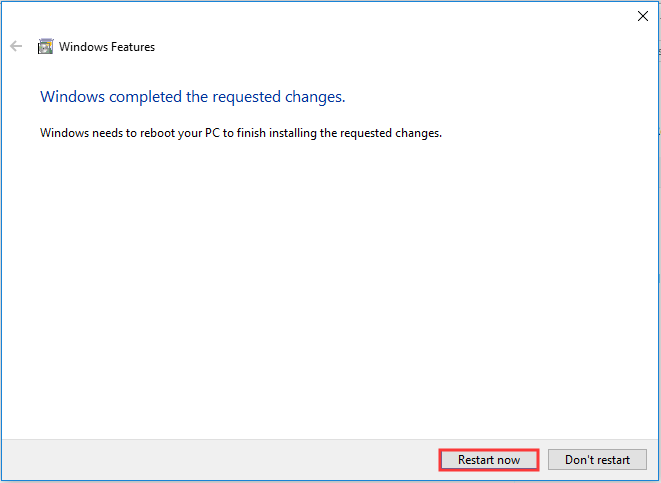
Step 4: Then, your Windows will start searching for required files. After the changes are applied, you will receive the following window. Just click Restart now button.
After that, the environment will be configured and you can download and install your Linux distribution of choice.
Move 2: Download and Install Linux Distribution
To download and install Linux distribution, you have 2 choices: use Microsoft Store or use Windows PowerShell. Let’s see one by one.
Use Microsoft Store
Just open your Microsoft Store and search for and select the Linux distribution that you want to install.
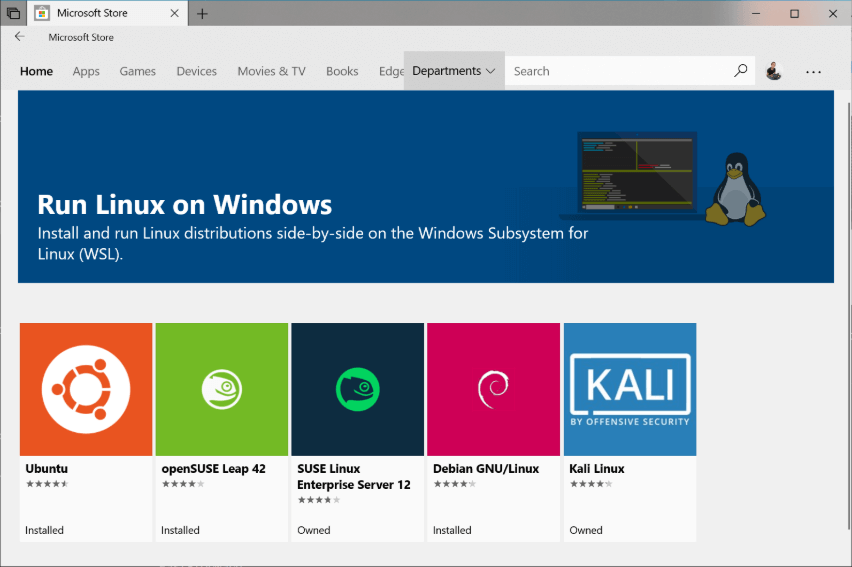
Here are some available Linux distributions you can choose:
- Ubuntu
- OpenSUSE Leap 15
- Kali Linux
- Debian GNU/Linux
- Fedora Remix for WSL
- Pengwin
- Alpine WSL
Then, just click Get (or Install in some cases) to download and install it.

Use Windows PowerShell
You can also download Linux using PowerShell if Windows Store is not available, and here I take Ubuntu 16.04 for example.
Step 1: Run Windows PowerShell as Administrator and
Step 2: Execute the following command line to download Ubuntu 16.04:
Invoke-WebRequest -Uri https://aka.ms/wsl-ubuntu-1604 -OutFile Ubuntu.appx -UseBasicParsing
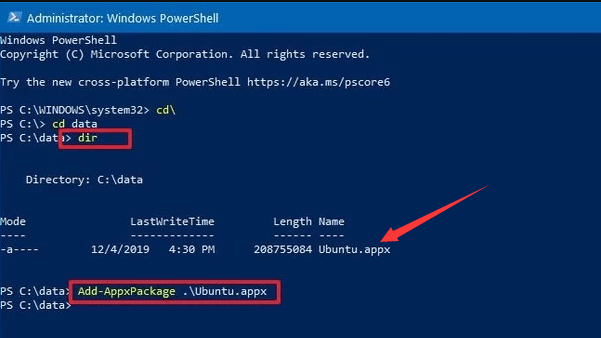
Step 3: Input dir and press Enter to check the name of the installer.
Step 4: Input the command Add-AppxPackage .APP-NAME.appx and press Enter to install your Linux.
Move 3: Complete Distro Initialization
After you download and install the Linux, you have to initialize your new distro instance to make sure it can be used.
Just launch your newly installed distro. When you run a new distro for the first time, you will get a window requiring you to wait for minutes to complete the installation.
After that, you need to set up a new Linux user account. Just input a username and a password and press Enter after each.

Troubleshooting
When you install Windows Subsystem for Linux, you might encounter some errors with stop code. Here are 2 common error.
Installation failed with error 0x80070003
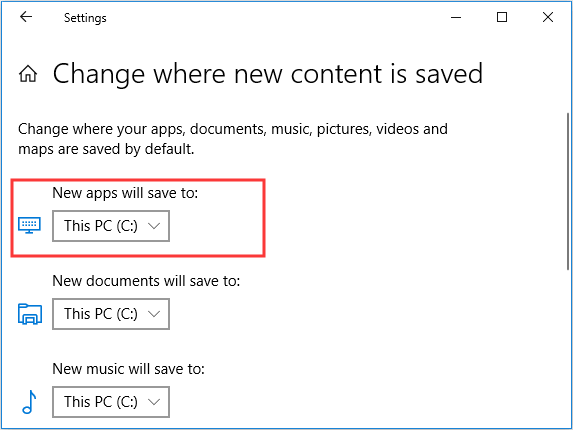
You will receive the error if you install Linux distros on non-system drive, because the Windows Subsystem for Linux only runs on your system drive. Please make sure you have stored it on the right place.
You can go to Windows Settings > System > Storage > Change where new content is saved to change the default path for downloading.
WslRegisterDistribution failed with error 0x8007019e
This error means that you haven’t enable the Windows Subsystem for Linux optional feature. You can enable it in Control Panel or Windows PowerShell following the steps mentioned above.

User Comments :