Windows 11 provides users with a way to install drivers and optional updates. Do you know how to install Windows 11 optional updates? Now, this post of MiniTool walks you through detailed steps and helps fix the Windows 11 optional updates not working issue.
Windows 11 is the next version of the Microsoft Windows 10 operating system that was revealed on June 24, 2021. This new version also inherits many features from Windows 10 like Optional updates. This option lets you download and install those drivers and updates that are not required but necessary to run a device properly
The Options updates mainly include these packages for Microsoft and some third-party products, device drivers like printers, and optional monthly updates. If you don’t want to install all required Windows updates by clicking on Check for updates, you can install optional updates in Windows 11. Let’s see how to install Windows 11 optional updates.
How to Install Windows 11 Optional Updates
In most cases, optional updates are not required for your system. Sometimes, however, if your hardware (printer, network adapter, or camera) becomes unresponsive or fails to work properly, you may consider installing the driver or optional updates. How to install Optional Updates in Windows 11? Let’s check out the detailed steps below:
Step 1. Press Win + I keys to open the Settings window, or you can right-click the Start menu at the bottom of your screen and select Settings.
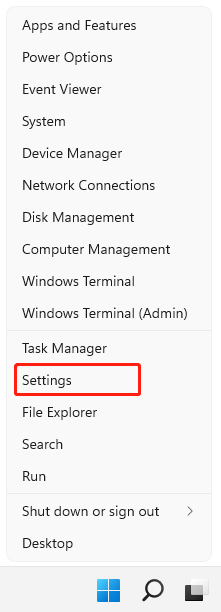
Step 2. In the Settings window, select the Windows Update option at the bottom of the left panel and scroll down the right sidebar, and click on Advanced options.
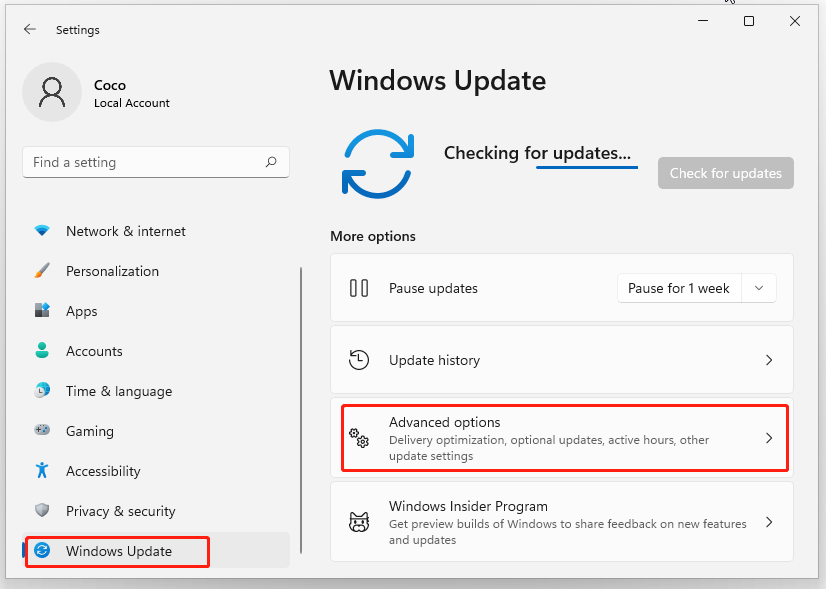
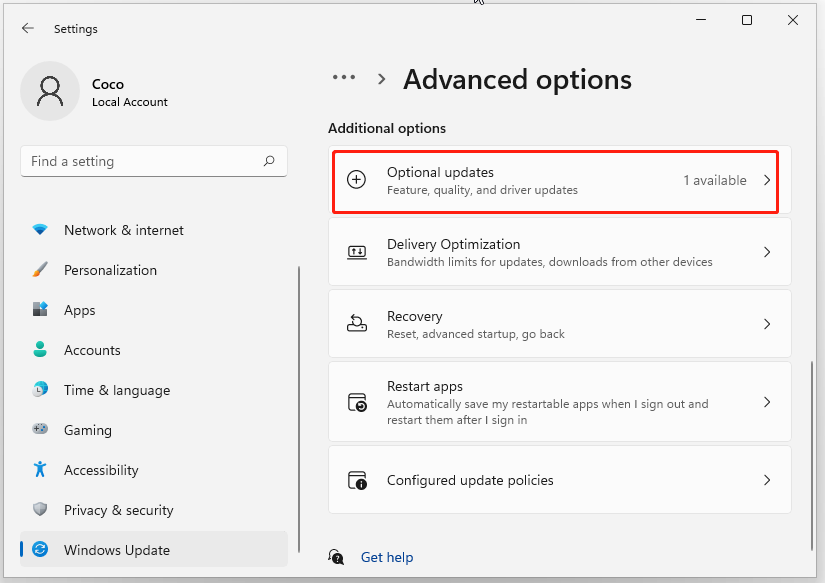
Step 3. Go to the Additional updates section from the left pane and click on Optional updates.
Step 4. Select the drivers or other optional updates that you want to install and click on the Download & install button. Here we take the VMware display driver for example.
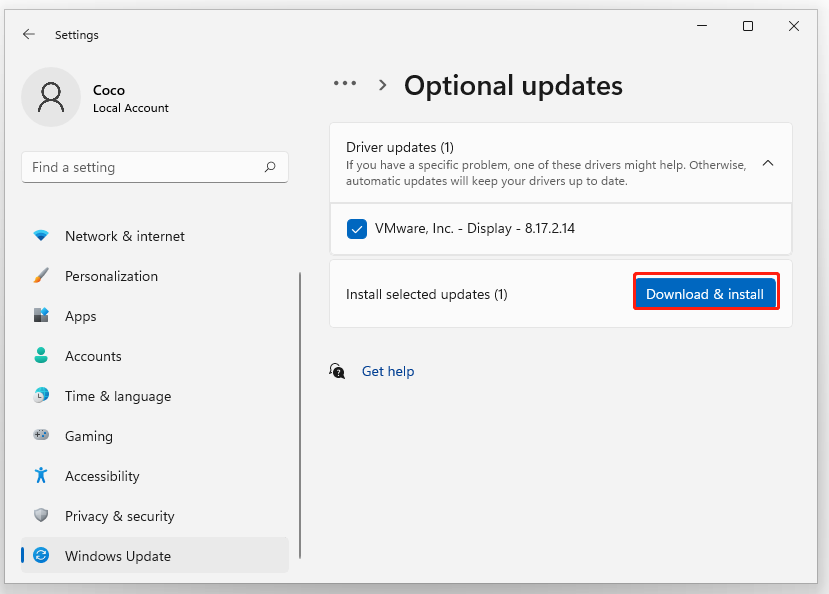
Step 5. Then Windows 11 will automatically download and install your selected updates. Of course, you may need to reboot your system to execute these changes depending on the updates.
How to Fix “Optional Updates Not Working in Windows 11”
However, some users reported that they encounter the Windows 11 optional updates not working issue. When they click on the Optional updates button, the settings app is automatically closed. Here is a true example from the Microsoft forum:
The Optional updates tab isn’t working on windows 11. (After I’ve clicked on optional updates under windows update, the settings app is automatically closed.) I’ve more than 600 GB of available space. I’m using windows 11 version 21H2. https://techcommunity.microsoft.com/t5/report-an-issue/optional-updates-isn-t-working-on-windows-11/m-p/2853819
If you are also troubled by the issue, you can restart your computer first and check if it works. If now, you can try the following 2 methods.
Fix 1. Run Windows Update Troubleshooter
Windows Update Troubleshooter is a practical built-in tool that enables you to detect and fix errors related to corrupted updates or some Windows updates issues. Here you can try running the troubleshooter to fix optional updates not working in Windows 11.
Step 1. Press Win + I to open the Settings window, and then select System from the left vertical menu and click on Troubleshoot from the right menu.
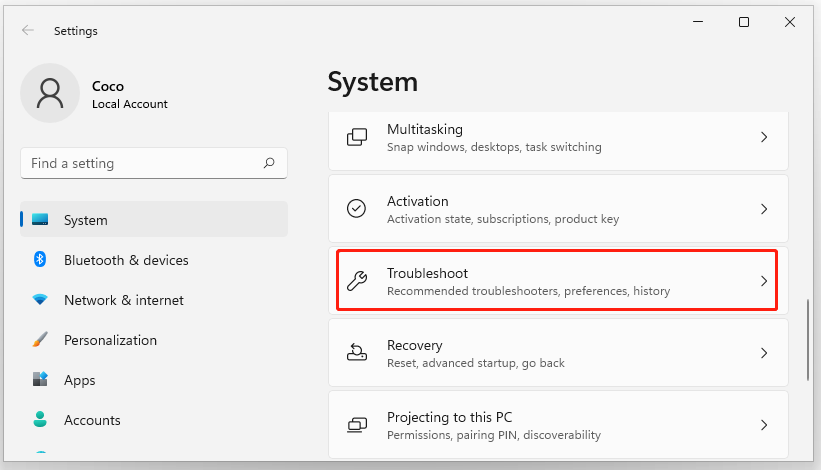
Step 2. Click on Other troubleshooters to expand all troubleshooters, and then click on Run next to the Windows Update section.
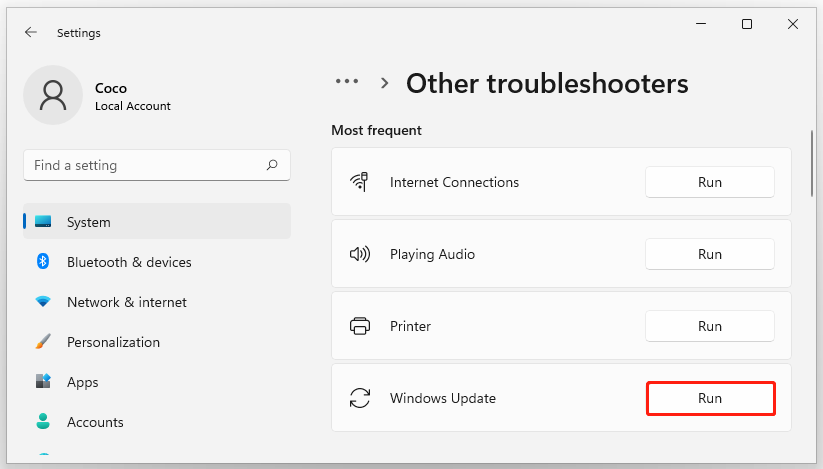
Step 3. Now, this troubleshooter will scan issues associated with the Windows Update components. If any fixes are identified, click on Apply this fix and follow the on-screen instructions to complete the repair.
Fix 2. Check System Files
A possible reason for Windows 11 optional updates not working is related to corrupted or missing system files. So, we recommend you use the SFC utility to scan and repair corrupted system files. Here’s how:
Step 1. Type cmd in the search box on the taskbar, and then right-click the Command Prompt app and select Run as administrator.
Step 2. Type sfc /scannow command in the elevated command prompt. This process may take you much time to scan, so please wait patiently.
Once this repairing process completes, restart your PC and see if the problem is gone.

![How to Fix Windows 11 Update Error 0x80040154? [4 Ways]](https://images.minitool.com/partitionwizard.com/images/uploads/2022/01/windows-11-update-error-0x80040154-thumbnail.jpg)
![How to Fix Spotlight Not Working in Windows 11? [Ultimate Guide]](https://images.minitool.com/partitionwizard.com/images/uploads/2021/12/how-to-fix-spotlight-not-working-in-windows-11-thumbnail.jpg)
User Comments :