If you are seeking for the methods to install and add fonts in Windows 11, this post is worth reading. It explains what the font is and offers you detailed steps for adding and install fonts on Windows 11. Explore the detailed information with MiniTool now.
What Is the Font
Like regular files, fonts can also be downloaded and shared between PCs through USB flash drives, CDs, and so forth.
If you don’t like the default fonts in Windows 11 or just want to try something new, you can install and add fonts by yourself. Before installing fonts, you should learn something about it.
What You Should Know before Installing Fonts
Though you are allowed to install and add fonts in Windows 11 manually, you should note that not all the font types are supported on Windows 11. Here, we list the most common font types that are nearly suitable for all the programs on Windows 11.
- OpenType (.otf)
- TrueType (.ttf or .ttc)
- PostScript (.pfb or .pfm)
Here are two methods to install and add fonts in Windows 11. You can pick one according to your preference.
#1. Install and Add Fonts through Microsoft Store
If you want to install and add fonts in Windows 11 via Microsoft Store, you can follow the given steps. The Microsoft Store allows you to download and install fonts in the same place.
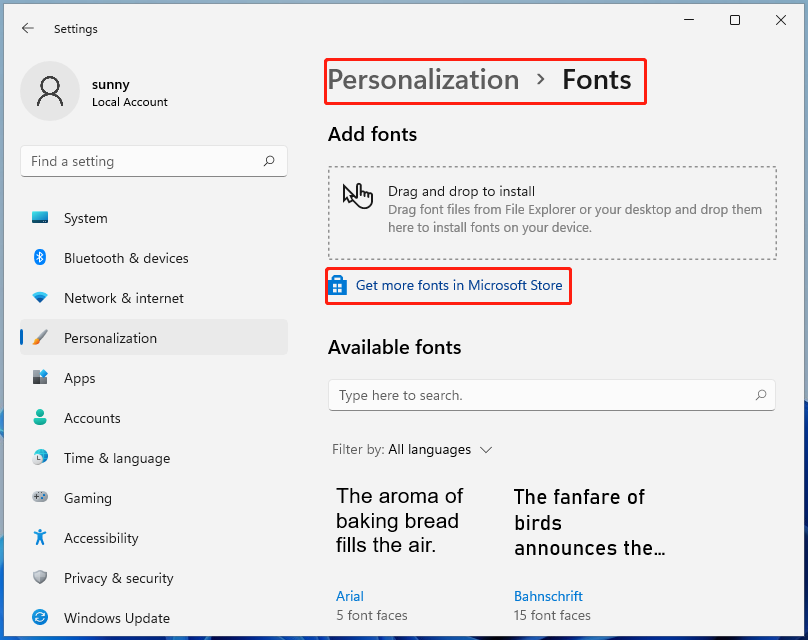
Step 1: Open Settings by pressing Windows and I keys, and then click Personalization > Fonts > Get more fonts in Microsoft Store.
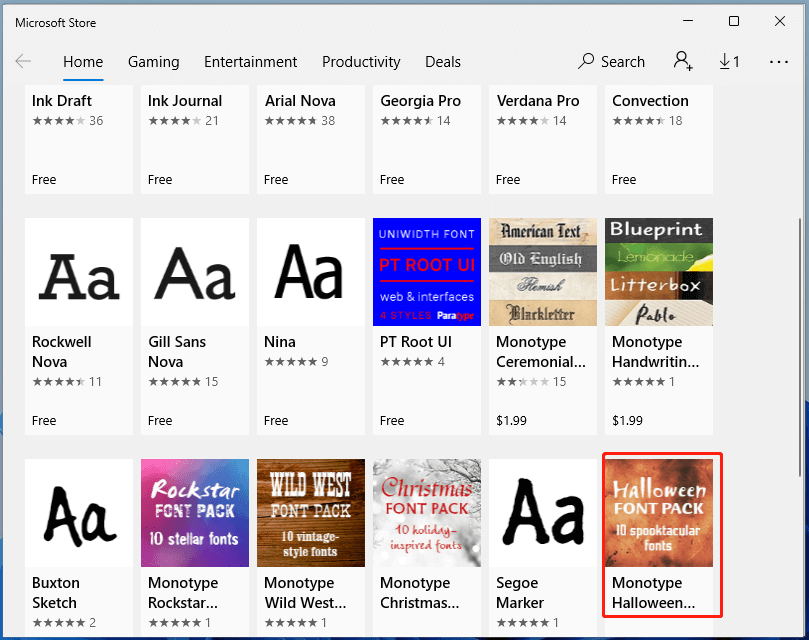
Step 2: In the Home menu of the Microsoft Store, choose the font you like and click on it.
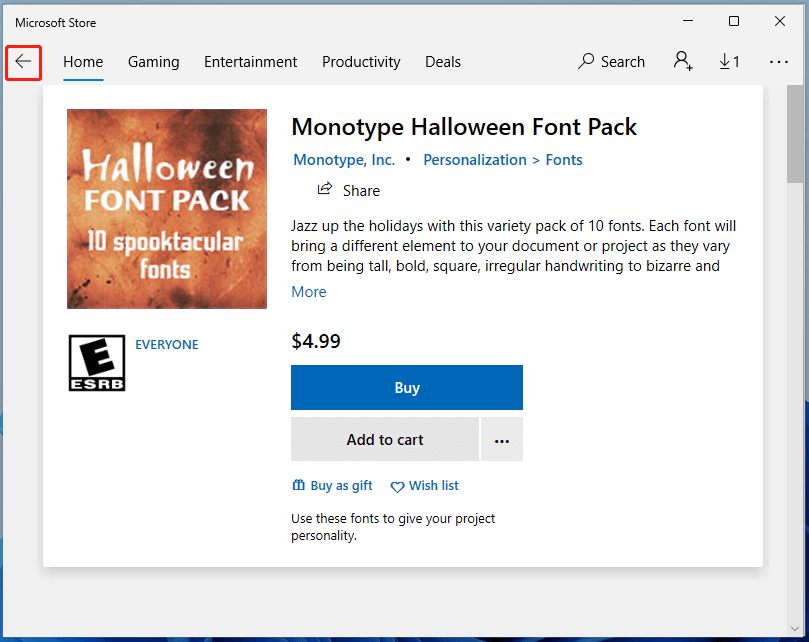
Step 3: As you can see, the font we choose here is not free. If you still want it, you need to buy it. To get a free one, click on the back arrow at the upper left corner of the Microsoft Store and choose another one.
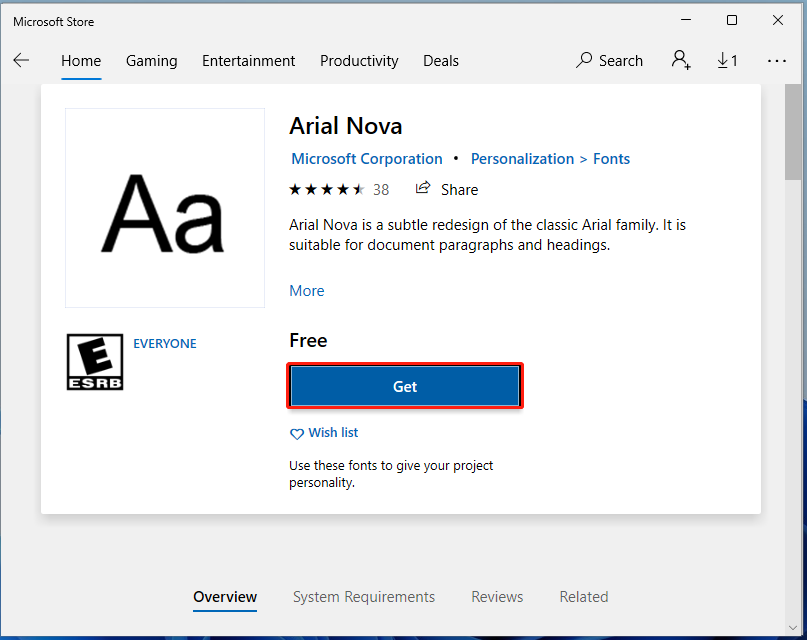
Step 4: Click the Get button to continue.
Step 5: In the next window, you will be asked to whether to sign in the Microsoft account. You can select an option according to your demand. If you choose “No, thanks”, you will back to the page. The font will be downloaded automatically.
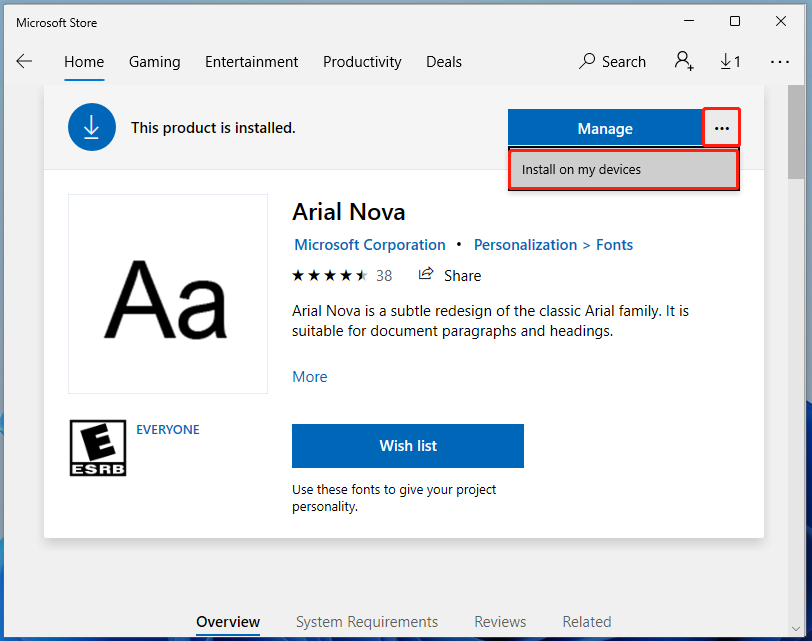
Step 6: You will see the message “This product is installed” after the download finishes. If it is not installed, click on the three horizontal dots next to the Manage button, and click Install on my devices. Then follow the prompted instruction to finish the installation.
#2. Install and Add Fonts from Web
You can also install and add fonts from webs like Google Fonts, FontSpark, Font Squirrel, Urban Fonts, Abstract Fonts, 1001 Fonts, FontZone, and etc. Actually, the web provides you with more options than Microsoft Store.
Step 1: Download font files from the websites, and then right-click on them and select Show more options.
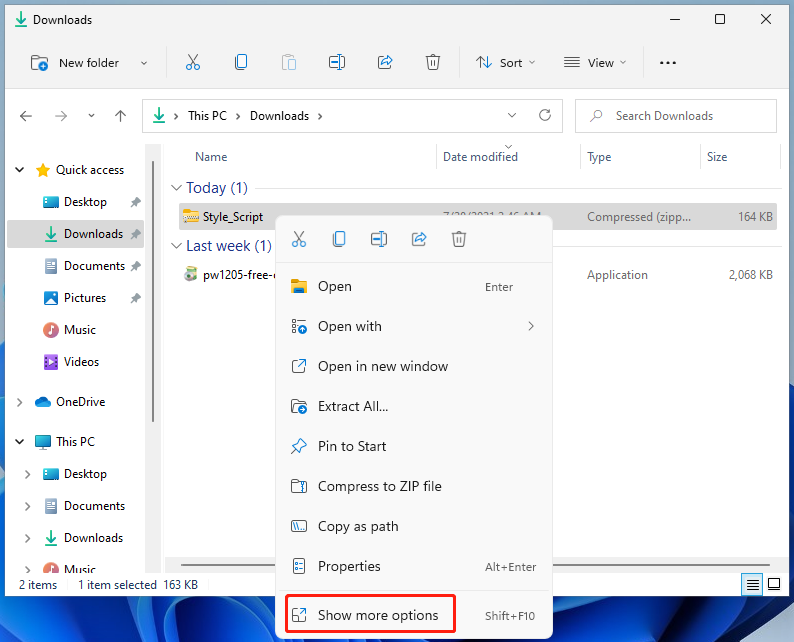
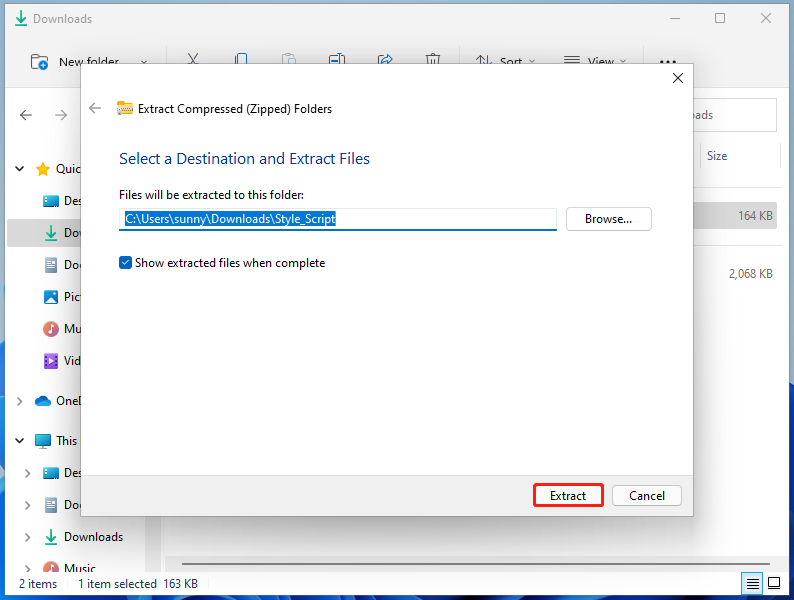
Step 2: In the next window, choose the Extract all option. Then click Extract to unzip the files.
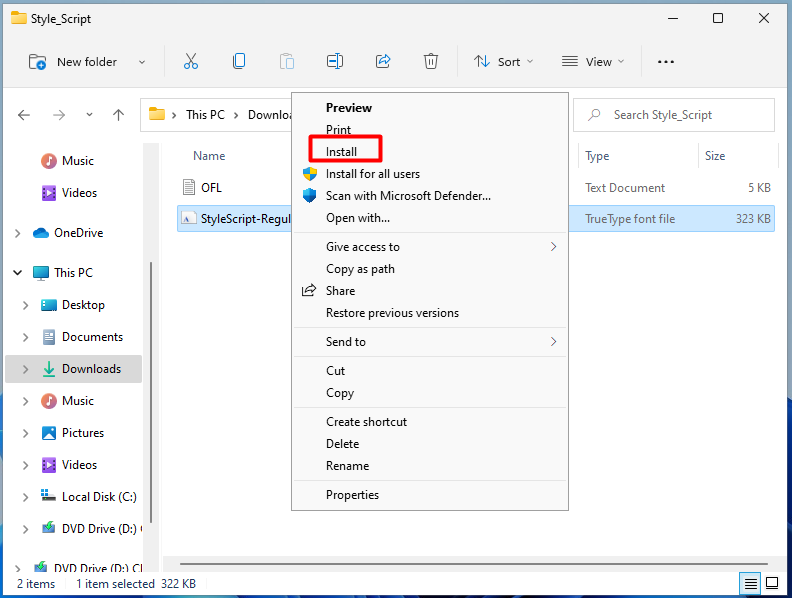
Step 3: Open the unzipped folder, and then right-click on the file and select the Show more options > Install option in the pop-up menu. Then the font will be installed automatically.
How to install and add fonts in Windows 11? This post has told you the answers. Try them now!



User Comments :