Overview of EZ-FLASH Cart
You may have heard of the flash cartridge (also known as a flashcart), a homebrew video game cartridge that uses flash memory for storage as well as running applications. These cartridges enable homebrew applications and games to be used and played when they are inserted into an otherwise officially licensed game console.
Flash cartridges are usually not officially created or sold. Rather, they are commonly unofficially produced and released by off-brand game accessories companies. EZ-FLASH carts are such products.
At the time of writing, EZ-FLASH has the following products on sale.
- EZ-FLASH Parallel: Support playing DS games on All Nintendo DS/3DS and all derivatives, including iQue products.
- EZ-FLASH OMEGA: Support GBA game copy and play with no client needed and GB/GBC/NES game copy and play based on emulator. It has a standard and a definitive edition. The latter adds MODE B, has a larger NOR flash area, and replaces SRAM with FRAM.
- EZ-FLASH Junior: Support GB/GBC game copy and play. Support Gameboy, Gameboy Pocket, Gameboy Color, and Gameboy Advance/SP, even with backlit mods and rechargeable batteries.
2. EZ-FLASH OMEGA can’t play some GB/GBC/NES games like Pokemon Crystal because it is based on an emulator, while the emulation is not perfect. EZ-FLASH Junior plays GB/GBC games natively. There is no emulation, so the game console will run these games as if they were on a real cartridge.
How to Use EZ-FLASH Cart for the First Time
How to use EZ-FLASH cart? If you are a novice in using flashcarts, you may have this question. In this part, I will show you how to use EZ-FLASH cart for the first time step by step. You can have a try.
Step 1. Format the MicroSD Card
EZ-FLASH Junior and EZ-FLASH Parallel support SD cards up to 32GB, while EZ-FLASH OMEGA supports SD cards up to 128GB.
When you get the microSD card, you need to format it properly on your PC. For SD cards not more than 32GB, you should format them to FAT32 with a file allocation unit size of 32KB. For SD cards larger than 32GB, you should format it to exFAT with a file allocation unit size of 32KB or larger. Then, you can use the following free ways to do that.
#1. Windows File Explorer
- Connect the SD card to your computer via an SD card reader.
- Open Windows File Explorer, right-click the SD card from the sidebar, and then choose Format from the menu.
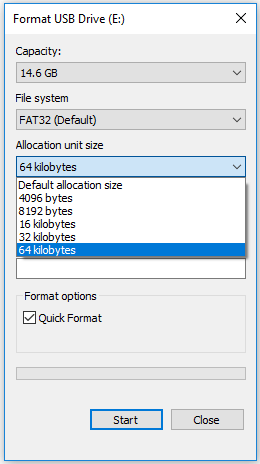
- On the pop-up window, select a proper file system (FAT32 or exFAT) and then select an allocation unit size (32 kilobytes or larger).
- Click the Start button to carry out the formatting operation.
#2. MiniTool Partition Wizard
MiniTool Partition Wizard FreeClick to Download100%Clean & Safe
- Launch MiniTool Partition Wizard.
- Right-click the partition on the SD card and choose Format from the context menu.
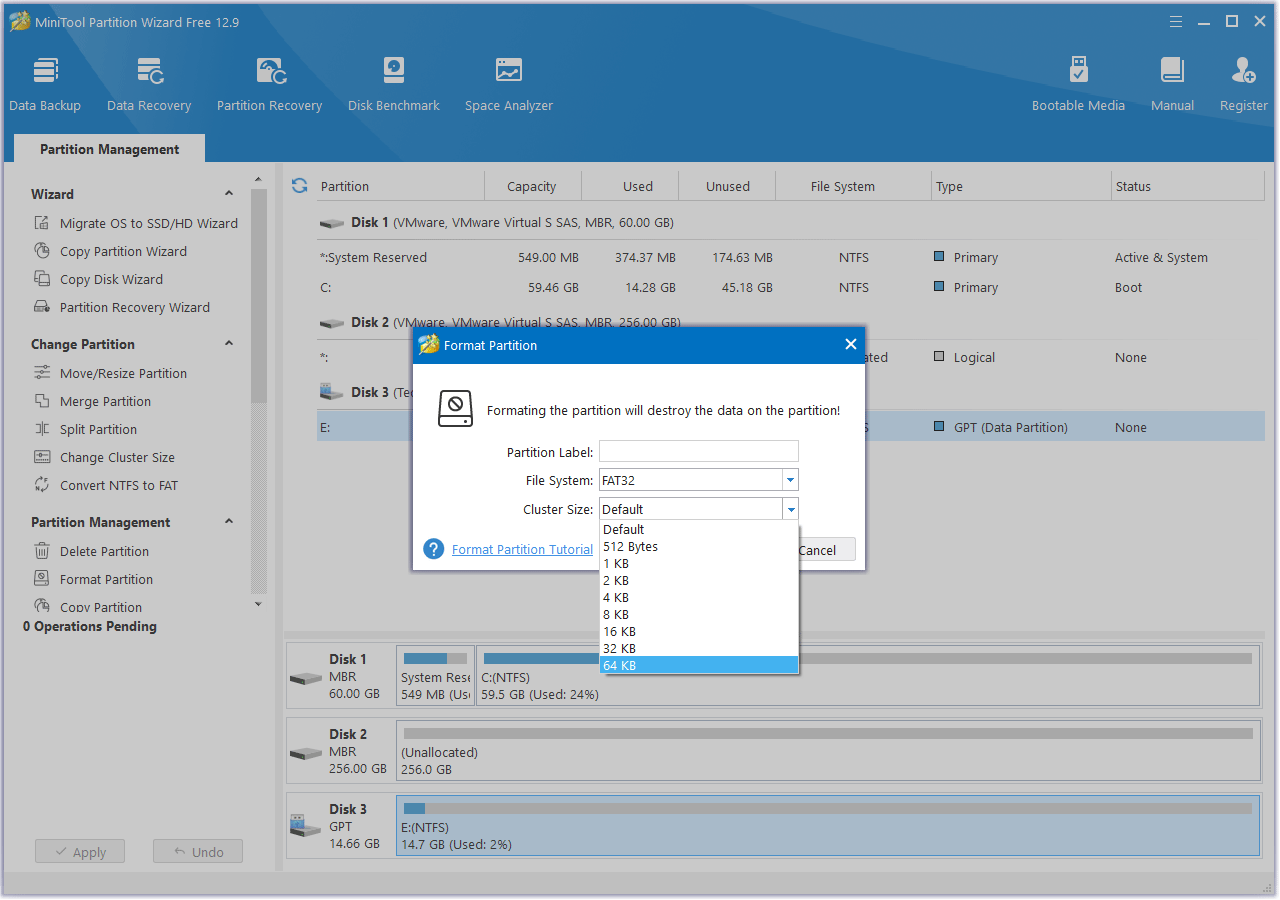
- On the pop-up window, choose a proper file system (FAT32 or exFAT) and a proper cluster size (32KB or larger), and then click OK.
- Click the Apply button to carry out the formatting operation.

Step 2. Download and Extract Files to the SD Card
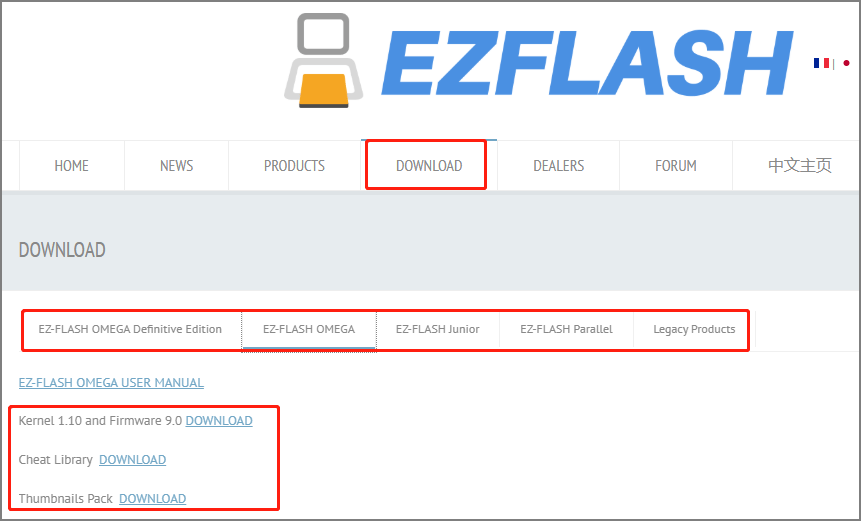
In this step, you need to download and extract the necessary files to the SD card, including the firmware and kernel upgrade files, the Cheat Library, the Thumbnails Pack, and the game ROM file. The former 3 types of files are offered by EZ-FLASH. You can download them from its official website. Here is the guide:
#1: Go to the EZ-FLASH official website and click the Download tab. Choose your EZ-FLASH product and then click the Download button to download these files. Make sure you have selected the correct product model. Otherwise, you will encounter issues when using the flashcart.
#2: Extract these files and move them to the root directory of the SD card. Under the right circumstances, you will see the following folders or files in the root directory of the SD card.
- For EZ-FLASH Parallel: The __ezds folder and the EZDS.dat file.
- For EZ-FLASH Junior: The ezgb.dat file and the Update_FW4.gb file.
- For EZ-FLASH OMEGA: The ezkernel.bin file, the CHEAT folder, and the IMGS folder.
- For EZ-FLASH OMEGA Definitive Edition: The ezkernelnew.bin file, the CHEAT folder, and the IMGS folder.
Step 3. Upgrade the Kernel and Firmware
Generally speaking, the firmware and kernel versions on the card purchased by the user will be lower than the latest version on the official website, so they need to be upgraded. After the upgrade, you can then play games.
How to upgrade the kernel and firmware? Here is the guide:
#1: In the previous step, you have put the kernel and firmware files into the SD card. Now, you need to insert the microSD card into the EZ-FLASH cart and then insert the EZ-FLASH cart into the game console.
#2: Power on the game console to upgrade the kernel and the firmware. During the process, do not turn off the power. Otherwise, the game console may be bricked.
- For EZ-FLASH Parallel: Power on the game console and it will upgrade the kernel and firmware automatically.
- For EZ-FLASH Junior: Power on the game console and then run Update_FW4.gb as a game.
- For EZ-FLASH OMEGA Standard and Definitive Editions: Press and hold the R button of the game console, and turn on the power of the game console. The kernel and firmware can be upgraded automatically.
Now, the EZ-FLASH setup has been completed and you can play games. As for the specific operations and hotkeys, you can refer to their user manuals.
Bottom Line
How to use EZ-FLASH cart for the first time? This post offers you a complete guide to that. You can have a try. If you encounter issues when using MiniTool Partition Wizard to format the microSD card, contact us via [email protected]. We will get back to you as soon as possible.
About The Author

Position: Columnist
Linda has been working as an editor at MiniTool for 5 years. She is always curious about computer knowledge and learns it crazily. Her articles are simple and easy to understand. Even people who do not understand computer can gain something. By the way, her special focuses are disk management, data recovery and PDF editing.
User Comments :