If you stop playing a game which is available on Blizzard Battle.net, you might need to uninstall it to free up disk space. You can also solve some problems in the game by uninstalling and reinstalling it. But how to uninstall Battle.net games? In this post, MiniTool Partition Wizard provides you three methods.
Blizzard Battle.net is an Internet-based online game platform developed by Blizzard Entertainment. It was released on December 31, 1996. This game service supports storefront actions, socia interactions, and matchmaking for all the current games provided by Blizzard, including Overwatch, World of Warcraft, Heroes of the Storm, Hearthstone, Diablo, etc.
As it is easy to create a Blizzard account and there are plenty games available, more and more game lovers are attracted by this platform. However, after a period of time, some games might need to be uninstalled, especially when users encounter problems while enjoying the game or they don’t like the game anymore.
Do you know how to uninstall Battle.net games? Here are 3 methods and you can choose on you prefer to have a try.
Method 1: Uninstall Battle.net Games in the Blizzard App
If you are using the Blizzard Battle.net app currently, it should be a good way to uninstall a game with the app, as you can finish the uninstallation within a few clicks. Here is how to uninstall games on Battle.net.
Step 1: In Blizzard Battle.net app, go to GAMES category to view the list of games.
Step 2: In the left pane, select the game you want to uninstall.
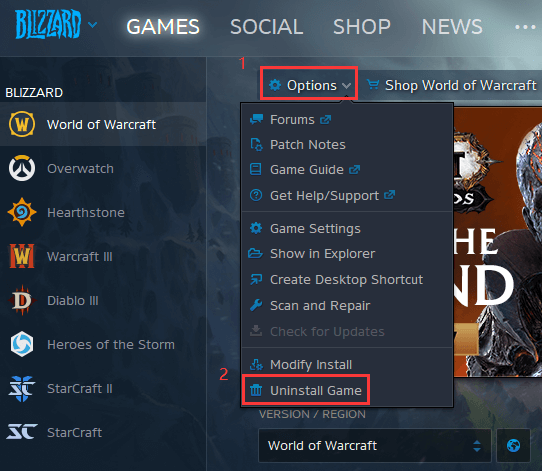
Step 3: In the right pane, click Options > Uninstall Game.
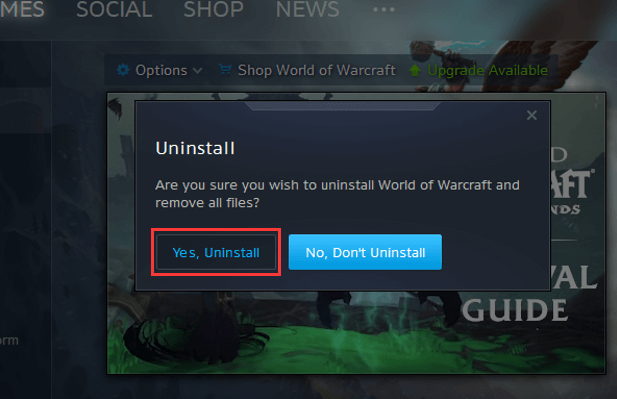
Step 4: There will be a pop-up window asking you are you sure you wish to uninstall the game and remove all files. Click the button “Yes, Uninstall”.
Then you should wait patiently and follow the onscreen instructions to finish the process.
Method 2: Uninstall the Game in Control Panel
If you are not using Blizzard Battle.net app currently or you don’t want to open the app, you can uninstall the target game with a Windows tool, Control Panel. You just need to:
Step 1: Press Win + S to open Windows Search utility. Then search for Control Panel and access it.
Step 2: Select View by: Category and click Uninstall a program to view your installed programs and features.
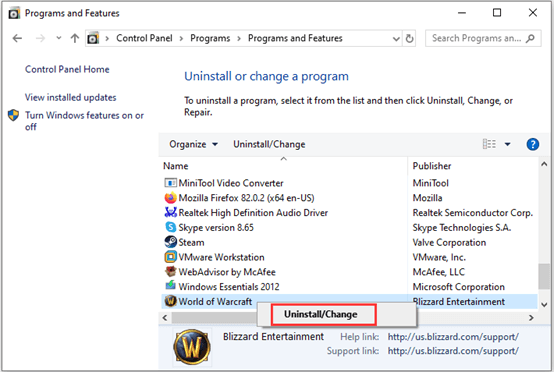
Step 3: Locate the target game that you want to uninstall and right-click it. Then select Uninstall or Uninstall/Change.
Step 4: A same confirmation window will pop up and you need to click Yes, Uninstall.
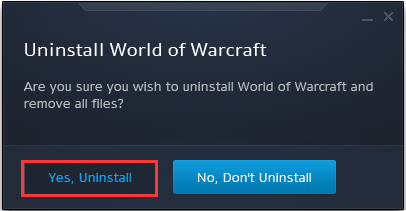
Wait until the uninstallation has been completed. After uninstalling, there might be remaining game files on your PC. You should check the following directories and delete related files or folders.
- C:WindowsTemp
- C:Program Filesgametitle
- C:Program Files (x86)gametitle
- C:Program FilesCommon FilesBlizzard Entertainment
- C:UsersPublicGamesgametitle
- C:UsersPublicPublic DocumentsBlizzard Entertainmentgametitle
Method 3: Use Professional Third-Party Software
If you have a lot of games to uninstall, it may cost you much time to uninstall them one by one. In this case, you can use a professional third-party program which is designed to clean up and optimize PC to uninstall them, such as IObit Uninstaller, Revo Uninstaller, CCleaner, etc.


![Top 10 CCleaner Alternatives You Can Try [New Update]](https://images.minitool.com/partitionwizard.com/images/uploads/2020/08/ccleaner-alternative-thumbnail.png)
User Comments :