In this post, MiniTool Partition Wizard introduces how to hide cursor while typing on Windows 11/10. If you don’t want to see your cursor while using Notepad, Microsoft Word, or other text apps, this post can help you.
If you are using word applications such as Microsoft Word, Notepad, and so on, you might find that the mouse cursor usually displays next to your text while you are typing. Sometimes it would be annoying as the cursor might make the text unclear.
If you don’t want to see your cursor while typing on Windows 11 or 10, you can hide it. And here are two methods.
Method 1: How to Hide Cursor While Typing via Settings
Windows 11 is a new operating system released recently by Microsoft. As the successor to Windows 10, Windows 11 is based on Windows 10 but designed with a different outlook and some changed or improved features. If your PC meets the system requirements for installing Windows 11, you can upgrade your Windows 10 to 11 free.
Both Windows 10 and Windows 11 allow you to hide cursor while typing and you can follow the tutorial below.
On Windows 10
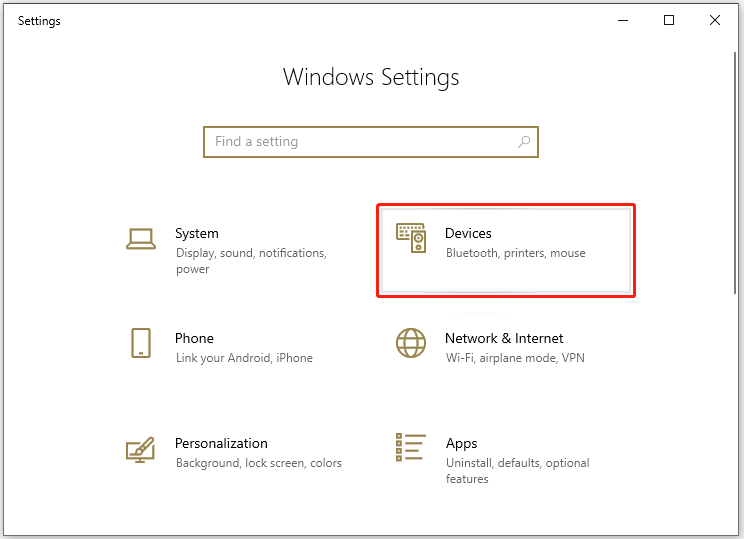
Step 1: Press Windows + I to open Windows Settings quickly. Then select the Devices category.
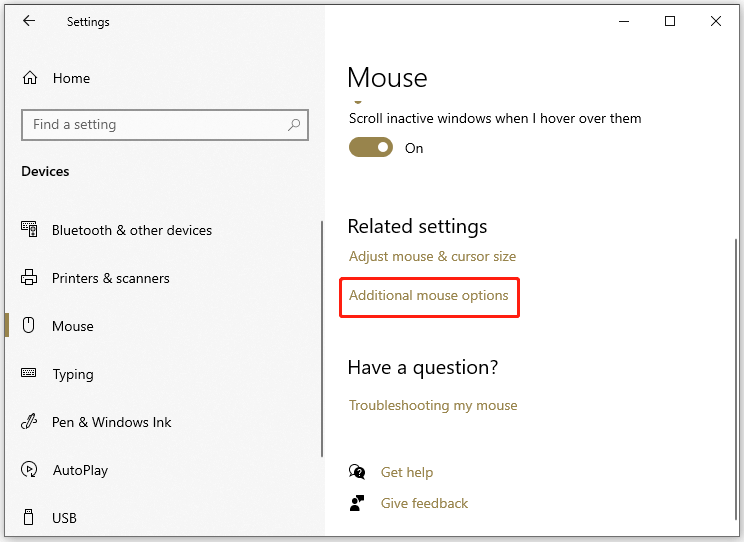
Step 2: In the following window, select Mouse on the left side. On the right side, scroll down and click Additional mouse options.
 .
.
Step 3: In the pop-up window, select the Pointer Options tab and check the Hide pointer while typing option.
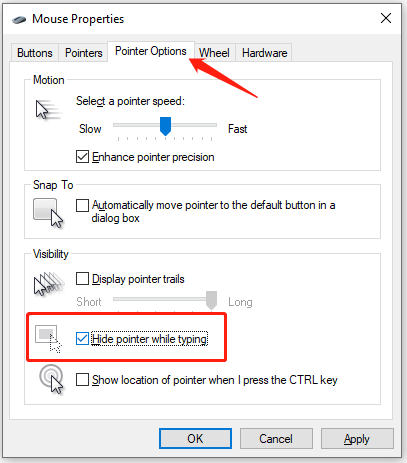
Step 4: Click Apply and OK to save the changed settings.
On Windows 11
Step 1: Press Win + I to open Settings.
Step 2: In the left pane, select Bluetooth & devices. In the right pane, select Mouse.
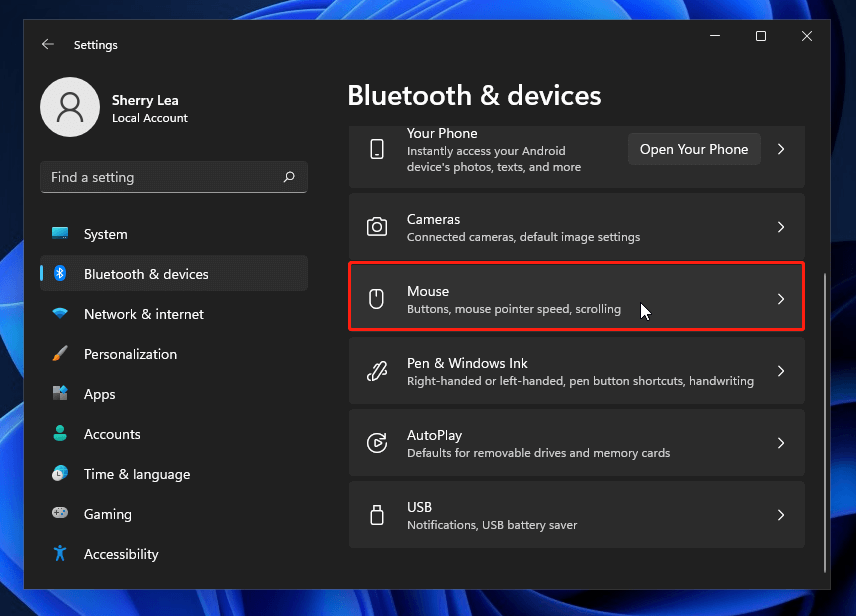
Step 3: Scroll down and click Additional mouse settings.
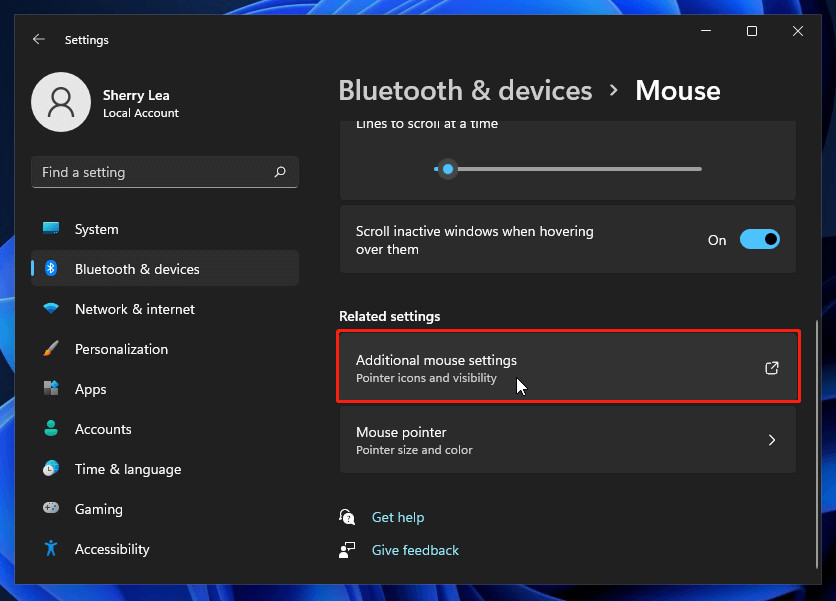
Step 4: In the pop-up window, select the Pointer Options tab and check Hide pointer while typing.
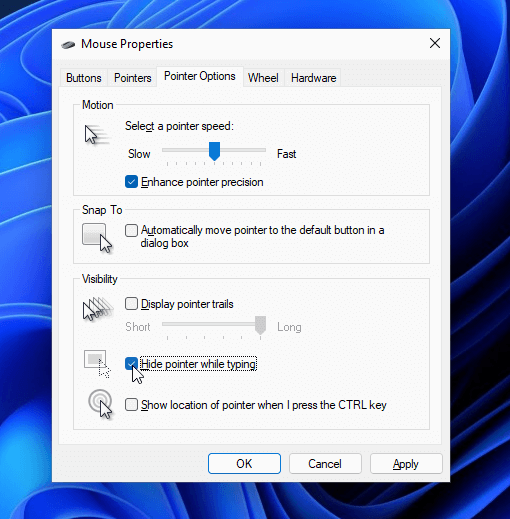
Step 5: Click Apply and OK.
Method 2: How to Hide Cursor While Typing via “Windows Cursor Hider”
Unfortunately, the “hide pointer while typing” feature in Settings doesn’t work for some applications such as Visual Studio. In this case, you might need to use a third-party program to hide cursor Windows 11/10.
Cursor Hider is such a program. It is a professional program that can help you hide the cursor while typing on Windows 11 or 10. How to get this tool? You just need to:
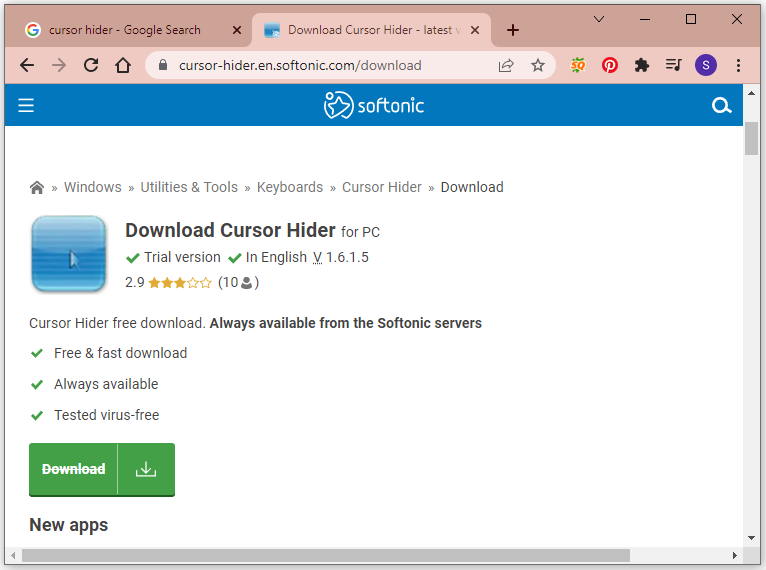
Step 1: Open a web browser and search for Cursor Hider. Then click a trusted link.
Step 2: Click the download button to download Cursor Hider for PC.
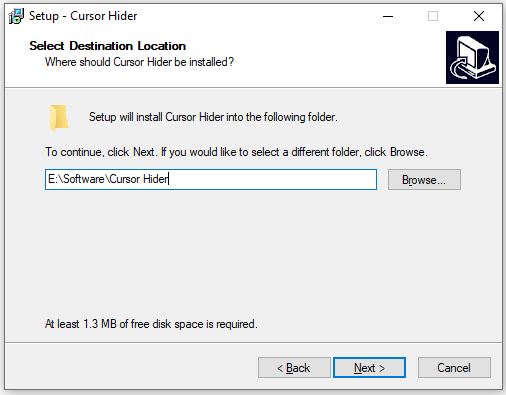
Step 3: Run the downloaded setup file and follow the on-screen instructions to install the program.
Step 4: Once the program is installed, it will launch automatically and you will see a little cursor icon on your taskbar, as the following picture displays. If you want to hide cursor while typing, you just need to click the icon and you will see a red x on the cursor.
![]()
![]()
There are also many alternative programs and you can search them on the internet if you don’t like this program.


User Comments :