Not everyone likes the same standard input language when using a computer keyboard, so it’s best to set up keyboard language that makes you feel more comfortable and efficient. In this article from MiniTool Partition Wizard, we will show you how to change language keyboard on Windows 11.
How to Add Keyboard Language on Windows 11?
The following are the main steps to add a keyboard layout on Windows 11:
Step 1: Press Windows + I shortcut key to open the Settings app.
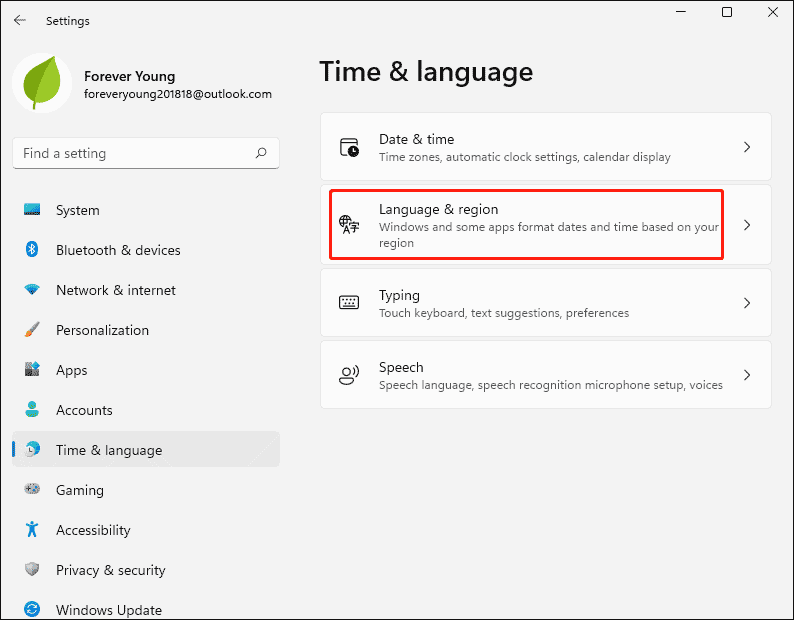
Step 2: Navigate to the Time & Language option on the left and click on the Language & Region option in the right panel.
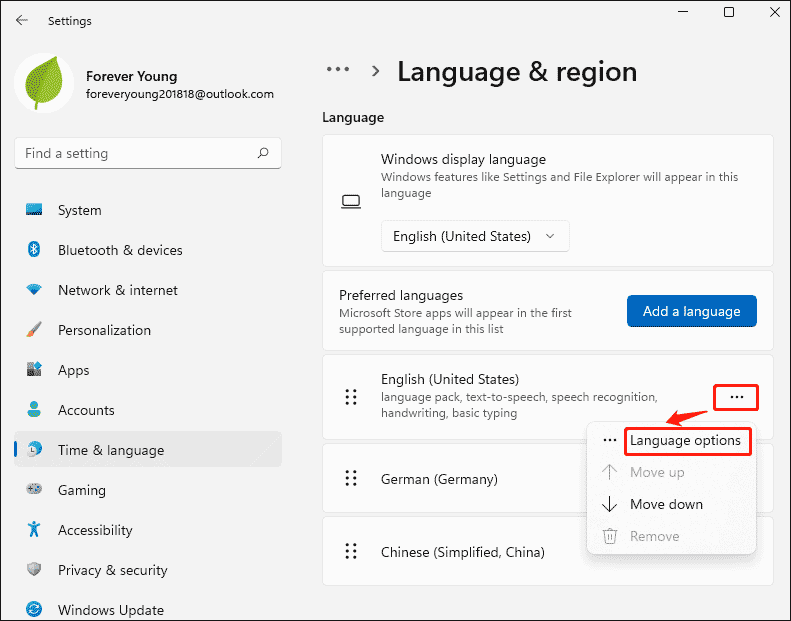
Step 3: Under the Language section, you can see the default and installed language packs. From here, select the language for which you want to add a keyboard layout, and then click the three-dot menu button next to it. Then, click on the Language option from the options that appear.
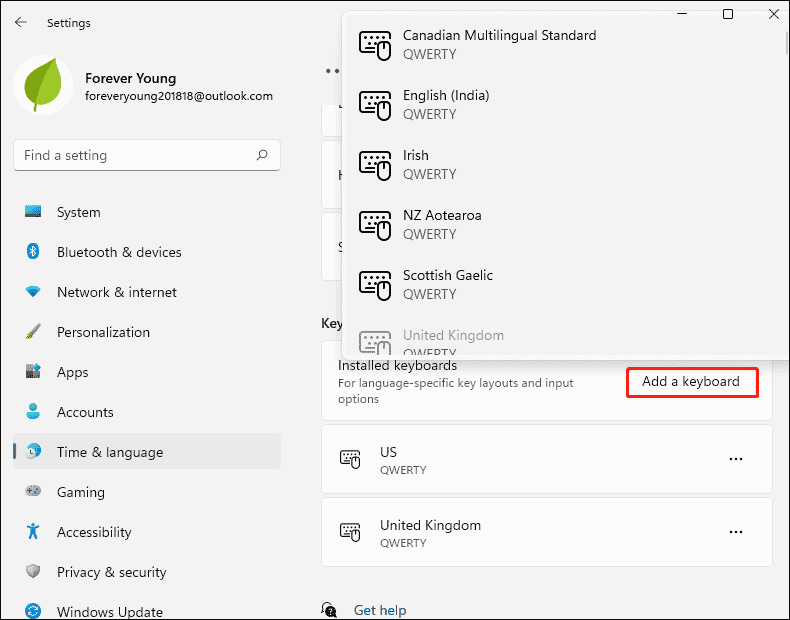
Step 4: In the Keyboards section, click the Add a keyboard button. Then select the language keyboard you want.
After you do that, the selected keyboard language will be added to the system tray on the taskbar.
How to Install New Language Keyboard on Windows 11?
You can install a new keyboard layout using your region or preferred language. To install a new language-specific keyboard layout in Windows 11, you can follow these steps:
- Navigate to the Settings > Time & Language > Language & regional.
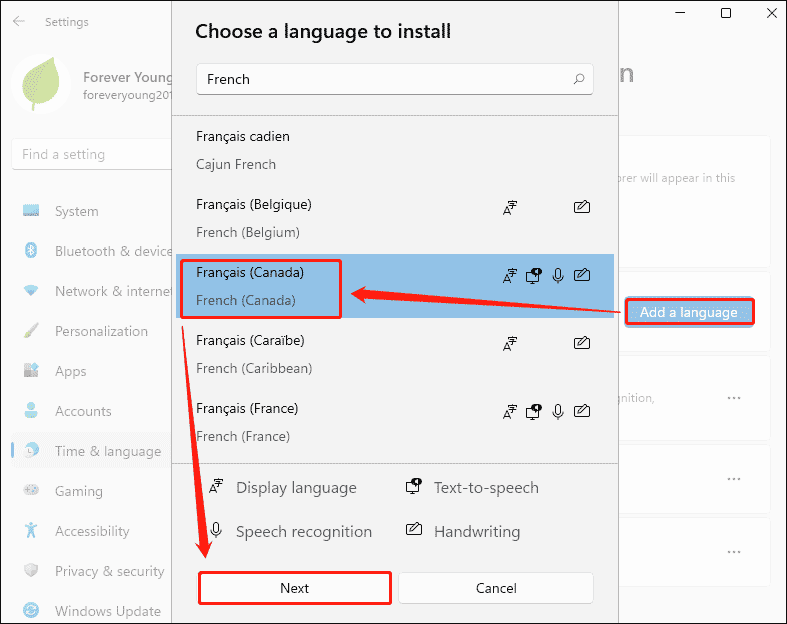
- Under the Languages section, click the Add Language option.
- Type a specific language in the search box and select the desired keyboard layout from the search results.
- Click the Next button, and then, click the Install button to install the selected keyboard layout.
How to Change Keyboard Language on Windows 11?
There are many ways to open and switch keyboard languages in Windows 11. Here are three common methods you can use to access all keyboard layouts and then use the one you want:
- Click the keyboard language name on the taskbar. After adding the keyboard language, you can see the language and keyboard language name on the taskbar. You just need to click the keyboard language name on the taskbar and then switch between keyboard languages as needed.
- Use shortcut keys or hotkeys to open the keyboard language. You can use Windows + Space or Shift + Alt hotkeys to quickly switch from the current keyboard language to another keyboard language.
- Open the keyboard language from the Quick Settings panel. Just click the WiFi or Volume icon to open the quick settings panel. You will see different options in this panel, including keyboard layout options. If you don’t see this feature, click the Edit quick settings button, and select Add. Then select the keyboard layout option.
How to Remove Keyboard Language on Windows 11?
If you need to delete a specific keyboard language in Windows 11, you can do that through the following steps.
- Use Win + I hotkey to open the Settings in Windows 11.
- Navigate to the Time & language > Language and region.
- Click the three horizontal dots available for the installed languages.
- Click the Remove.
Bottom Line
Now we have reached the end of this article. In this article, we introduce to you how to change language keyboard on Windows 11. Do you have any questions about this content? If you have any questions, please leave them in the comment zone and we will try to answer them as soon as possible.


User Comments :