Sometimes, we have to change IP address out of many reasons. How to change IP address on Windows 10? If you are also searching for the answer, you can follow this Windows 10 guide provided by MiniTool to change IP address.
Before You Do
How to change your IP address? In order to change IP address Windows 10 smoothly, it’s required to log in to Windows 10 using an administrator account. Besides, you need to find the IP address of your router and computer. To do so, follow the steps below.
Step 1. Press the Win + I keys to open the Settings app and go to the Network & Internet section.
Step 2. In the Status tab, scroll down the right sidebar and click on the View your network properties option.
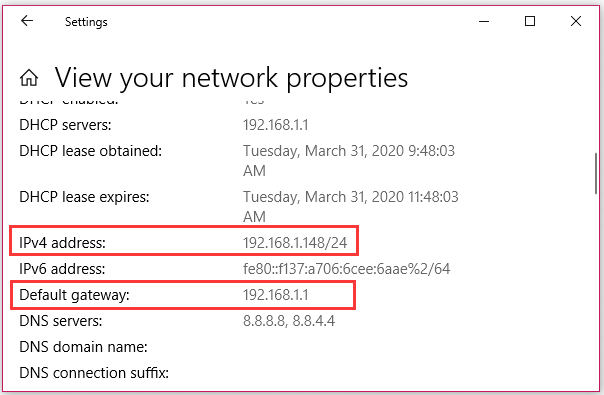
Step 3. Now, scroll down the new screen to find the Default gateway and IPv4 address sections. The router’s IP address is next to the Default gateway and the IPv4 address identifies your computer. Remember the IP addresses you have found.
Now, let’s see how to change IP address Windows 10 in the following part.
How to Change My IP Address in Windows 10
Here we will walk you through 2 methods. Each method will be discussed in detail. Now, let’s start learning how to change IP address Windows 10.
Method 1. Change IP Address Windows 10 Using the Settings App
The first and simplest way to change IP address is to use the Settings app. Here’s a full guide for you:
Step 1. Open the Settings app by pressing Win + I keys and then click on Network & Internet.
Step 2. In the pop-up window, select the network type based on your situation. If your device connects to the Internet through a wireless card, select the Wi-Fi section. If your device is using a wired connection, select the Ethernet section.
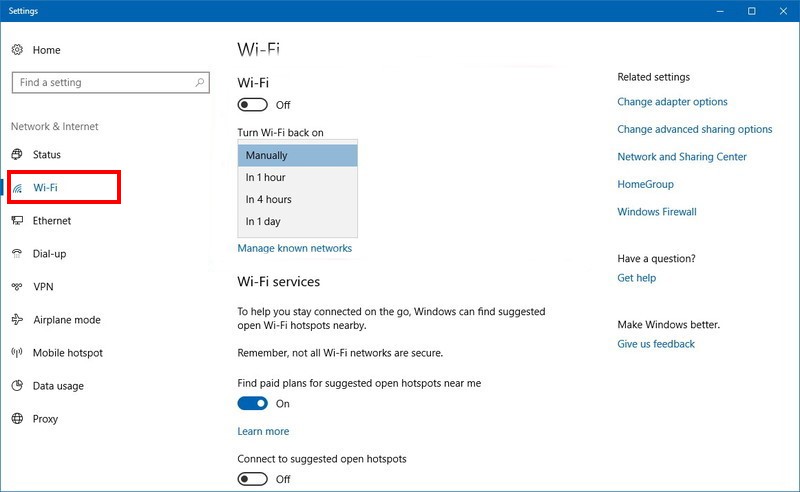
Step 3. Scroll down the right sidebar to locate the IP settings section and click on the Edit button.
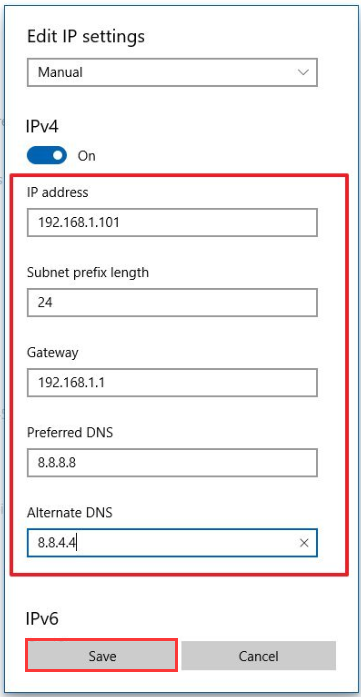
Step 4. In the pop-up dialog box, select Manual from the drop-down menu and enable the IPv4 switch.
Step 5. Enter all the required details below including IP address, Subnet prefix length, Gateway, etc.
IP address: It refers to the static IP address that you want to use.
Subnet prefix length: It refers to the prefix length that determines the size of the subnet.
Gateway: It refers to the IP address of your router.
The Preferred DNS and Alternate DNS settings are not mandatory to enter. The setting will be automatically assigned by your router if they are blank.
Step 6. After the details are entered, click on the Save button to change IP address.
Method 2. Change IP Address Windows 10 in Control Panel
In addition to the above method, you can change IP address Windows 10 through the Control Panel. Here’s how to do that:
Step 1. Type control in the search window and select the Control Panel app from the best match.
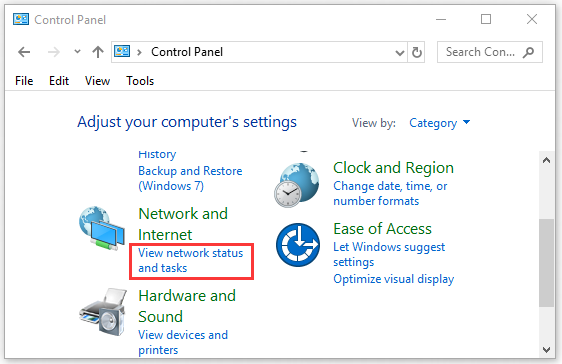
Step 2. Change the View by to Category, and then click on View network status and tasks under the Network and Internet section.
Step 3. Navigate to the View your active networks tab and click on your Internet connection next to it.
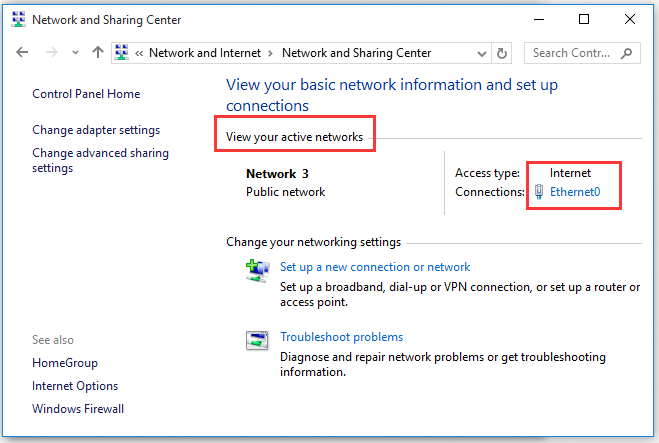
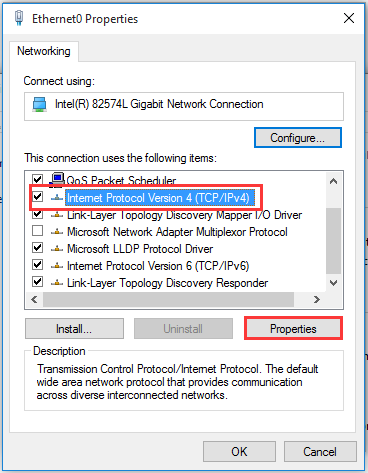
Step 4. In the pop-up window, click on Properties and then select the Internet Protocol Version 4 or IPv6, which depends on the IP address that you’re ready to change.
Step 5. Click on the Properties button.
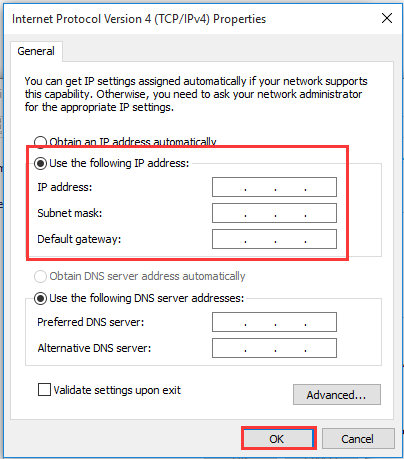
Step 6. In the Properties window, select the Use the following IP address option if you want to set a static IP address.
Step 7. Then you need to enter all the required details manually including IP address, subnet mask, and Default gateway. After that, click on OK to save the changes and exit the window.
How to change your IP address in Windows 10? I believe that already have known detailed steps. Now, it’s your turn to have a try.


User Comments :