Do you want to know how to add fonts to Photoshop? If you have this need, this guide is for you. In this post, MiniTool Partition Wizard provides a step-by-step guide on how to add fonts to Photoshop for you. You can follow this guide to add fonts to Photoshop easily.
Photoshop is a photo editing software that is popular around the world. It is available in many different languages, such as English, French, Chinese, Japanese, and so on. It also provides many good features and tools like Layers, Vector Mask, Slice Tool, Retouching Tools, etc.
Photoshop’s basic tools can satisfy many basic needs in your daily life. However, if you want to use some special fonts that not include in Photoshop’s font library, you may want to know the way to add them.
Do you know how to add fonts to Photoshop? Luckily, no matter whether you want to add fonts to Photoshop on Windows or add fonts to Photoshop on Mac, you can get a step-by-step guide in the below content.
How to Add Fonts to Photoshop?
Adding fonts to Photoshop is very easy. You can just divide this process into two parts: one is downloading fonts from the website, and the other is installing them and adding them to Photoshop.
Before you add fonts to Photoshop, please make sure you have quit Photoshop first. Or you won’t see the new font on your photoshop.
Download Fonts for Photoshop
There are many websites that you can download fonts from like Google Fonts, Font Squirrel, Fontspace, BEfonts, Dafonts, Ffonts, Free Script Fonts, FontsArena, Pinspiry fonts, 1001 Free Fonts, and Unblast. Here I use Google fonts as an example.
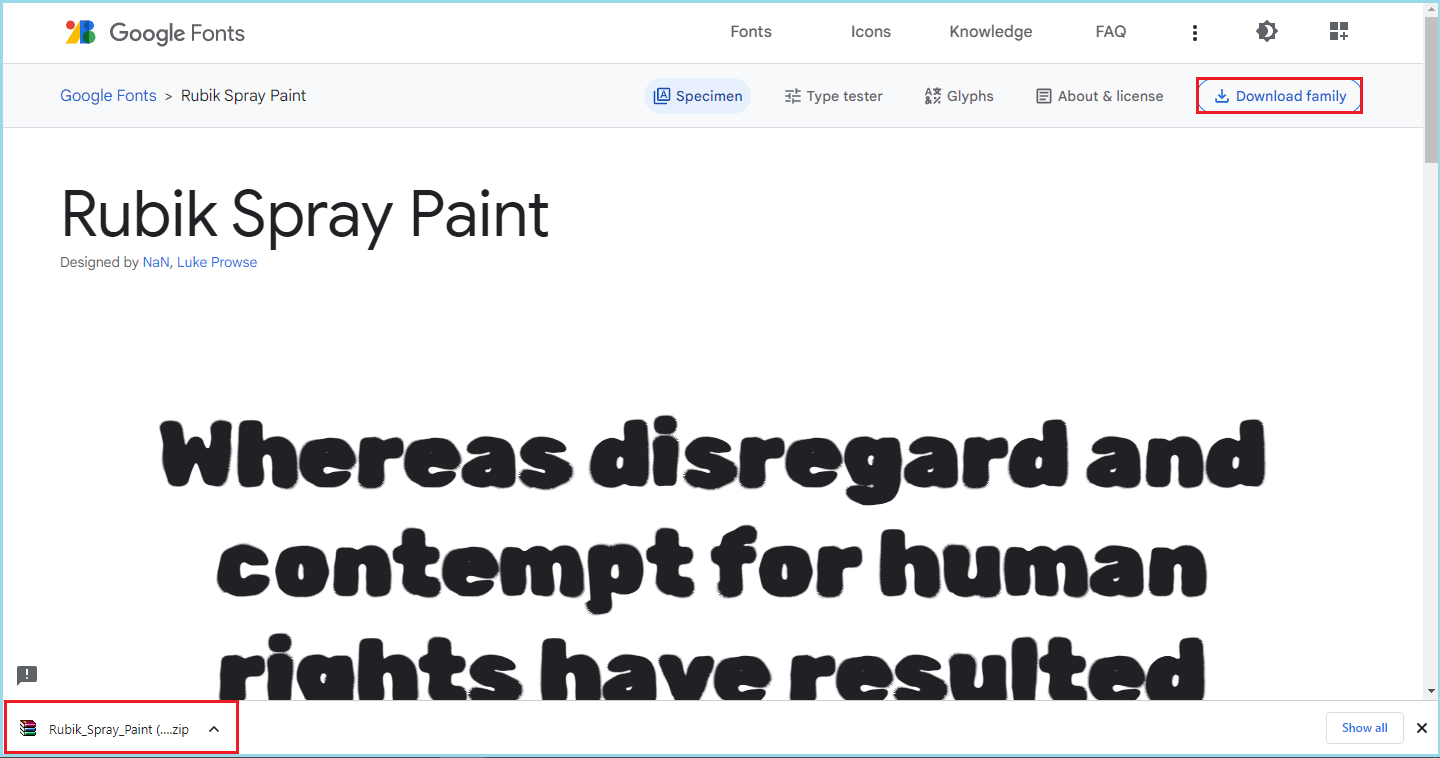
- Go to Google Fonts’ official website.
- Select the font you like from the font list.
- On the new page, click the Download family button on the right-top.
- After that, the font zip file will download to your computer.

Add Fonts to Photoshop on Windows
Step 1. Unzip the font zip file on your computer.
Step 2. Open the font folder and then double-click on either the OTF or TTF font file.
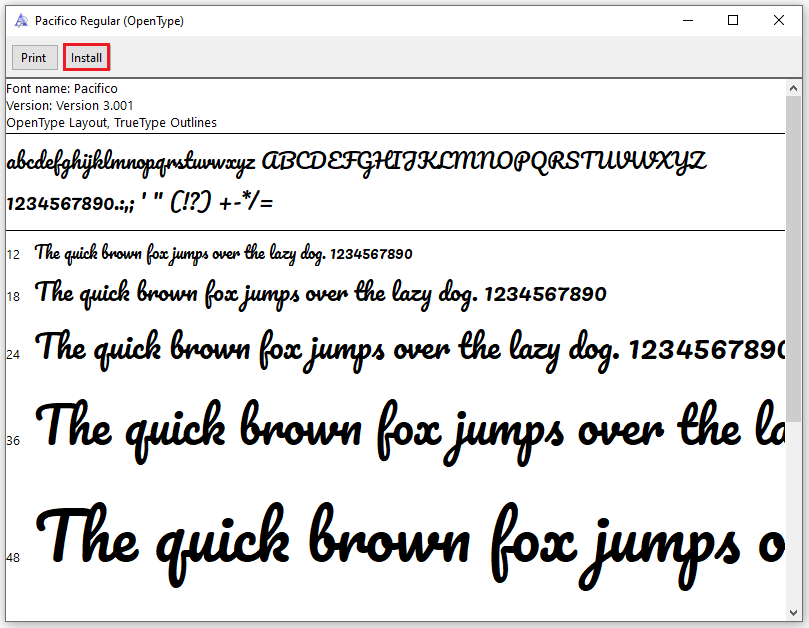
Step 3. After that, you can see a window pop up. Here, you can have a preview of the font, and you can see two small buttons on the top of the window, they are Print and Install.
Step 4. Click the Install button.
Step 5. Once done, the Install button will gray out. At this moment, you just need to exit this window and launch your Photoshop, and then you can see the new font in your font library.

Add Fonts to Photoshop on Mac
- Make sure you have unzipped the font zip file on your computer.
- Open the folder, and double-click on either the OTF or TTF font file.
- After that, a window will pop up with a preview of the font, and you can see a small button at the bottom saying “Install”.
- Click the Install button.
- Launch your Photoshop and then you can see the newly added font shown in the font library.
How to Remove Fonts from Adobe Photoshop?
After reading the contents above, you may already know how to add fonts to Photoshop. However, if you add too many fonts to your font library, you may find it hard to pick a textual style from here. In this situation, you can delete some of them. Here’s the way for the Windows system:
Step 1. Press the Windows and I keys at the same time to open the Settings window.
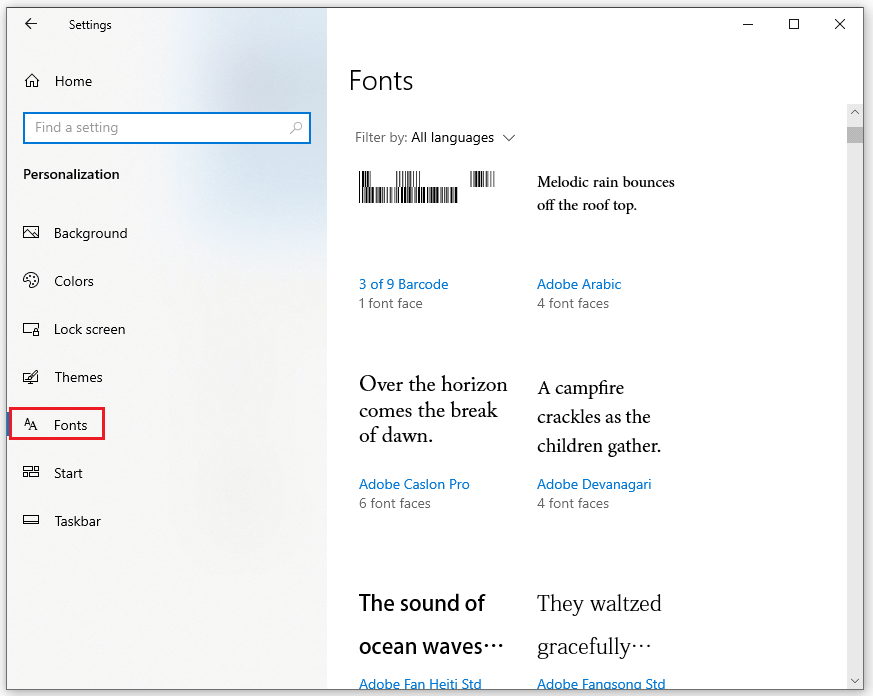
Step 2. Select Personalization in the Settings window.
Step 3. Next, select Fonts from the left panel.

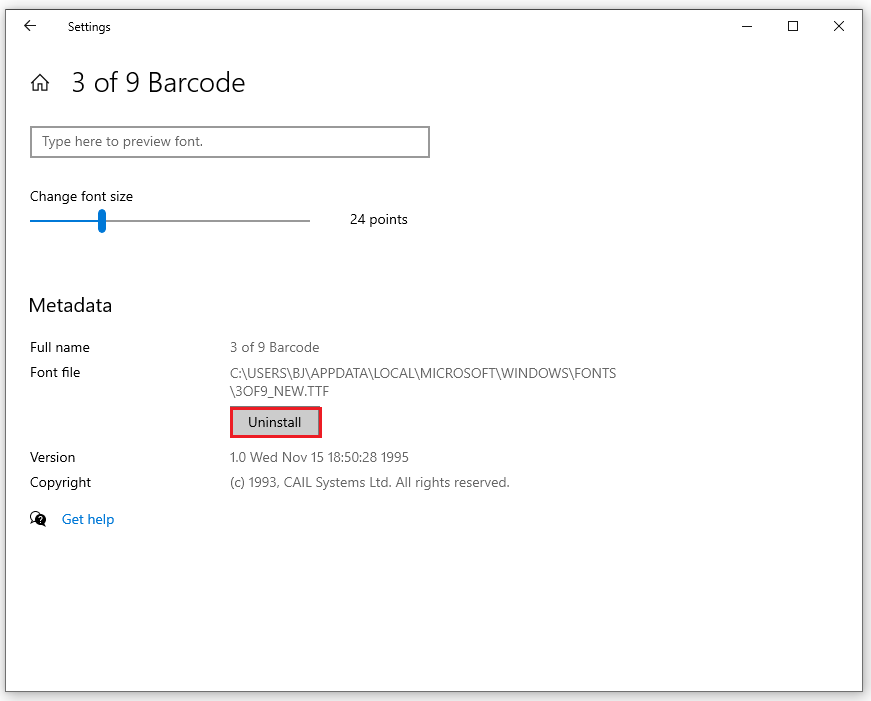
Step 4. Scroll down to select the font you want to delete, and then click Uninstall on the new page.

Bottom Line
This post is a full guide on how to add fonts to Photoshop. No matter whether you want to add fonts to Photoshop on Windows or add fonts to Photoshop on Mac, you can get the steps here.
MiniTool Partition Wizard is an all-in-one partition manager and can be used for data recovery and disk diagnosis. If you are interested in MiniTool Partition Wizard and want to know more about it, you can visit MiniTool Partition Wizard’s official website by clicking the hyperlink.

![How to Make a GIF Your Wallpaper Windows 10? [ A Full Guide]](https://images.minitool.com/partitionwizard.com/images/uploads/2022/09/how-to-make-a-gif-your-wallpaper-thumbnail.jpg)


User Comments :