Elements like outdated graphics driver, wrong video cable connection, improper screen resolution, and other factors can cause the horizontal lines on laptop screen. Well, you can fix the issue with the following methods.
Solution 1: Reconnect the Video Cable
The horizontal lines on laptop screen might be associated with the incorrect video cable connection. So, you should try reconnecting the video cable to the monitor to resolve the horizontal lines on laptop HP issue after it appears.
Solution 2: Change Screen Resolution
Wrong screen resolution is responsible for the vertical or horizontal lines on laptop screen HP issue. Hence, you can try changing screen resolution to troubleshoot the error. Here is the guide for you.
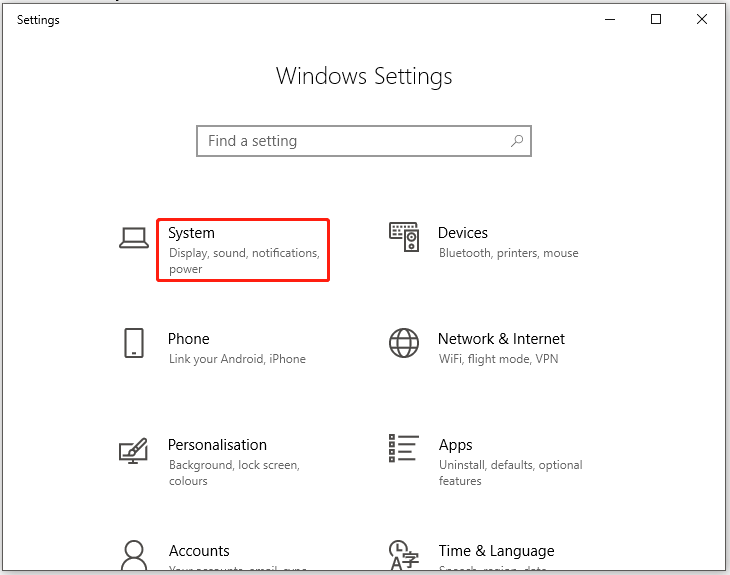
Step 1: Press Windows and I keys to open Settings and then click System to continue.
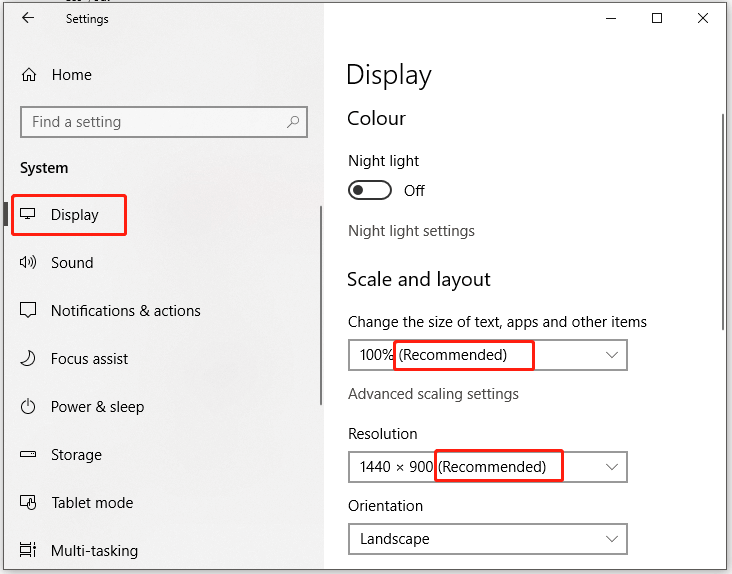
Step 2: In the next window, click Display. Then move to the right side and make sure that the scale and layout and resolution are set to recommended value.
Step 3: Now, check if the horizontal line on laptop screen disappears. If not, try other solutions.
Also read: Windows 10 Display too Big & How to Resize Computer Screen
Solution 3: Update Graphics Driver
Outdated drivers can result in various errors like Graphics Device Driver Error Code 43, Esc key not working, MHW graphics device crashed, and so forth. It is possible that the horizontal lines on laptop screen issue is also triggered by outdated driver.
If so, you should update graphics driver. Here’s how to do that.
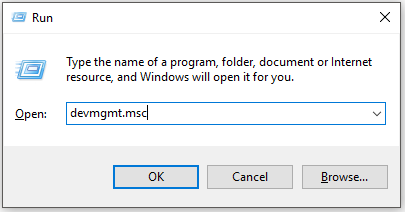
Step 1: Press Windows and R keys to open Run window, and then input devmgmt.msc and hit Enter to open Device Manager. Alternatively, you can open the Device Manager by right-clicking the Windows icon and click on the Device Manager option in the pop-up menu.
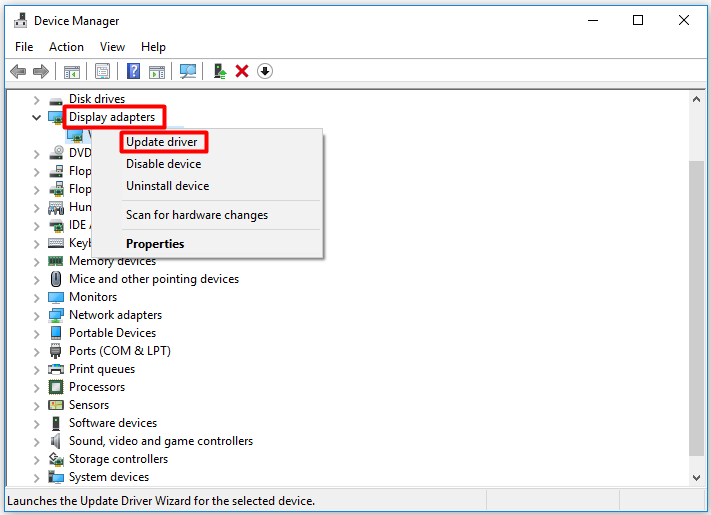
Step 2: Expand the Display adapters by double-clicking it. Then right-click on your graphics driver from the listed drivers and click Update driver.
Step 3: In the next window, choose a driver update method based on your demand. You can update the graphics driver either automatically or manually. Then follow the on-screen instruction to finish the process.
Solution 4: Run Display Quality Troubleshooter
The Windows built-in program – Display Quality Troubleshooter, is also helpful for fixing monitor horizontal lines. You can run it by following the steps below.
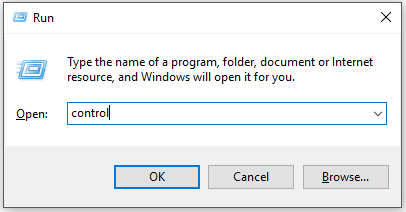
Step 1: After opening the Run window, type control and press the Enter key.
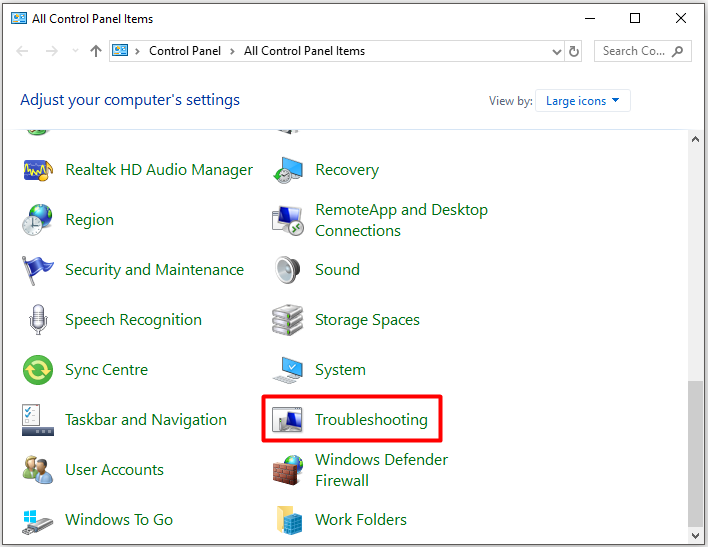
Step 2: In the Control Panel, change the View by as Large icons and then click Troubleshooting.
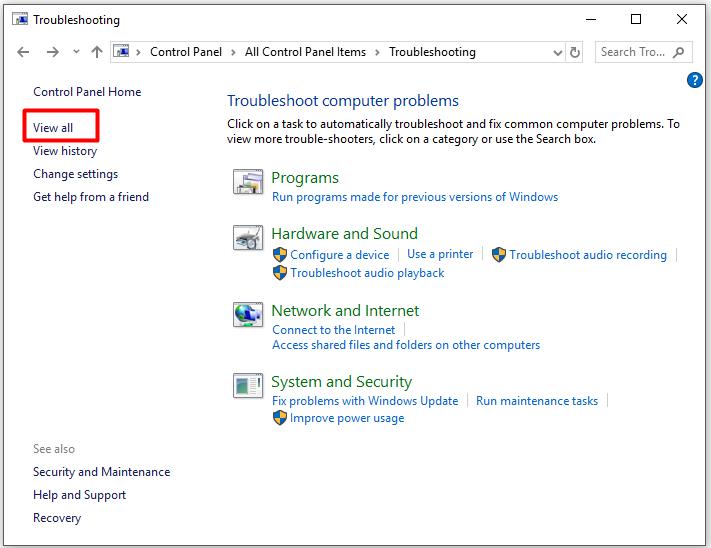
Step 3: Click View all in the left pane.
Step 4: Find the click on Display Quality from the listed items. Then type password for admin or give permissions if asked. After that, follow the elevated instruction to complete the operation.
Solution 5: Perform a Clean Boot
If you still see horizontal line on laptop after trying the above methods, perform a clean boot. If monitor works properly in clean boot, it indicates that something interferes with displays. Then you should remove it manually.
Step 1: Open the Run window, input msconfig and click OK.
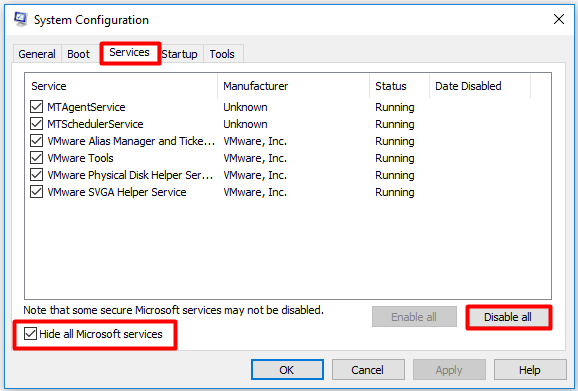
Step 2: In the System Configuration window, move to the Services tab and check the Hide all Microsoft services box. Then click Disable all.
Step 3: Navigate to the Startup tab and then click Open Task Manager.
Step 4: Right-click on the startup programs and click Disable. Repeat this operation to disable all the listed startup programs. Then close Task Manager.
Step 5: Click on OK in the System Configuration window and then reboot your computer. If your computer displays normally, enable the programs that you’ve disabled one by one until you see the horizontal line on laptop screen again. Then remove that program manually.
How to fix horizontal lines on laptop screen? Top 5 solutions have been illustrated to you. Choose one to fix the issue now!

User Comments :