Is disk space running low on Windows Server? If so, you come to the right place. Here, Partition Magic offers you 6 ways to free up space in Windows Server. Besides, you can also extend the partition or upgrade to a larger hard drive to obtain more disk space.
This guide applies to Windows Server 2025, Windows Server 2022, Windows Server 2019, Windows Server 2016, Windows Server 2012 R2, Windows Server 2012, and Windows Server 2008 R2.
Why You Need to Free up Space in Windows Server
Windows Server’s disk space can run out after you use it for one or two years. If you deal with dozens of files every day, the time to run out of space might be shorter. Then you can encounter the low disk space error on Windows Server.
At the same time, the Server will slow down, lag, and even be unresponsive, which is pretty annoying. So, it’s urgent to increase disk space for your Windows Server. Freeing up space is an effective way to reach the purpose, especially if there are lots of space-consuming but useless files or apps on the computer.
Check Disk Space Usage in Windows Server
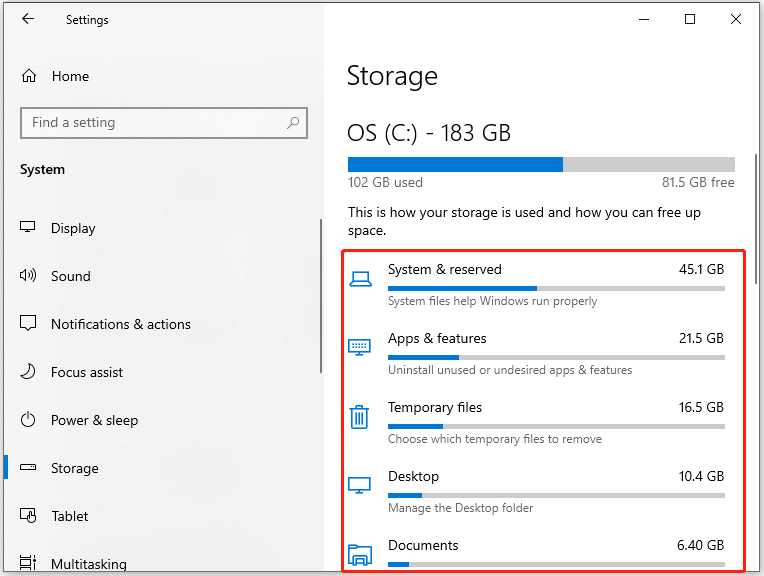
Before you free up space in Windows Server, it is necessary to know what’s taking up space on your hard drive exactly. In Settings, you can check the used & unused space of each partition and the detailed space usage within the partition by sub-categories (like System & reserved, Apps & features, temporary files, documents, etc.).
- Press the Windows and I keys to open Settings.
- Click on System > Storage.
- The detailed space usage of the C drive is displayed on the right panel of Settings. You can scroll down the sidebar to view all the details.
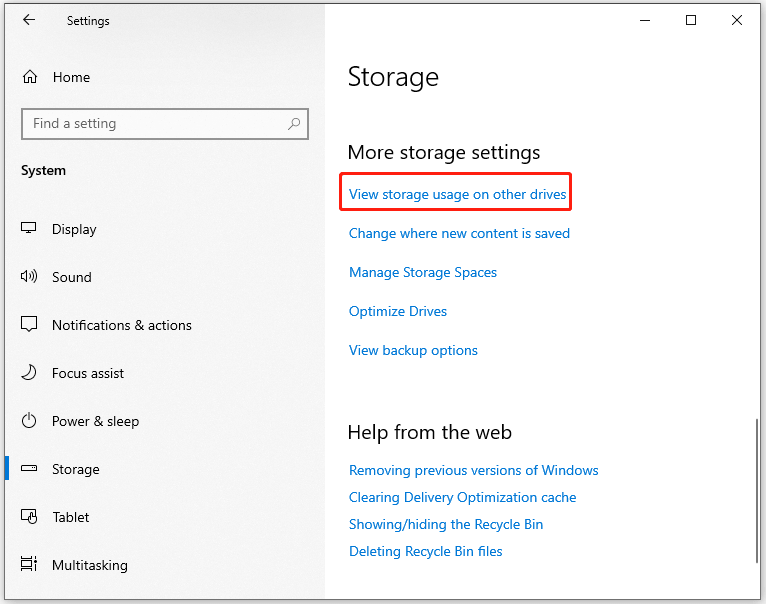
To view disk space usage of other drives on the Windows Server, click View storage usage on other drives under More storage settings section. Alternatively, open File Explorer and click This PC in the left panel.
Now, you can free up drive space in Windows Server based on the above disk space usage with the following methods.
Method 1: Turn on Storage Sense
Turning on Storage Sense is a simple way to free up disk space on Windows Servers. What is Storage Sense? It’s an embedded feature in Windows Server 2019 and later versions that can automatically clean up servers in Windows by deleting unimportant files.
The following steps show you how to turn on Storage Sense and configure it to your preference.
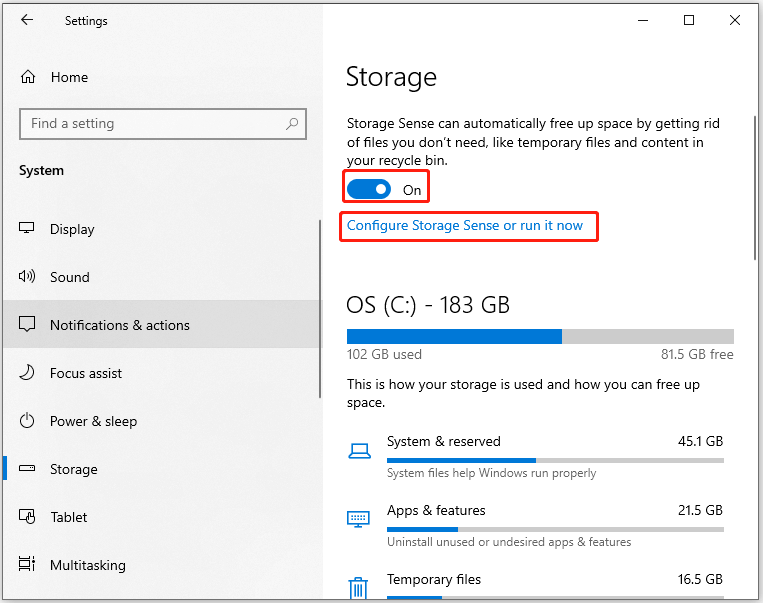
Step 1: Open Settings, and go to System > Storage.
Step 2: Toggle on the Storage Sense option.
Step 3: Click on Configure Storage Sense or run it now.
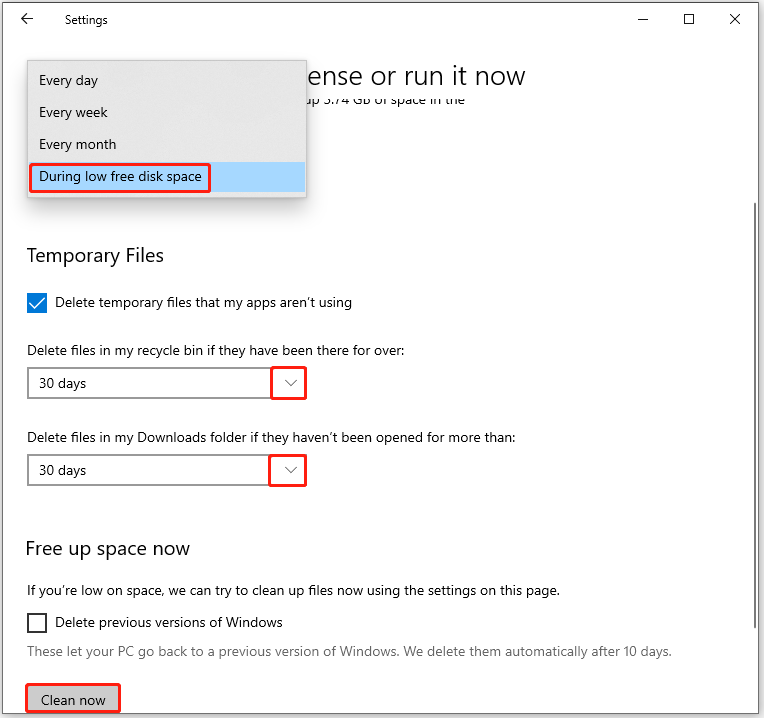
Step 4: Configure settings based on your demands and click the Clean now button.
- Decide how often you want to run Storage Sense: Every day, Every week, Every month, or During low free disk space.
- Set how long to keep files in the Recycle Bin before deletion: 1 day, 14 days, 30 days, or 60 days.
- Determine how long to keep files in the Downloads folder: 1 day, 14 days, 30 days, or 60 days.
Method 2: Run Disk Cleanup
Disk Cleanup is a built-in utility in Windows that helps you delete unnecessary files, temporary Internet files, and other items that occupy disk space on the Windows Server. Here, you can use it to free up drive space in Windows Server.
Step 1: Type disk cleanup in the search box and then click Open under the displayed Disk Cleanup.
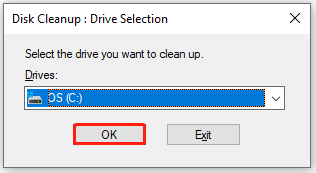
Step 2: In the pop-up window, select the drive you want to clean up and click OK. The C drive is selected by default.
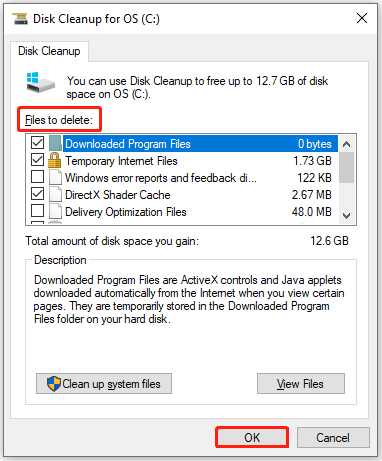
Step 3: In the next window, choose files to delete and click OK. You can tick the box in front of the files that occupy much space on the drive.
If you receive the following errors while using Disk Cleanup, refer to the given articles to troubleshoot them.
Method 3: Empty Recycle Bin
The Recycle Bin holds all the deleted files or directories on the computer, which can consume disk space on the Windows Server. So, emptying the Recycle Bin is an available way to free up space in Windows Server. To do that, follow these steps.
Step 1: Double-click on the Recycle Bin icon on the desktop to open it.
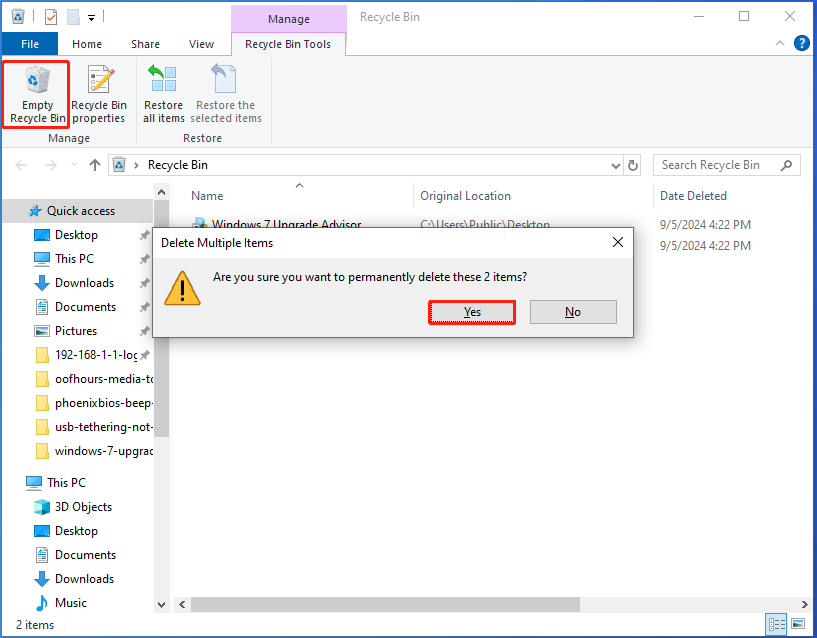
Step 2: Click on the Empty Recycle Bin option and click Yes in the pop-up warning window. Alternatively, press Ctrl + A to select all the files and directories in the Recycle Bin, right-click on any of the items, and choose Delete to permanently delete them.
Method 4: Run MiniTool Partition
In addition to the above utilities, MiniTool Partition Wizard can also help free up disk space on Windows Servers. As a disk space analyzer, it can find what’s taking up your hard drive space and delete useless files/folders to release disk space for you.
It tells you the exact amount of disk space used by each file/folder and the percentage of disk usage occupied among the total drive. You can view the disk space usage by switching between Tree View, File View, and Folder View.
Besides, you can view the disk space usage of a certain file by typing the file name or file path under File View and clicking Apply. Then you can find large files quickly and then delete them to clean up the drive. Given that fact, MiniTool Partition Wizard can be used as a PC cleaner. It helps you clean up your computer effectively.
Moreover, MiniTool Partition Wizard allows you to partition hard drives, format SSDs, convert MBR to GPT, migrate Windows 10, format FAT32, etc. Now, download this software on your computer and then use it to free up space in Windows Server with the steps below.
MiniTool Partition Wizard DemoClick to Download100%Clean & Safe
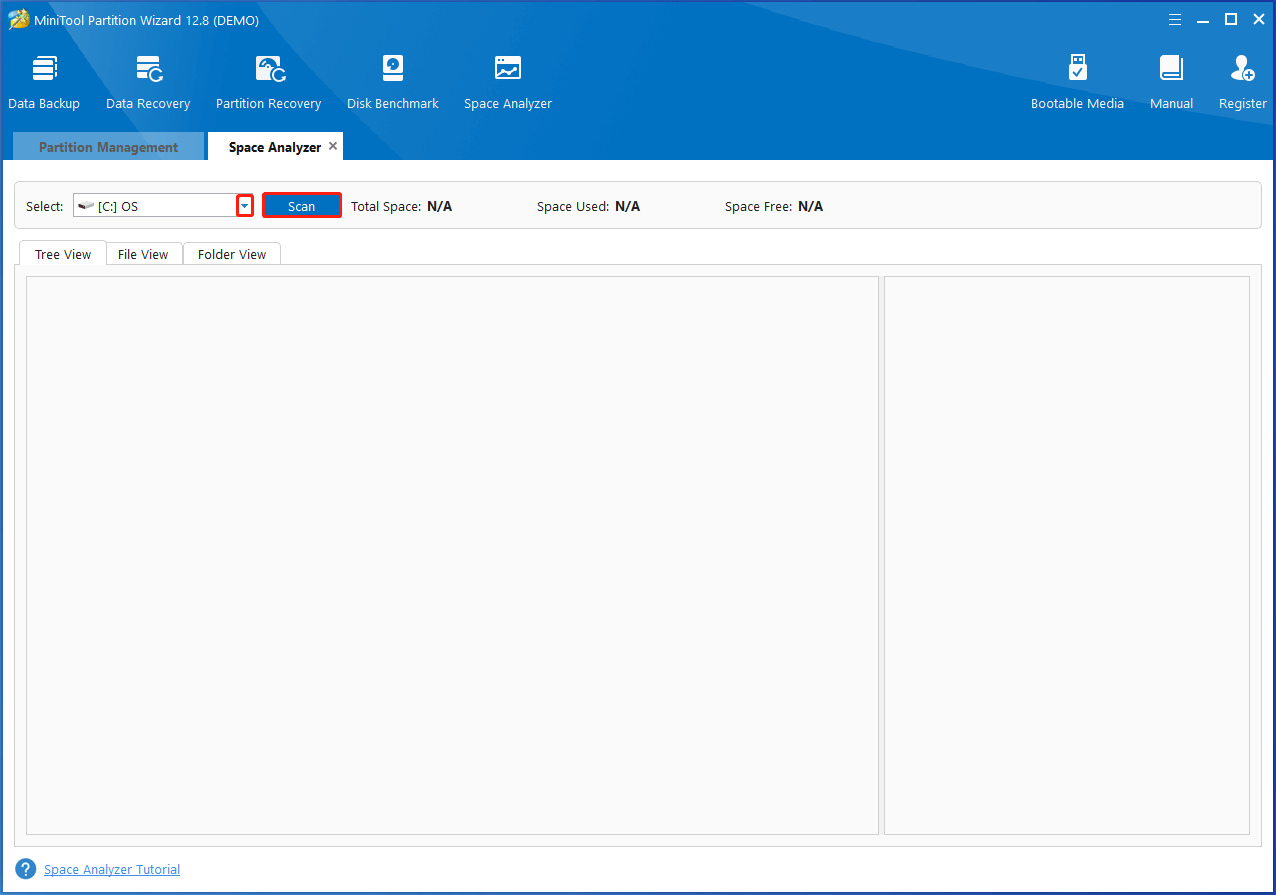
Step 1: Run MiniTool Partition Wizard and then click Space Analyzer in its main interface.
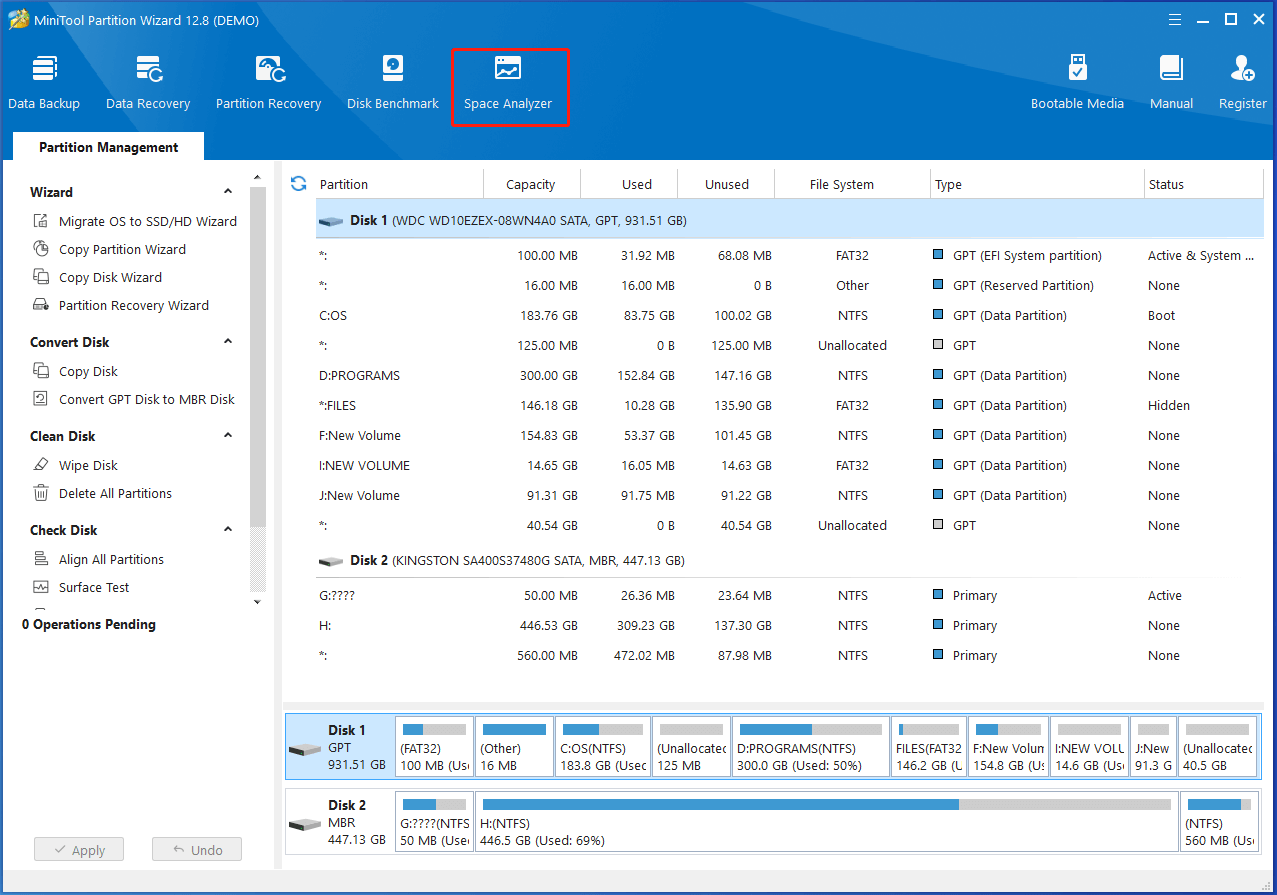
Step 2: From the drop-down menu, select the drive you want to check the disk space usage. Then click the Scan button.
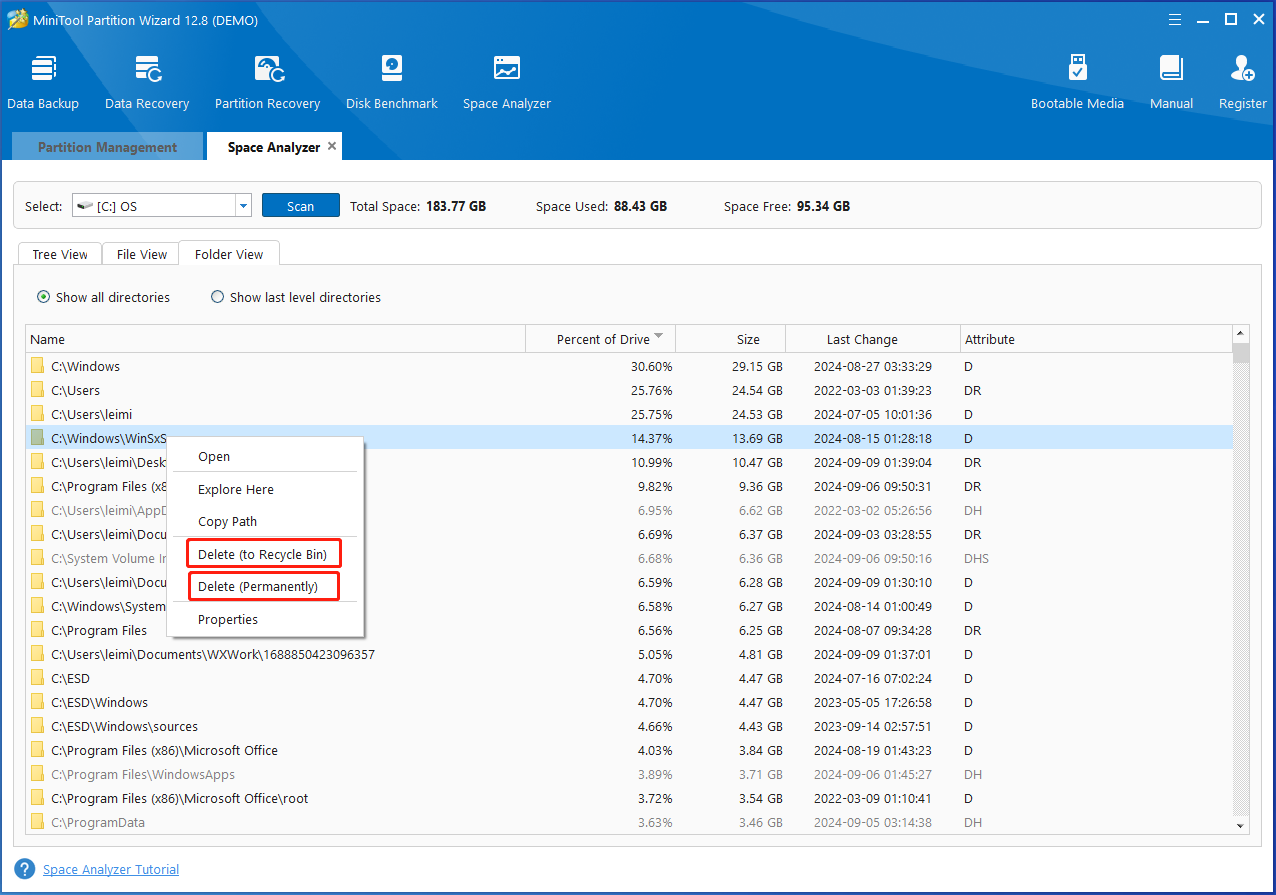
Step 3: After the scan process ends, the result will be displayed. Right-click on the large but useless files/folders and choose Delete (to Recycle Bin) or Delete (permanently).
Method 5: Compress System Files and Folders
If you don’t want to delete data, compressing files and folders is a good way to free up space in Windows Server. You can use built-in compression tools in Windows Server to compress big files and folders.
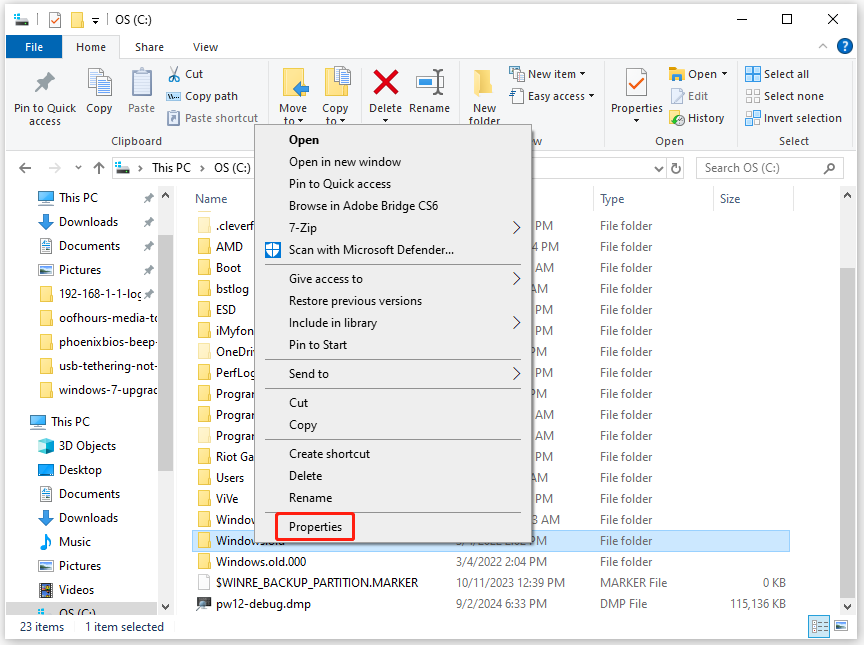
Step 1: Open File Explorer and locate the file or folder that you want to compress.
Step 2: Right-click on the target file or folder and click Properties.
Step 3: In the Properties window, click the Advanced button to continue.
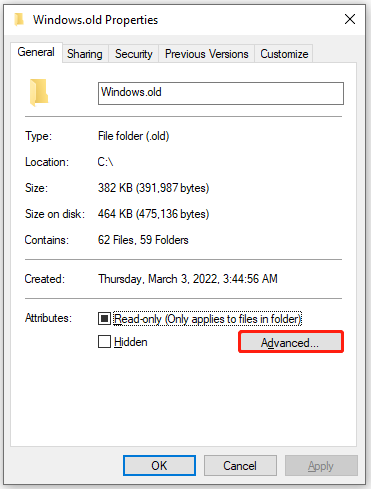
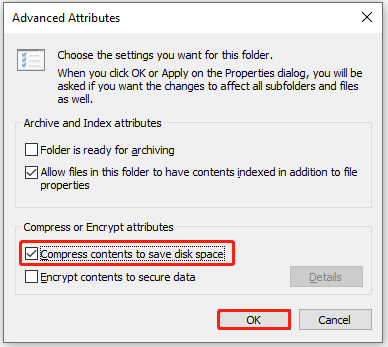
Step 4: Check the box in front of the Compress contents to save disk space option and click the OK button to save changes.
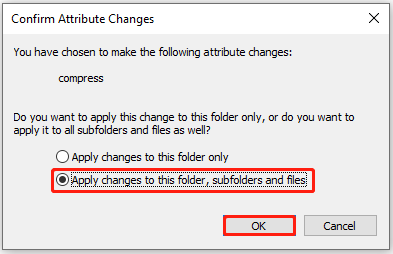
Step 5: In the Properties window, click Apply to execute the operation. Decide whether to choose the “Apply changes to this folder only” option or “Apply changes to this folder, subfolders and files” option in the confirmation window Then click OK to start the compression process.
Repeat the above process on other large files or folders in Windows Server to free up space.
![How to Free up Space on Windows 10 Using Compactor? [Solved]](https://images.minitool.com/partitionwizard.com/images/uploads/2023/03/free-up-space-using-compactor-thumbnail.jpg)
Method 6: Reset Virtual Memory Page File Size
The page file usually is set for virtual RAM, and it can occupy certain disk space in the C drive. When it gets too big, it can lead to high disk usage issues on Windows Server and Windows 11/10 systems. In this case, resetting the virtual memory page file size is a great way to free up space in Windows Server.
Here’s a full tutorial for you.
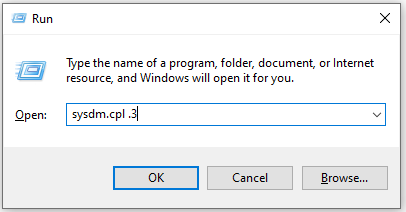
Step 1: Hold the Windows and R keys simultaneously to open the Run dialog window.
Step 2: Type sysdm.cpl .3 and hit Enter in the Run window.
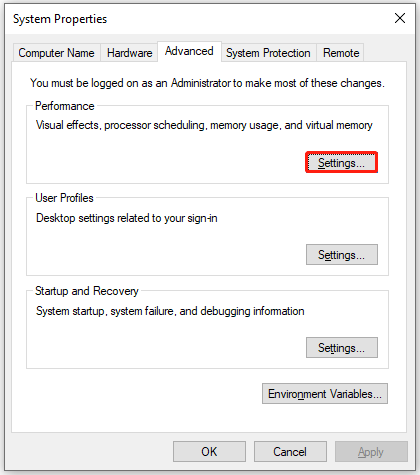
Step 3: In the System Properties window, click on the Advanced tab and click the Settings button under Performance.
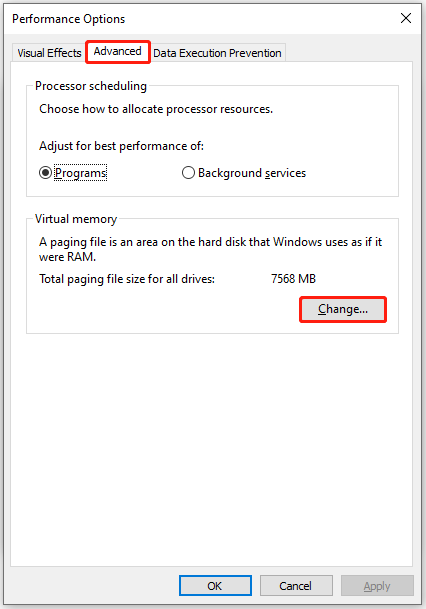
Step 4: Navigate to the Performance Options tab and click Change under the Virtual memory section.
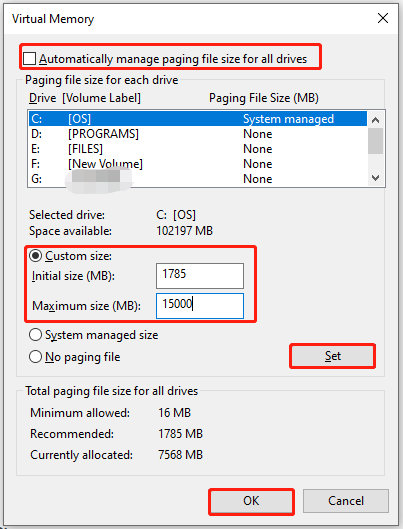
Step 5: In the Virtual Memory window, configure the settings and save changes.
- Uncheck the “Automatically manage paging file size for all drives” option.
- Click the drive that you want to change its page file size.
- Tick the Custom size option and type the exact value in the box behind the Initial size and Maximum size field. You can set the recommended paging file size as initial size.
- Click Set > OK.
Other Ways to Increase Disk Space in Windows Server
In addition to freeing up space, you can also extend the partition or upgrade to a larger hard drive to obtain more disk space on your Windows Server. To do that, simply use MiniTool Partition Wizard. Its Extend Partition feature allows you to take free space from other partitions or unallocated space on the same disk to enlarge the partition.
MiniTool Partition Wizard DemoClick to Download100%Clean & Safe
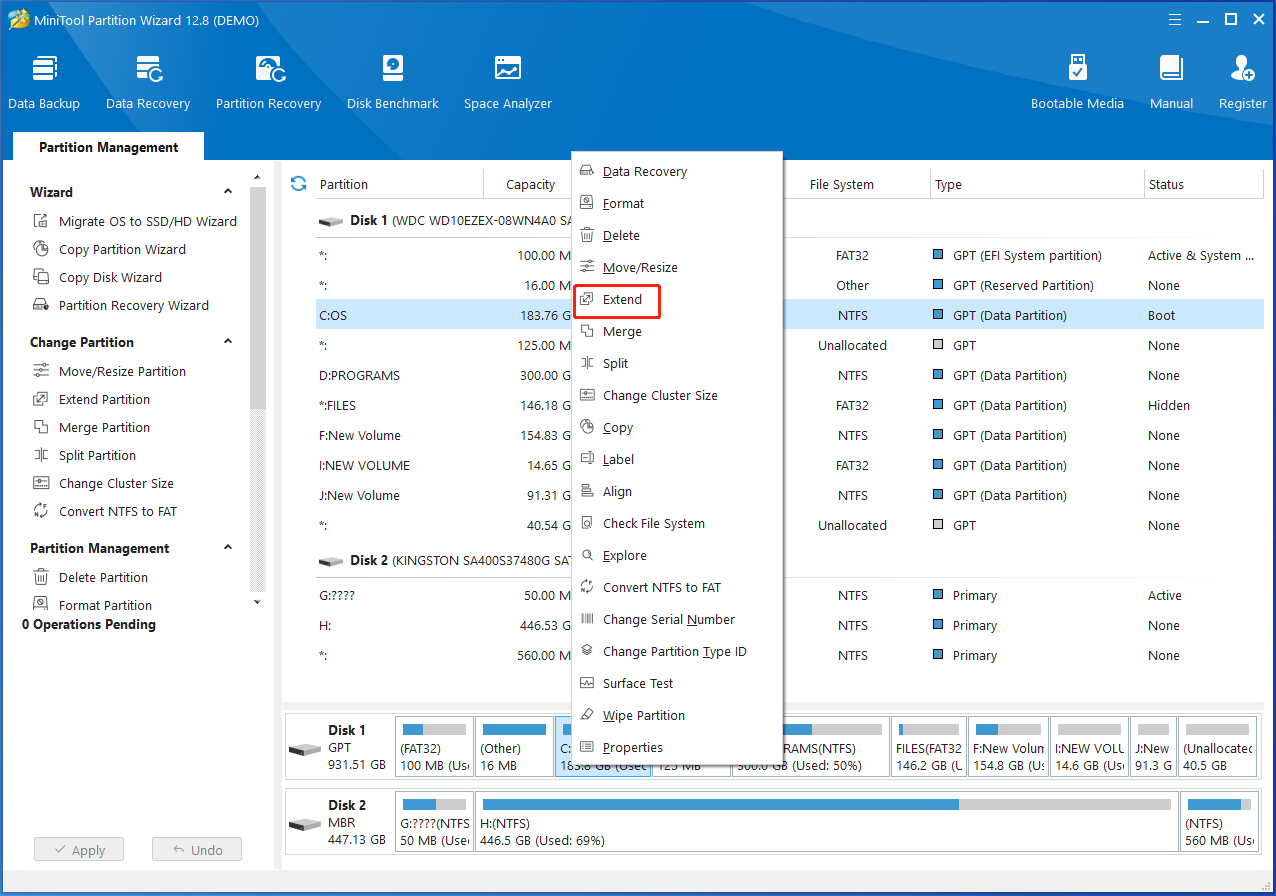
Step 1: In the main interface of MiniTool Partition Wizard, right-click on the target partition and choose Extend.
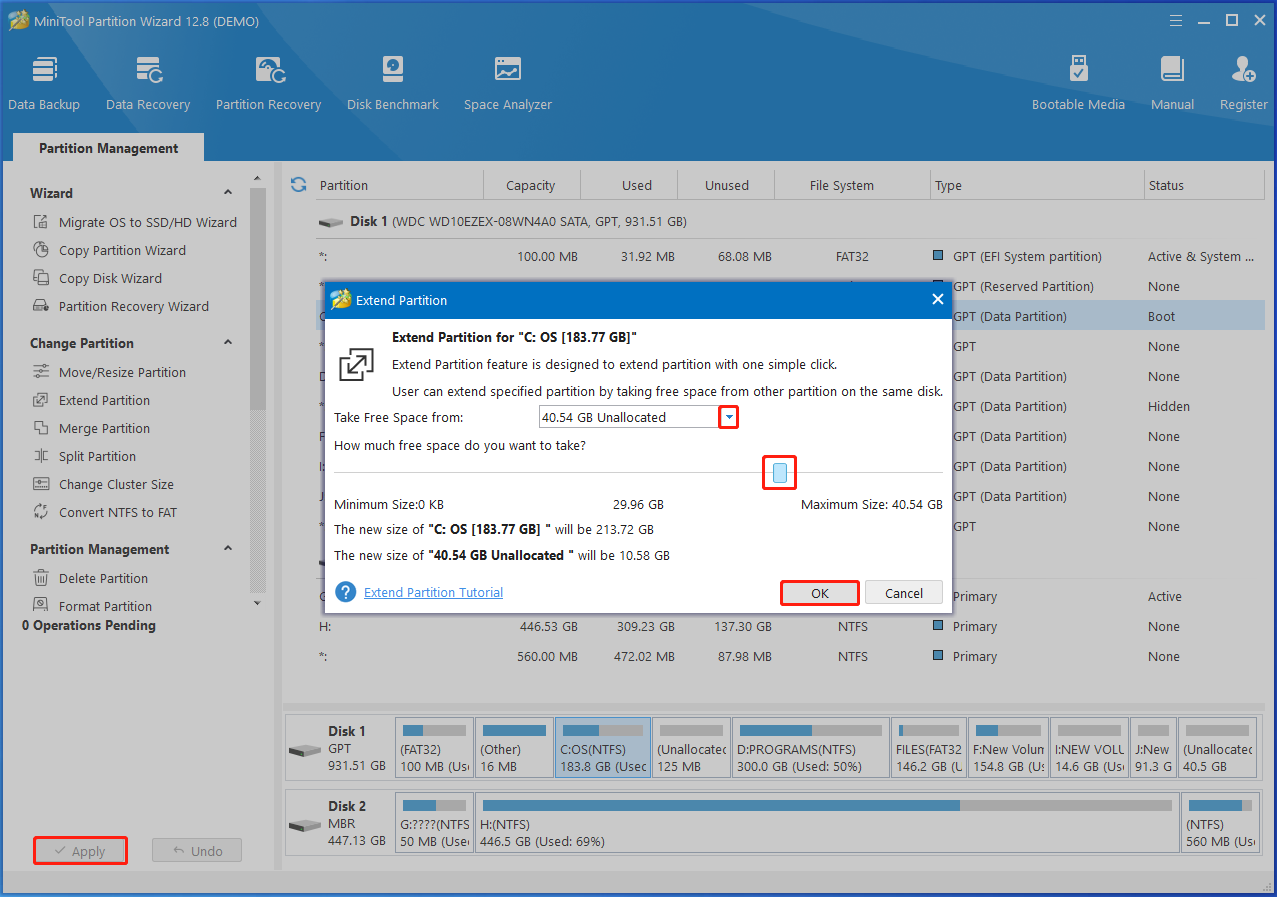
Step 2: In the Extend Partition window, choose the partition or unallocated space that you want to take space from and move the block to decide how much space you plan to take. Then click OK to save changes.
Step 3: Finally, click Apply to carry out the operation.
To upgrade the hard drive without data loss, you should clone the hard drive using MiniTool Partition Wizard before replacing the current disk.
MiniTool Partition Wizard DemoClick to Download100%Clean & Safe
Make a Choice
Top 6 methods for freeing up space in Windows Server have been shown to you. Now, it’s your turn to make a choice. Pick one method from the post to free up disk space on Windows Servers. If you encounter any issues while using MiniTool Partition Wizard, contact us by sending an email via [email protected].
About The Author

Position: Columnist
Having writing articles about computer tech for a long time, I am rather experienced especially on the aspect of computer optimization, PC enhancement, as well as tech terms explanation. The habit of looking through tech forums makes me a great computer issues collector. And then, many articles related to these issues are released, which benefit plenty of users. Professional, effective, and innovative are always the pursuit of an editing worker.
User Comments :