The Flashforge Dreamer 3D printer allows you to print over USB, print from an SD card, or print over Wi-Fi. However, when you choose to print using an SD card, you need to choose the correct file system format for your SD card. Fortunately, this article from Partition Magic provides you with a complete guide to the Flashforge Dreamer SD card format.
There are more and more 3D printers on the market, so what is 3D printer technology? 3D printer technology is the technology that transforms three-dimensional models into physical objects. The most common 3D printing technology is called FFF (Fused Filament Fabrication), that is, fused filament manufacturing technology.
Below, I will introduce you to a 3D printer in detail: Flashforge Dreamer.
Overview of Flashforge Dreamer
Flashforge Dreamer is a popular desktop 3D printer that is suitable for home, school, and small business use. Here are some of the main features of Flashforge Dreamer:
- Dual extrusion function: Flashforge Dreamer is equipped with dual extruders, which can print two objects of different colors or materials at the same time.
- Large-size printing platform: Flashforge Dreamer provides a larger printing platform, usually 230mm x 150mm x 140mm.
- Touch screen operation: The device is equipped with a touch screen, which makes your operation more intuitive and convenient.
- Lower noise: Compared with other 3D printers, the printing process of Flashforge Dreamer is relatively quiet.
- Wi-Fi and USB connection: Dreamer provides Wi-Fi and USB interface support, among which Dreamer only supports USB 2.0 ports.
How to Use Flashforge Dreamer 3D Printers
How to print from an SD card using Flashforge Dreamer 3D printers? Here are the steps:
- Press the Print button, and a printing options screen will pop up.
- Make sure that the Material Left is selected as ABS. Advanced settings can be configured under the More Options icon.
- Click OK and save the file to the SD card.
- FlashPrint will start slicing the 3D model.
- Once the slicing is complete, you will need to remove the SD card from your computer and insert it into the SD card slot on the Dreamer.
- Turn on the Flashforge Dreamer and press Print, then press the middle SD Card icon.
- Select the file you want to print and press Yes.
Flashforge Dreamer SD Card Format
Flashforge Dreamer 3D printers support USB connection printing, SD card printing, and Wi-Fi printing. You need to use a 2.0 data cable to connect the USB to the printer, and if the SD card you use is a microSD card, you need to use an SD card adapter.
The file system format supported by Flashforge Dreamer 3D printers is FAT32, so you need to format your SD card to FAT32 before using it. How to format it?
Below, I will introduce two ways to format your SD card, one is to use Windows File Explorer, and the other is a third-party software–MiniTool Partition Wizard.
Use Windows File Explorer
This method can be used if the capacity of your SD card is less than 32GB. Because Windows File Explorer cannot format FAT32 larger than 32GB. The reason why it cannot be formatted is that Microsoft manually sets the FAT32 file system to have a size limit of 32 GB.
Step 1: Connect the SD card to your PC.
Step 2: Type File Explorer in the Search box and click it to open.
Step 3: Click This PC on the left side.
Step 4: On the right panel, right-click the SD card and then choose the Format option.
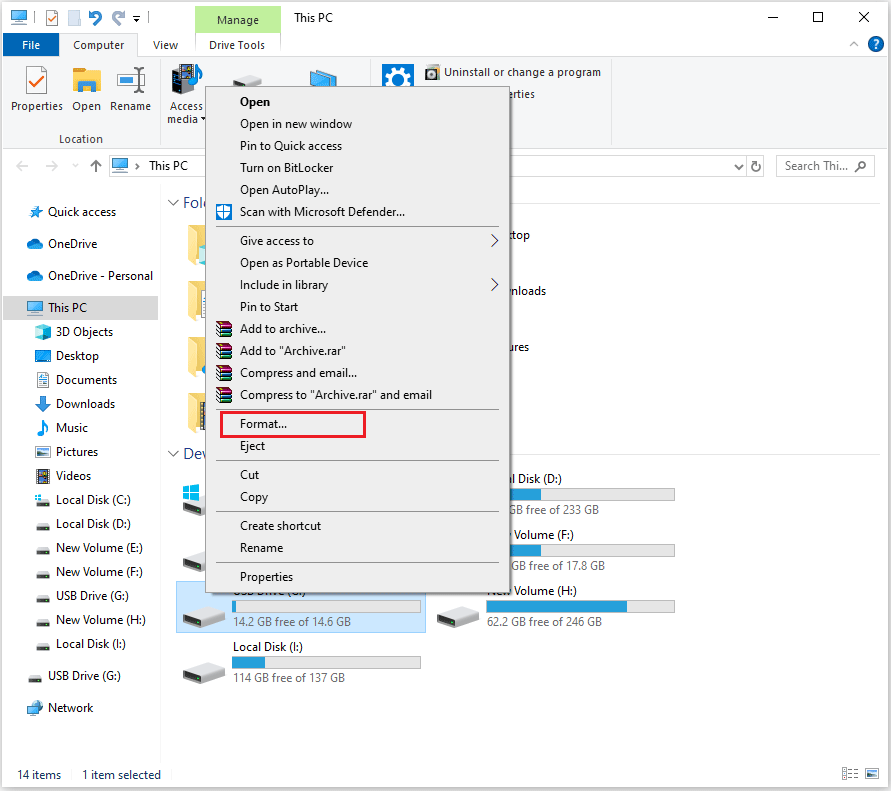
Step 5: In the new pop-up window, select the FAT32 file system. Keep other parameters as the default value and then click Start.
Use MiniTool Partition Wizard
MiniTool Partition Wizard is a professional disk management tool. If your SD card capacity is more than 32GB, then you can use this method to format drives larger than 32 GB to FAT32 for free. Of course, SD cards smaller than 32GB can also be formatted using this method.
MiniTool Partition Wizard FreeClick to Download100%Clean & Safe
What’s more, this software can help you extend/copy/delete/resize partitions, change cluster size, test hard drive speed, clone a hard drive, migrate OS without data loss, recover data from hard drive, rebuild MBR, convert MBR to GPT, etc.
How to format Flashforge Dreamer SD card via MiniTool Partition Wizard? Here is the guide:
Step 1: Connect the SD card to your computer. Then run MiniTool Partition Wizard to enter its main interface.
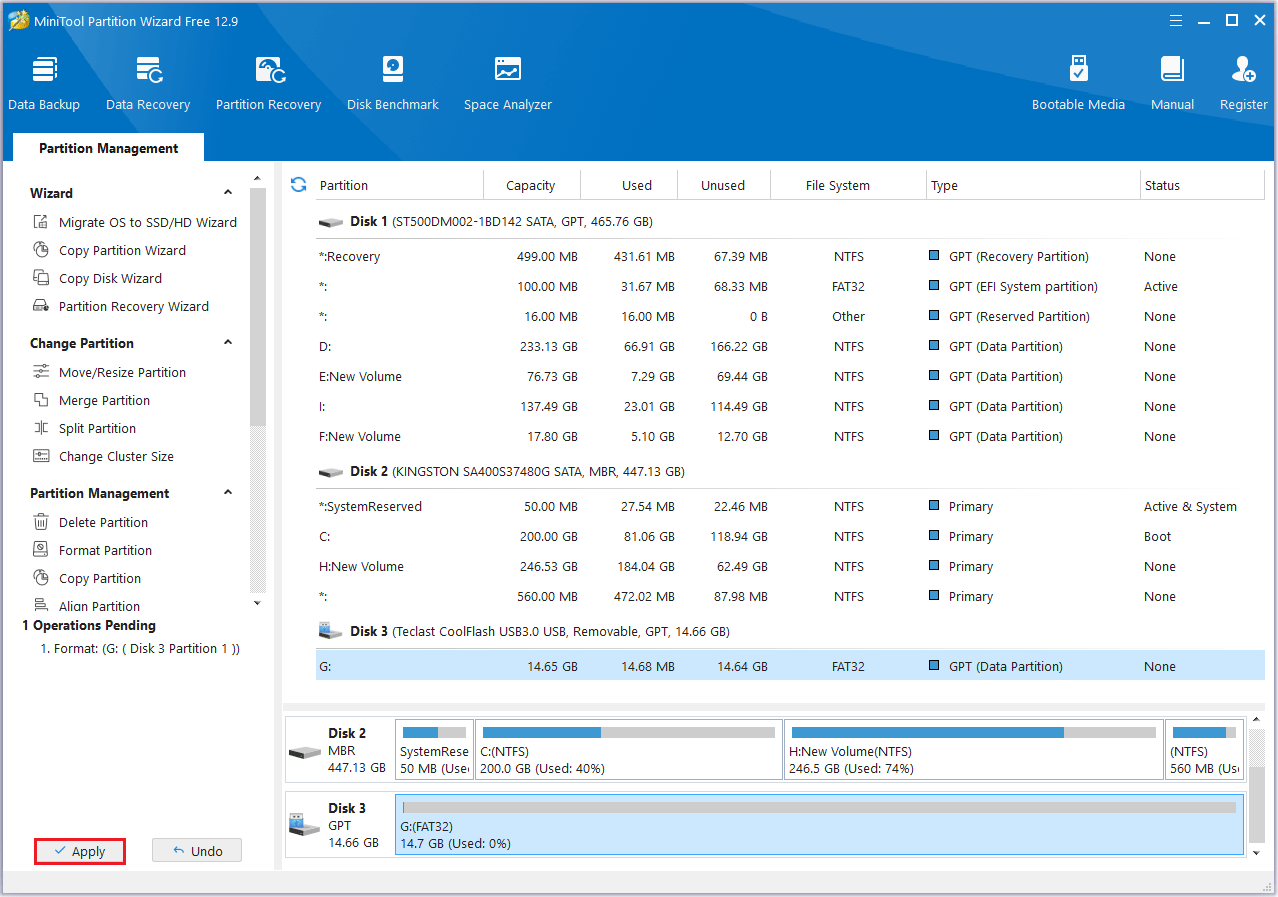
Step 2: Right-click the partition on your SD card. Then, choose the Format option from the context menu.

Step 3: In the new pop-up window, choose FAT32 File System. Keep other parameters to the default option and then click OK. (You can customize the partition label.)
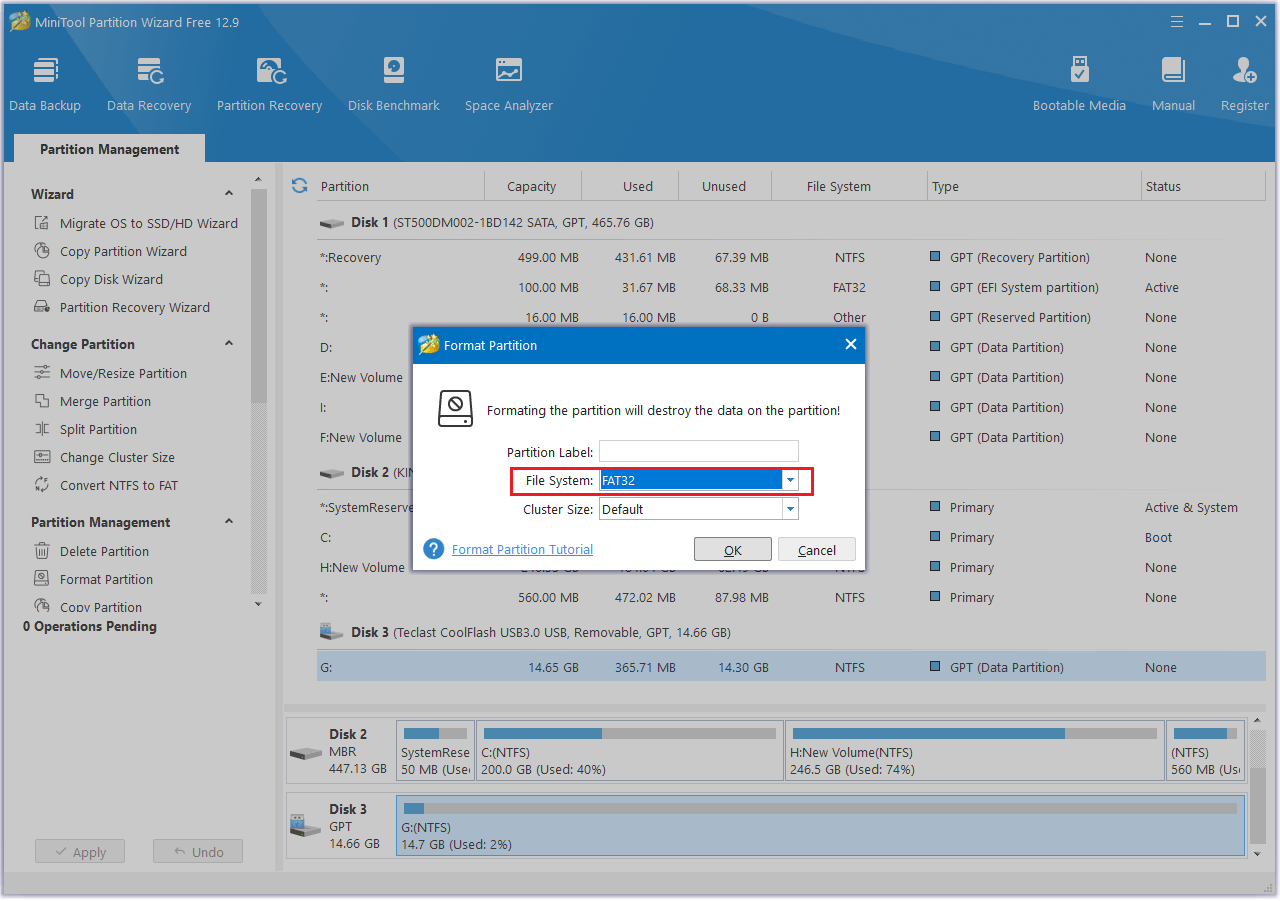
Step 4: Click the Apply button to execute the pending actions.
Fix Flashforge Dreamer SD Card Not Found Issue
Sometimes, you may encounter the Flashforge Dreamer SD card not found problem. I searched online for some information, and it may be caused by the following reasons:
- SD card is not inserted correctly: If the SD card is not fully inserted into the printer’s SD card slot, the printer may not recognize it.
- Incompatible SD card format: Flashforge Dreamer usually requires the SD card format to be FAT32. If the SD card uses another format (such as NTFS), the printer may not recognize it.
- Damaged SD card: If your SD card is damaged, the printer will not be able to recognize the contents of the card.
- Poor contact of SD card: When the SD card and the card slot have poor contact, the printer may not be able to read the data in the card.
- SD card memory is full: If the SD card memory is full, it may also cause the printer to be unable to read.
How to format Flashforge Dreamer SD card? This post provides you with 2 ways.Click to Tweet
Bottom Line
How to use Flashforge Dreamer 3D printers? How to do the Flashforge Dreamer SD card format? This article introduces you to a perfect guide.
If you have any questions or suggestions while using the MiniTool Partition Wizard, you can contact us via [email protected] to get a quick reply.
About The Author

Position: Columnist
Cecilia is a new member of MiniTool. She works as an English editor on the MiniTool team. She likes to learn articles about computers and is passionate about partition management and Windows operating systems. She is committed to allowing readers to use simple, efficient, and fast methods to solve the computer problems they encounter. To provide more professional solutions, she will continue to learn and master computer knowledge.
User Comments :