Sometimes, you might notice that the Windows Update Cleanup files occupy 3.99TB when you use Disk Cleanup after installing a certain Windows update. Why does this happen? How could you fix the problem and remove 3.99TB Windows Update Cleanup files? Don’t worry. MiniTool Partition Wizard provides some possible solutions in this article.
About Windows Update Cleanup 3.99TB Bug
The Disk Cleanup (cleanmgr.exe) is a built-in utility in Windows that helps to free up disk space without affecting your personal files and system functionality. When you use this tool to search for files on the system drive, you might see the Windows Update Cleanup item.
According to the official description, Windows Update Cleanup deletes or compresses older versions of Windows updates that are no longer needed and taking up space. Commonly, the contents of this folder will be removed automatically after 30 days from when the new update was installed.
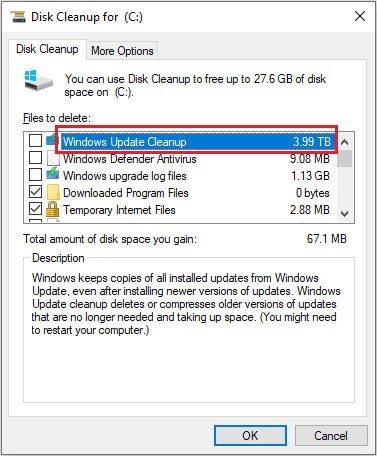
However, some users found that the size of Windows Update Cleanup is 3.99TB in Disk Cleanup, just as the following screenshot shows. This Disk Cleanup bug commonly appears after installing the Windows 10 KB3194798 update.

Windows tends to keep multiple instances of a file in different places, but the file only occupies disk space in a single location while the rest of instances take up no space (they are existed on the disk virtually). The Disk Cleanup tool is not configured to exclude such situations, and thus it calculates these files inaccurately, which leads to this bug.
This Disk Cleanup bug won’t the normal functioning of your computer, and you won’t get much disk space after cleaning up Windows Update Cleanup 3.99TB. You can wait for the utility to delete the folder automatically to solve the problem. But if you are bothered by the large size of the folder, you can try the following methods to remove the folder and force the tool to calculate accurately.
Related article: Solved: Windows Update Cleanup Stuck Happens on Disk Cleanup
Method 1: Delete the Folder with Administrative Privileges
At first, you can open the Disk Cleanup tool as administrator to delete the folder and fix the Windows Update Cleanup 3.99TB bug. You just need to:
Step 1: Press Windows + S to bring up the Search bar.
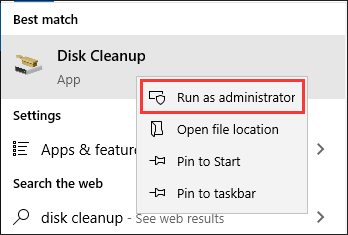
Step 2: Input disk cleanup in the box, right-click the best match result and choose Run as administrator to open the utility with administrative privileges.

Step 3: Select your system drive (commonly C:) and click OK button. Then, check Windows Update Cleanup and click OK button to clean the files.
After that, restart your computer and open the utility again. Now, the size of the Windows Update Cleanup should be normal.
Method 2: Update Your Windows
As mentioned before, this Disk Cleanup bug 3.99TB used by Windows Update Cleanup is caused by a specific Windows update. So, the new updates released by Microsoft may contain certain bug fixes for the issue. To fix the problem, you can try checking for and installing the latest Windows updates.
Here’s a simple guide to update Windows:
Step 1: Right-click the Start button and choose Settings from the menu.
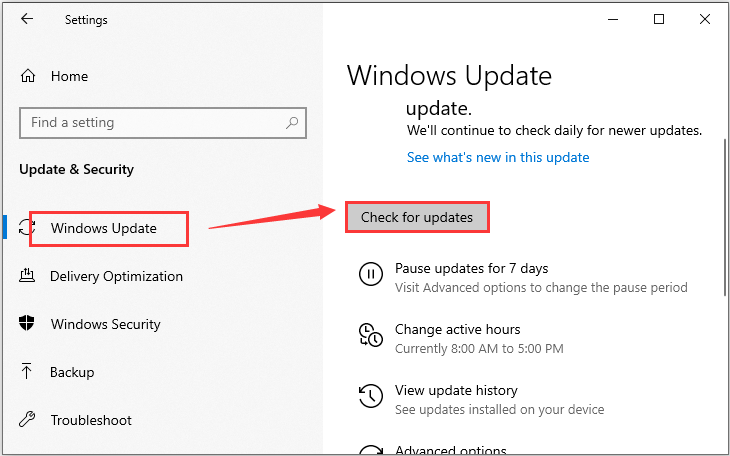
Step 2: Choose Update & Security category and click Windows Update section.
Step 3: In the right pane, click the Check for updates button.

Method 3: Use DISM Command
Besides, you can also manually delete the Windows Update Cleanup folder using the DISM tool. This is also an easy operation, and you can follow the steps below.
Step 1: Press Windows + R to invoke Run window.
Step 2: Input cmd in the empty box and press Ctrl + Shift + Enter to open Command Prompt as administrator.
Step 3: Type the following command line and press Enter key to perform a component cleanup for your computer.
dism /online /Cleanup-Image /StartComponentCleanup
Wait patiently until the process is completed, and then restart your computer. Now, the Windows Update Cleanup 3.99TB bug should be resolved.
Related article: [Solved 2020] DISM Failed On Windows 10/8/7 Computer

User Comments :