What Causes the Exception on Invalid Stack Error in Windows 11?
Generally, the EXCEPTION_ON_INVALID_STACK stop code occurs when you are trying to install Windows 11 on your computer or after you upgrade to Windows 11. Once the error comes out, you cannot boot your computer normally. This error can be caused mainly by the following multiple factors:
- Temporary bugs and glitches
- Corrupted system files
- Corrupted Boot Configuration Data (BCD)
- Bad sectors on the hard drive
- …
It’s so annoying that you are unable to use your PC properly with the “exception on invalid stack Windows 11” error. Let’s work out this error now!
How to Fix the Exception on Invalid Stack Error in Windows 11?
To help you solve the EXCEPTION_ON_INVALID_STACK stop code in Windows 11, we summarize the following several effective troubleshooting methods.
Method 1: Restart Your PC
After running into the “exception on invalid stack Windows 11” error, you ought to try restarting your PC first. This way can clear the memory cache and free up RAM in your system. If the error is still here after a restart, you need to try more advanced solutions.
Method 2: Check Your Computer Compatibility for Windows 11
Usually, if you install Windows 11 on a PC that doesn’t meet the minimum system requirements of Windows 11, chances are that the “exception on invalid stack Windows 11” issue appears. Therefore, it’s essential to check if your PC is compatible with Windows 11.
If your computer fulfills the minimum system requirements to run Windows 11, you can go on with other ways. If not, we recommend you get the system back to Windows 10 to bypass the error.
Method 3: Perform an SFC Scan
As we can know from above, the Windows stop code exception on invalid stack may appear if there are some corrupted system files on your PC. In this case, it’s recommended that you run the SFC (System File Checker) utility to fix this error. To do this, you need to enter Windows RE (Recovery Environment) using Windows installation media. In addition, you can also enter Win-RE by the following steps.
Step 1: Turn off your computer, and then press the Power button to turn it on. As soon as the screen lights up, hold the Power button again to turn off the computer.
Step 2: Keep turning on and turning off your computer several times until you see a blue screen with Recovery. Click the See advanced repair options button.
Step 3: In the next window that shows Choose an option, click Troubleshoot. Then go to Advanced options > Command Prompt.
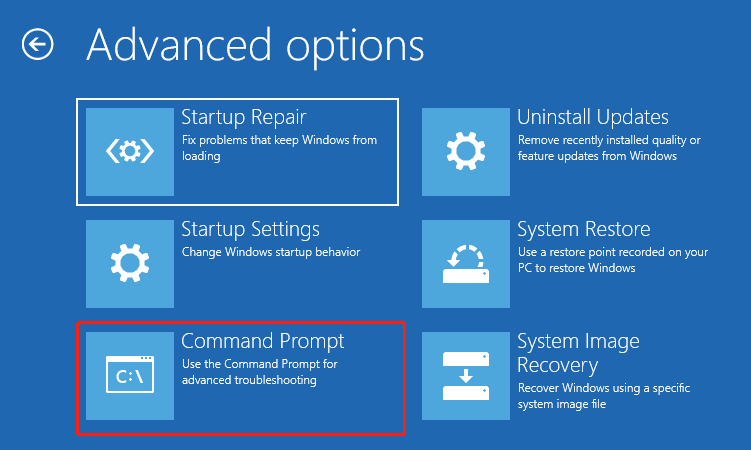
Step 4: In the Command Prompt panel, type sfc /scannow and press Enter to execute this command.
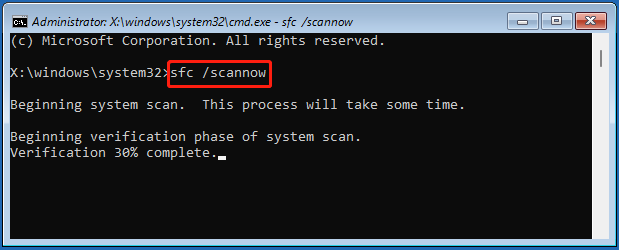
Step 5: Wait until the scan is completed. Then exit Command Prompt and boot your computer normally to check if the exception on invalid stack error is repaired.
Method 4: Use the CHKDSK Utility
Bad sectors in your hard drive may also lead to the “exception on invalid stack Windows 11” issue. Therefore, you can use the CHKDSK utility to scan & locate the bad sectors on the disk and recover the readable information from the detected bad sectors. To run this tool, follow the steps below.
Step 1: Go to Troubleshoot > Advanced options > Command Prompt in Windows RE once again.
Step 2: Type chkdsk c: /r in the panel and then press Enter to carry out the operation.

Step 3: After the process is finished, restart your computer to see if the error is solved.
Method 5: Scan Bad Sectors with MiniTool Partition Wizard
Although the CHKDSK utility is convenient to scan and repair disk errors, sometimes it may bring some unexpected issues to you, such as data loss, CHKDSK not working, etc. Therefore, for higher security, we highly recommend MiniTool Partition Wizard to you.
MiniTool Partition Wizard is a wonderful disk checker that allows you to check & fix corrupted file system, scan bad sectors, view disk space usage, and so on. In this section, we mainly introduce how to scan bad sectors on the hard drive with this tool and the following are detailed steps.
Part 1: Create a USB Bootable Drive
Because of the “exception on invalid stack Windows 11” issue on your computer, you cannot boot your PC normally. So, you need to create a bootable USB drive first. To do this, you can also use MiniTool Partition Wizard.
Step 1: Download and install MiniTool Partition Wizard on another computer that can run properly.
MiniTool Partition Wizard DemoClick to Download100%Clean & Safe
Step 2: Connect your USB flash drive to this computer. Then launch MiniTool Partition Wizard to enter its main interface.
The operation of building bootable media will delete all the data in the drive. Hence, you’d better make a backup of the drive first.
Step 3: Click the Bootable Media button on the top-right corner. Then click WinPE-based media with MiniTool plug-in in the next window.
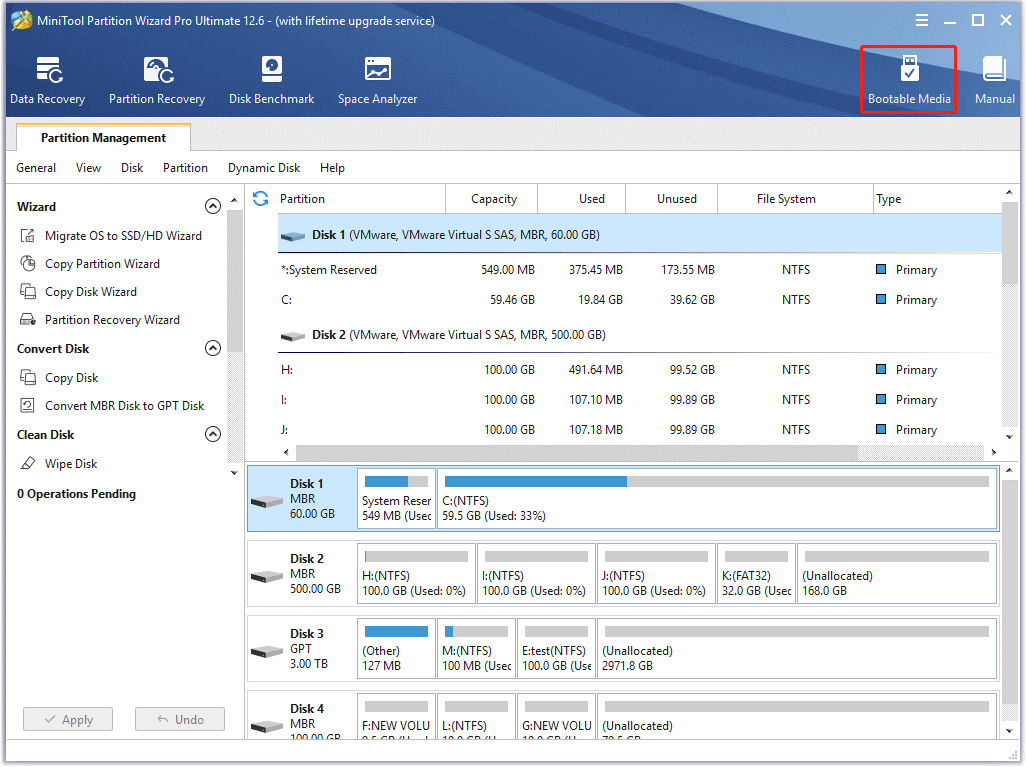
Step 4: After that, select USB Flash Disk and then click Yes in the pop-up window that says the data on the USB disk will be destroyed.
Step 5: Once the bootable USB flash drive is created, click Finish.
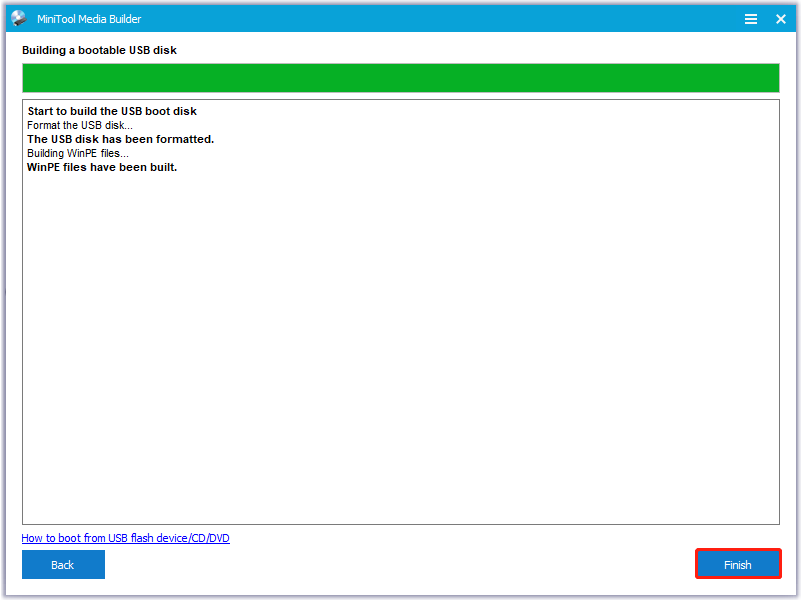
Step 6: Remove the specific USB drive from the computer.
Part 2: Check for Bad Sectors
After the bootable USB flash drive, you can boot your computer and scan bad sectors.
Step 1: Connect the USB drive to the problematic computer and then boot the computer from the bootable USB drive.
Step 2: Wait a while and you will enter MiniTool Partition Wizard automatically.
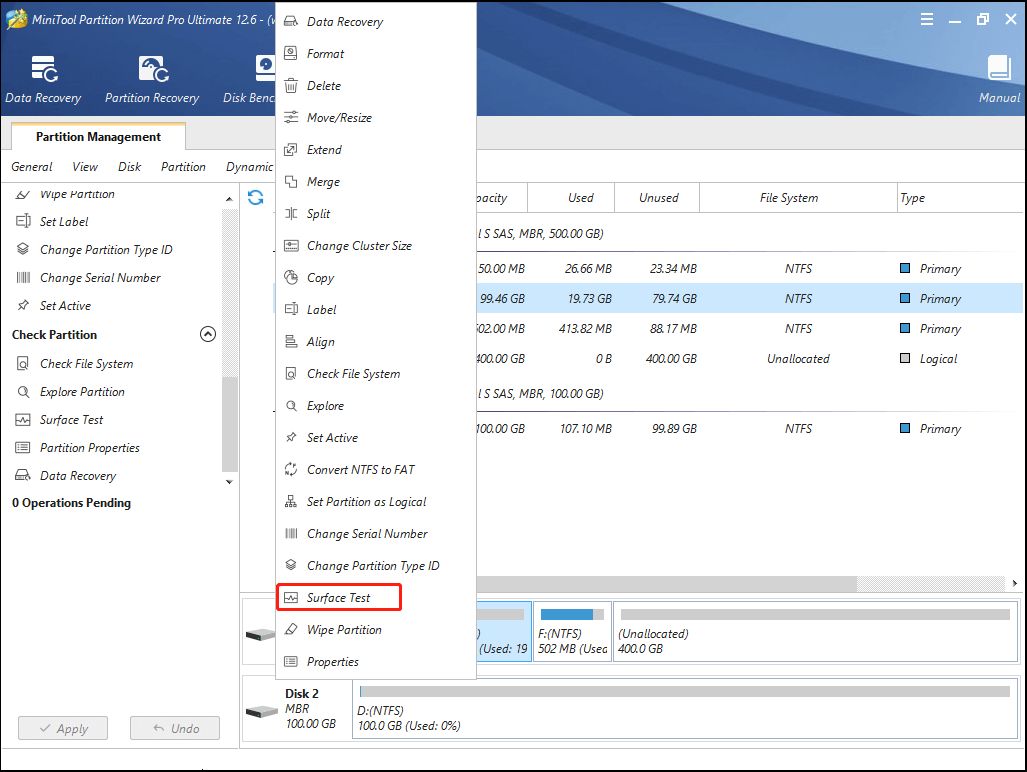
Step 3: In the main interface, right-click the target partition and then select Surface Test.
Step 4: In the pop-up window, click Start Now to begin scanning bad sectors.
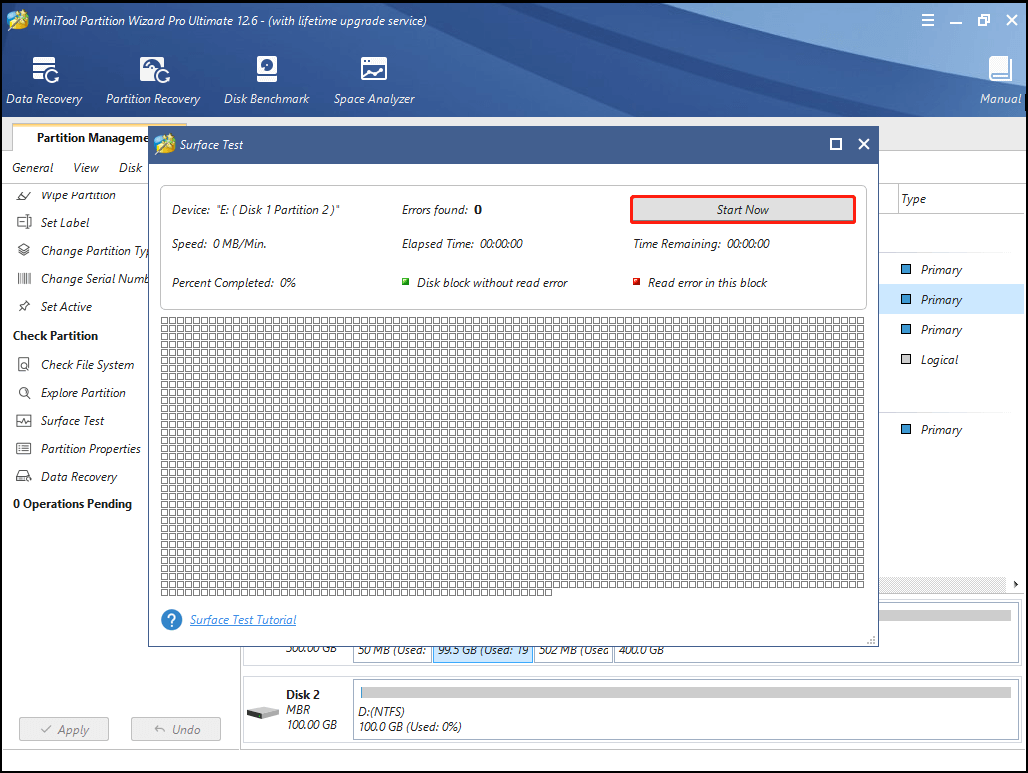
Step 5: After the scanning is completed, bad sectors will be marked in red.
You may be interested in: Can We Remove Bad Sector from Hard Disk Permanently?
Method 6: Rebuild the Boot-Related Data
When the “exception on invalid stack Windows 11” issue comes out, you can also try repairing the boot sector to fix the issue.
Step 1: Open Command Prompt in Windows RE.
Step 2: Type the following commands in the panel and press Enter after each one to execute them:
- bootrec/ fixmbr
- bootrec/ fixboot
- bootrec/ scanos
- bootrec/ rebuildbcd
Step 3: After all the commands are carried out, boot your system normally to see if the error is fixed.
Method 7: Perform a System Restore
If you have created a system point before the Windows stop code exception on invalid stack shows up, you can perform a system restore. In this way, you can get your system back to a previous state where your system can run well without the annoying error.
Step 1: Go to Troubleshoot > Advanced options > System Restore in Windows RE. Then click Windows and press Enter in the next window.
Step 2: Click Next in the pop-up window to continue.
Step 3: Select a healthy restore point and click Next.
Step 4: Finally, click Finish to end the operation.
After that, your computer will restart. Once you can see the Home screen, it means you solve the error successfully.
Method 8: Uninstall the Latest Updates
If there are any recent qualities or feature updates for your system that are installed automatically or manually, you may also get stuck in the exception on invalid stack error. On this occasion, uninstalling these updates may work if you want to get rid of the stop code. To do this, you need to act as follows.
Step 1: The operation also requires Windows Recovery Environment. Hence, ensure you enter Windows RE first.
Step 2: After that, go to See advanced repair options > Troubleshoot > Advanced options > Uninstall Updates.
Step 3: In the next window, select the Uninstall latest quality update option. Then click Windows > Uninstall quality update.
Step 4: After you finish the operation, go to Uninstall Updates in Windows RE again. Then select Uninstall latest feature update > Windows > Uninstall feature update.
Step 5: Once the above process is completed, reboot your computer normally and check if the error is fixed.
Method 9: Clean Install Windows 11
If other ways don’t help you solve the “exception on invalid stack Windows 11” issue successfully, then you can perform a clean installation. Please note the process of clean installing Windows 11 will delete everything on your computer and so it’s better to back up your computer before the process begins.
Step 1: Connect the USB drive without any data to a computer that can run normally.
Step 2: Visit Windows 11 download page and click Download Now in the Create Windows 11 Installation Media section.
Step 3: Once the .exe file is downloaded, open it in File Explorer and double-click the file. Then click Accept and Next to continue.
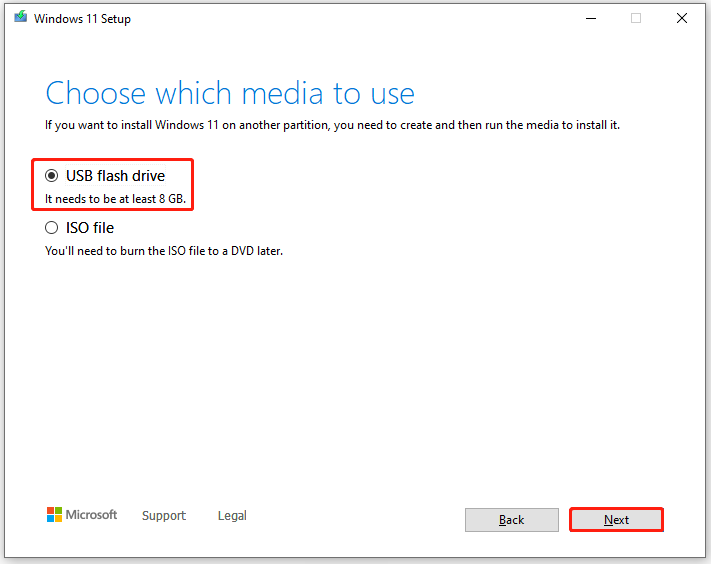
Step 4: Select USB flash drive and then click Next. Then select the specific USB drive and click Next.
Step 5: After the Windows 11 installation media is created, connect it to the problematic computer. Then boot the computer into BIOS and change the boot order to enable your system to boot from the specific USB drive.
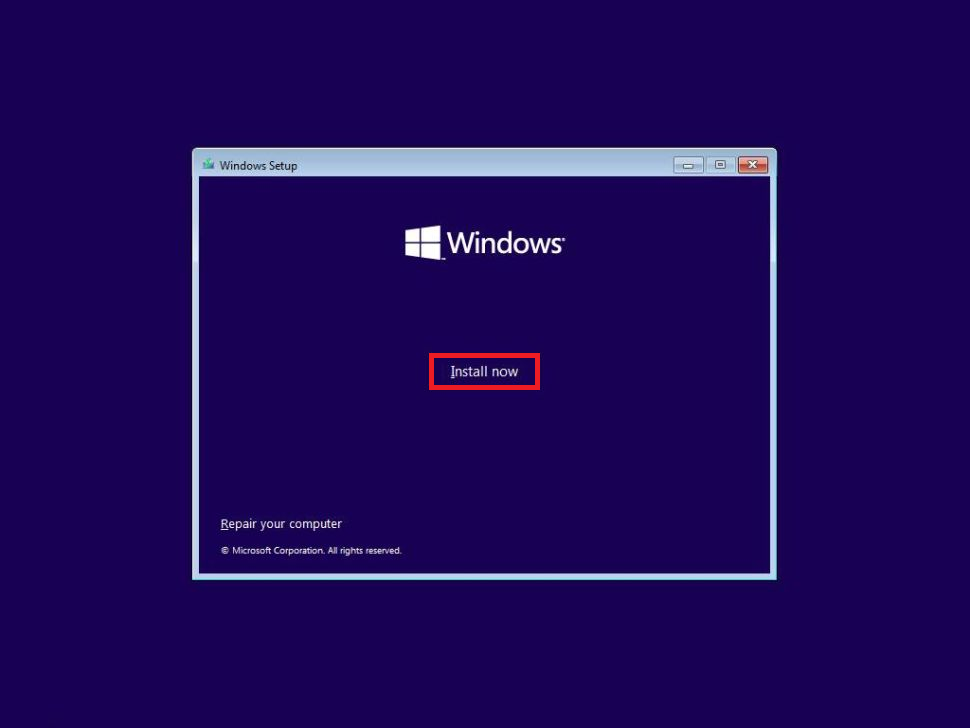
Step 6: Click Next when you see the Windows Setup window. Then click Install now.
Step 7: Click I don’t have a product key and then select the Windows version you are about to install. Click Next to go to the next step.
Step 8: Tick the checkbox next to the I accept the license terms option and then click Next.
Step 9: Select Custom: Install Windows only (Advanced). Then select the partition where the system is installed (it is usually Drive 0). Click Delete and then OK to delete the selected partition.
Step 10: Select Drive 0 Unallocated Space to install Windows and click Next. After that, the setup will install a fresh copy of Windows 11 on your computer.
Bottom Line
After running into the Windows stop code exception on invalid stack, you can try the above solutions to solve this error. If you have any other solutions to this issue, please share them with us in the comment part below.
If you have difficulty in using MiniTool Partition Wizard, you can contact us via [email protected].

User Comments :