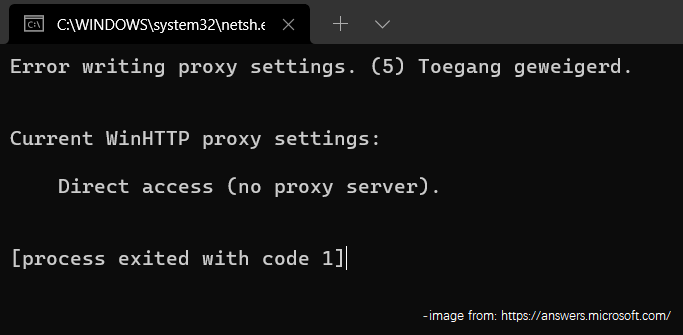
It is common to see problems happen after users upgrade to Windows 11. “Error writing proxy settings” is one of them. And this post from the MiniTool Partition Wizard puts together some solutions to this problem.
Windows 11 is a new operating system provided by Microsoft. It is designed as the successor to Windows 10, and Windows 10 users can upgrade to Windows 11 for free.
Unfortunately, some users received “error writing proxy settings” after upgrading to Windows 11. According to them, the problem appeared every time when they turn on Windows 11, which is annoying.

Do you encounter the same error? How to fix it? Don’t worry. Here are some solutions and you can have a try.
Solution 1: Release/Renew Your IP
When you encounter Windows 11 error writing proxy settings, you can try releasing and refreshing your IP address. It can help you get out of the problem temporarily.
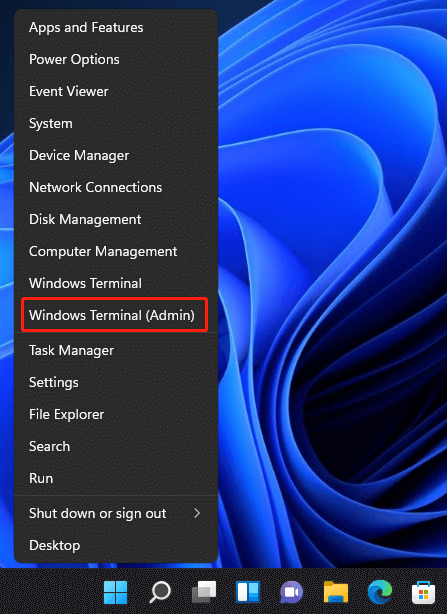
Step 1: Right-click the Windows button on the taskbar and select Windows Terminal (Admin).

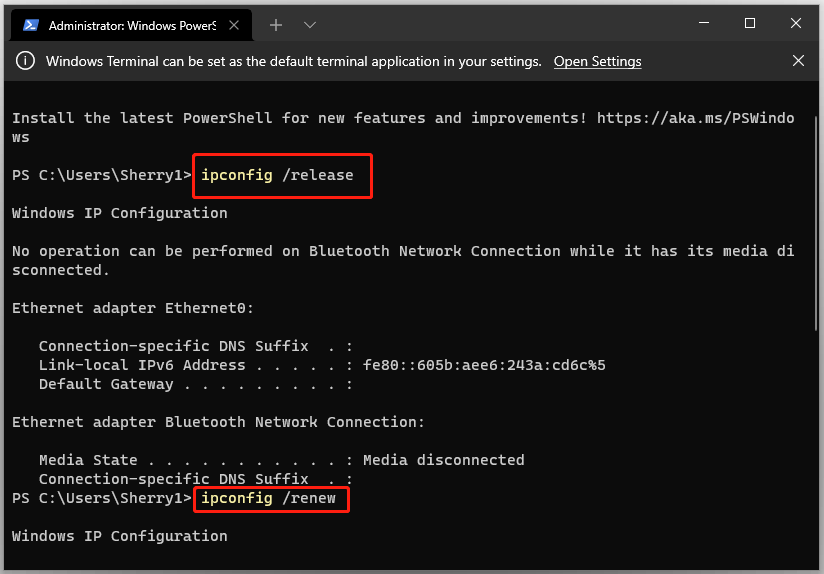
Step 2: Input the following commands one by one and press Enter after each.
- ipconfig /release
- ipconfig /renew

Unfortunately, the “error writing proxy settings” message could disappear temporarily after the above steps, but it might happen again on the next startup. If you want to solve it for good, you can keep trying the next solution.
Solution 2: Disable Startup Programs
Windows 11 error writing proxy settings could also happen due to a third-party program that is interfered with your operating system. Some programs will add themselves to the Startup list when you download and install them. If you have such startup apps, please disable them at startup.
Step 1: Press Shift + Ctrl + Esc to run Task Manager.
Step 2: Switch to the Startup tab.
Step 3: Right-click each startup program and select Disable.
Then you can restart your computer to check if the problem has been solved. If you are not sure which program is the culprit, you can perform a clean boot to figure it out.
Solution 3: Set Windows Console Host as the Default Terminal App
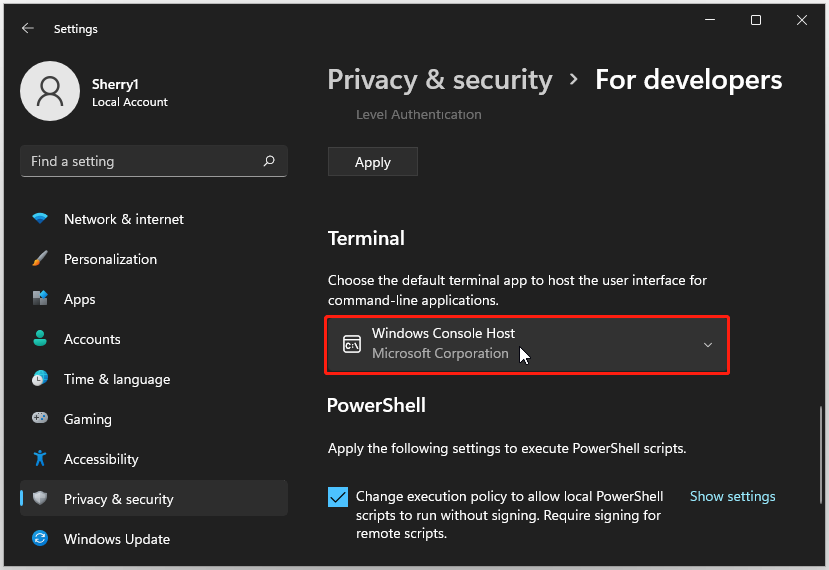
By default, Windows Console Host is the default terminal app on Windows 11. If you have changed the default terminal app, you might encounter the error writing proxy settings on Windows 11. In this case, you need to set Windows Console Host as the default app to fix the problem.
Step 1: Open Windows Settings by pressing Windows + I.
Step 2: In the left pane, select Private and Security. In the right pane, select For Developers.
Step 3: Under the Terminal section, click the drop-down menu and select Windows Console Host as the default terminal app.

If the default terminal has already been set to Windows Console Host, move on to the next solution.
Solution 4: Go back to the Previous Version
Windows 11 allows you to roll back the recent Windows update installed before 10 days.
If all the solutions above failed to solve error writing proxy settings on Windows 11, you might need to consider rolling back to a previous version of Windows 11. It can be used if you are sure the error writing proxy settings happened after a Windows update.
You just need to:
Step 1: Open Windows Settings.
Step 2: Select System > Recovery.
Step 3: Under the Recovery options section, select Go back.
For more detailed steps, you can refer to our previous post: Downgrade/Uninstall Windows 11 and Go Back to Windows 10.


User Comments :