The error 0x8007112A that prevents users from deleting or moving folder might occur on Windows 7/8.1/10 computer. In this article developed by MiniTool Partition Wizard, you will learn about 4 methods to get rid of the issue effectively.
It is a rather common operation to delete or move folders for a computer user. However, the operation might be interrupted by a certain error. Today, we will talk about the error 0x8007112A that prevent you delete or move folders in Windows 7/8.1/10.
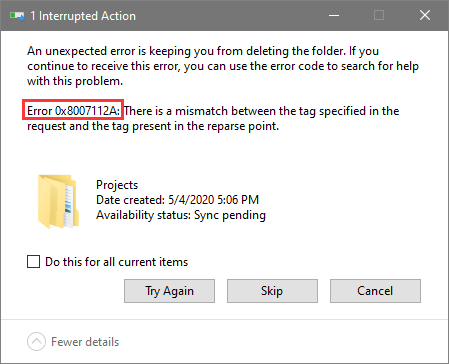
When you get the error, you will get the following error message:
An unexpected error is keeping you from deleting the folder. If you continue to receive this error, you can use the error code to search for help with this problem.
Error 0x8007112A: There is a mismatch between the tag specified in the request and the tag present in the reparse point.

If the error code 0x8007112A appears on your computer, you can try the following solutions to fix it by yourself.
Solution 1: Run File & Folder Troubleshooter
For any issues with file and folder including the error 0x8007112A, you can use Windows File & Folder troubleshooter. Just follow the steps below:
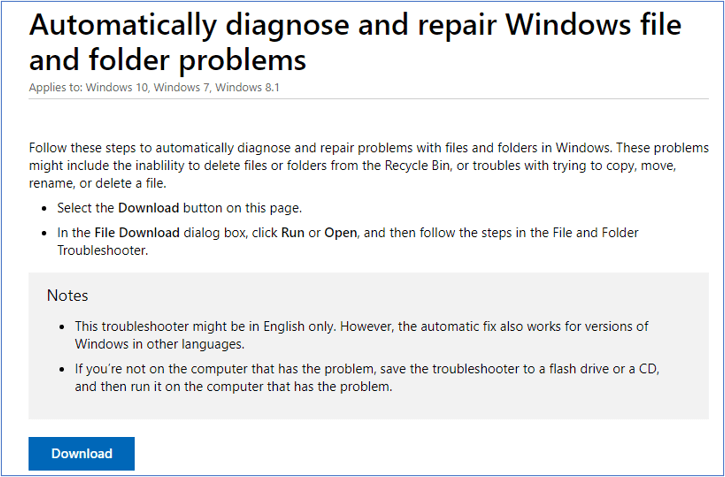
Step 1: Visit the official website to download the utility. This tool is compatible with Windows 7/8.1/10 and you just need to click Download button and save it to your computer.

Step 2: Launch the downloaded tool with administrative privilege. After opening it, click Advanced, then check Apply repairs automatically option, and click Next.
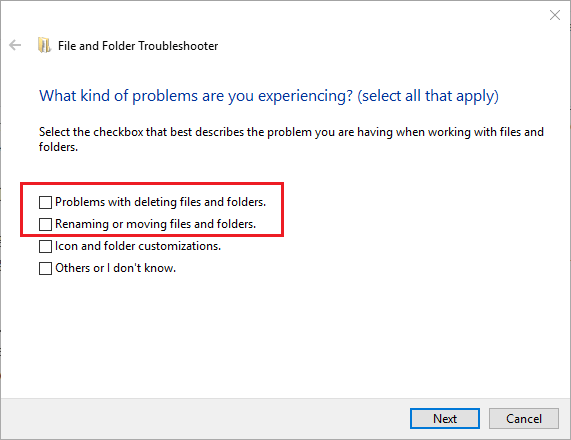
Step 3: Then, you will be required to select the type of problem you are facing. As for the error code 0x8007112A, you should check Problems with deleting files and folders and Renaming or moving files and folders options. Click Next to start the troubleshooting.

After the process is completed, check if you can delete or move files and folders now. If not, move on to the next solution.
Solution 2: Perform SFC And DISM Scan
If certain related system files are corrupted or missing, you might also encounter the error 0x8007112A. In this case, you can use System File Checker and Deployment Image Servicing and Management tools to scan and fix potential system file issues.
Step 1: Press Windows + R, input cmd and press Ctrl + Shift + Enter to launch Command Prompt as administrator.
Step 2: Input the command sfc /scannow and press Enter. Then, this utility will start scanning for corrupted or missing system files and then replace them with a cached copy.
Step 3: After the process is finished, restart your computer and open Command Prompt as administrator again. Now, input the command Dism /Online /Cleanup-Image /ScanHealth and press Enter.
Wait patiently until the scanning is done and then restart your computer again. Now, the error code 0x8007112A should have been removed.
Solution 3: Restore Your System to An Earlier Date
Sometimes, an unexpected error is keeping you from deleting the folder after you install a certain application or Windows update.
If you have made any changes for your computer before the error occurs, it might be helpful to undo these changes, including removing recently installed apps, uninstalling Windows update and setting the changed settings to the default.
If you don’t remember the specific change you have made, you can choose to restore your computer to an earlier date. In this way, you can bring your system back to the status before the error occurs without affecting your personal data.
Solution 4: Modify Windows Registry
Finally, you can try modify your Windows registry. This is an effective solution but is risky. So, before you start, back up the registry in advance to avoid any damages.
Now, follow the instructions below:
Step 1: Open Run dialog, type regedit and click OK to open Registry Editor.
Step 2: Go to ComputerHKEY_LOCAL_MACHINESYSTEMCurrentControlSetServicesCSC and click on the Parameters subfolder under CSC.
Step 3: Right-click the empty space in the right pane and choose New > DWORD (32-bit) Value.
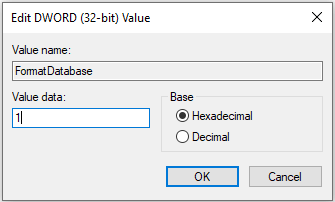
Step 4: Name the new DWORD as FormatDatabase and double-click it to edit it. Then, enter 1 in the box of Value data and click OK.

Once it’s done, restart your computer and the error 0x8007112A should have been resolved.

User Comments :