Google Chrome is one of the most popular web browsers over the world. If you encounter the ERR_NAME_RESOLUTION_FAILED error when you use Chrome, you can try these 4 solutions provided by MiniTool Software.
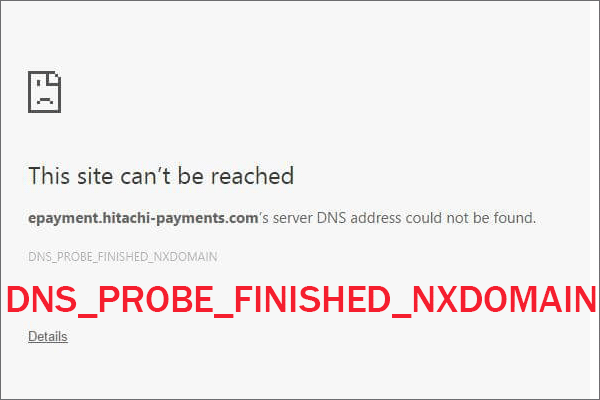
Thousands of users watch news or deal with work in Google Chrome every day. However, sometimes when you try to open Chrome, you may find that you have lost your Internet connection and all you can see on the screen is the error message: ERR_NAME_RESOLUTION_FAILED. It’s really annoying.
You’re not the only one who encounters ERR_NAME_RESOLUTION_FAILED in Chrome. Many users have solved the problem with the following solutions. You can have a try.
Solution 1: Clear Browsing Data
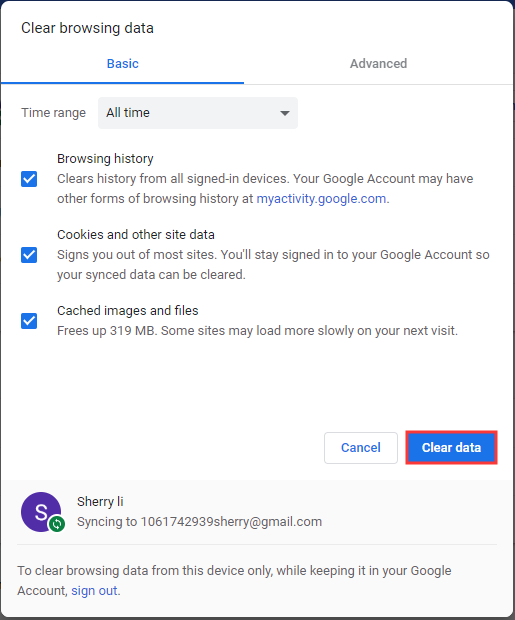
When you encounter ERR_NAME_RESOLUTION_FAILED error in Chrome, the first thing you can do is clearing browsing data in Chrome. Because saved data (such as cache, cookies, passwords and so on) could slow down the browser and even prevent you from opening the website.
Step 1: Click the three-dot icon in Chrome.
Step 2: Put your mouse on More tools and then select Clear browsing data.
Step 3: Choose All time in Time range and check all the options. Then click Clear data.

Now you can open the failed website again to see if this error has been fixed. If not, try the next solution.
Solution 2: Reset Google Chrome
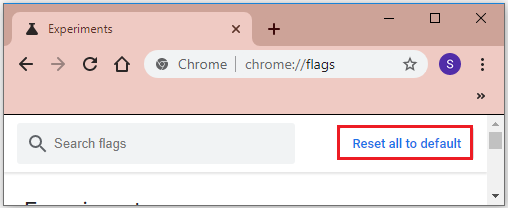
Some Chrome users have fixed err name resolution failed error by resetting Google Chrome. You just need to type chrome://flags/ in the address bar and press Enter. Then click Reset all to default option on the right side of the pane.

Solution 3: Change DNS Address
Google DNS offers a faster and securer connection. When you receive ERR_NAME_RESOLUTION_FAILED error, you can try fixing it by switching to Google DNS.
Step 1: Press Win + I to open Settings. Then go to Network & Internet.
Step 2: On the left pane, choose Status, then click Network and Sharing Center in the right pane.
Step 3: On the left side of the pane, choose Change adapter settings. Then right-click the internet connection you’re using currently and select Properties.
Step 4: Select Internet Protocol Version 4 (TCP/IPv4) and click Properties.
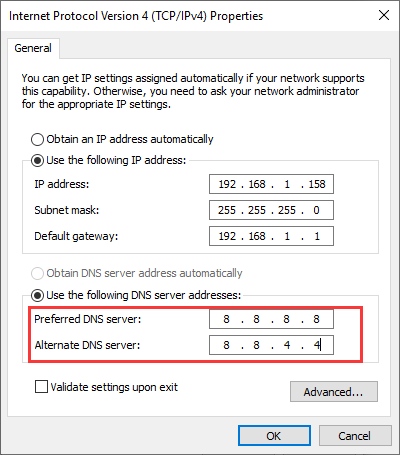
Step 5: Select Use the following DNS server addresses. Then input the following information:
- Preferred DNS server: 8.8.8.8
- Alternate DNS server: 8.8.4.4

Step 6: Click OK to save the changes you have made.
Now you can check whether your chrome works properly.
Solution 4: Reset Netsh Winsock
Resetting Winsock is also an effective way to fix err name resolution failed error. It requires you to use the Command Prompt. You can follow the steps below.
Step 1: Press Win + R to invoke Run window. Then type cmd in the box and press Shift + Ctrl + Enter to run Command Prompt as administrator.
Step 2: In the Command Prompt window, input the following command one by one. Remember to press Enter after each command.
- ipconfig /release
- ipconfig /all
- ipconfig /flushdns
- ipconfig /renew
- netsh int ip set dns
- netsh winsock reset
Then you can use your Chrome and see if the error disappears.
If you cannot fix err name resolution failed with all the solutions above, here are some other suggestions which may be helpful:
- Restart your router or modem. You will face this error when you lose internet connection. Try restarting your router or modem and then check if it is solved.
- Check your antivirus settings. Some antivirus programs may prevent the browser from connecting to the Internet. You can disable your antivirus temporarily to solve the problem.
- Uninstall problematic programs or applications. If the error appears after you install specific programs or device drivers, you need to uninstall them and then check if the problem is fixed.


User Comments :