What is UEFI boot mode? How to enable UEFI mode in Windows? If you are troubled by these questions, this post from Partition Magic is what you need. It will provide you with detailed steps and clear screenshots.
The Brief Introduction of UEFI
UEFI (Unified Extensible Firmware Interface) is a computer’s motherboard firmware interface. It acts as a “middleman” between the computer’s firmware and the operating system. This interface is used to automatically load the operating system from a pre-boot operating environment to an operating system, thereby simplifying the boot process.
Using UEFI boot mode, your computer can initialize hardware components and boot the operating system stored on the hard disk.
UEFI uses the GUID Partition Table (GPT). GPT breaks the 2TB limit of MBR and can theoretically provide a hard disk capacity of 18EB. GPT has no actual limit on the number of partitions and supports up to 128 partitions by default in Windows. Each GPT partition has a unique GUID, which enhances the security and fault tolerance of partition data.
After understanding what UEFI is, let’s learn why you need to enable UEFI mode.
Why You Need to Enable UEFI Mode in Windows
UEFI and Legacy are two modes of BIOS. Since the advent of UEFI 2.0, UEFI has gradually replaced BIOS, and more and more users tend to start their computers in UEFI mode. UEFI mode is a newer standard that breaks many limitations of BIOS mode. Compared with traditional BIOS mode, it has many advantages, including:
- Faster boot times: UEFI’s optimized code enables faster boot times.
- Better security: UEFI boot mode supports Secure Boot, which ensures that no malware can tamper with the boot process.
- Larger disk support: UEFI with GPT supports more disk capacity.
- Graphical user interface (GUI): This feature enhances usability by providing a visually rich interface that enables users to perform tasks more intuitively in various applications and settings.
- Windows 11 installation requires UEFI boot mode: If you need to upgrade from Windows 10 to Windows 11 and are using Legacy boot mode, you need to enable UEFI mode.
- Architecture bit: UEFI supports both 32-bit and 64-bit architectures, which helps the computer use more RAM to handle more complex processes than BIOS.
How to Enable UEFI Mode in Windows
In this section, we focus on how to enable UEFI mode in Windows. It’s very easy to enable UEFI boot mode if your computer supports it. Before that, you can check your boot mode in the System information.
- Press the Win + R keys simultaneously, type msinfo32 in the Run box, and hit Enter to open the System Information screen.
- On the left side of the System Information window, select System Summary.
- Scroll down to find BIOS Mode. You will be able to find out the Boot Mode is Legacy. It indicates that your OS is booted with BIOS.
To enable UEFI mode in Windows, follow the steps below:
Step 1: First, you need to shut down your computer.
Step 2: Turn on the computer and immediately press the F2 key or another function key (F1, F3, F10, or F12) and the ESC or Delete key when the computer brand logo appears to open the Setup Utility window.
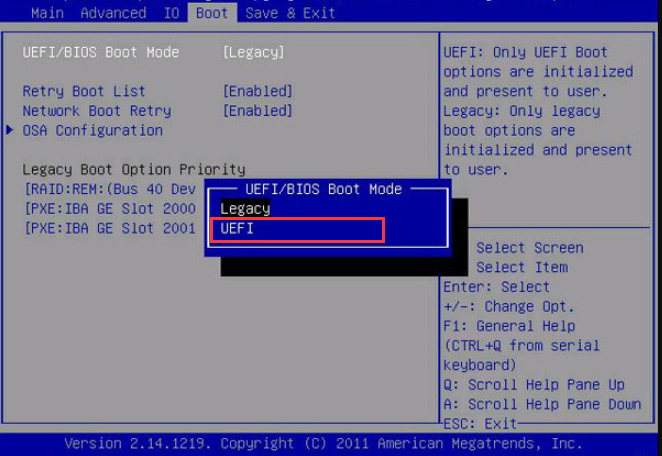
Step 3: Go to the Boot tab by pressing the right arrow key.
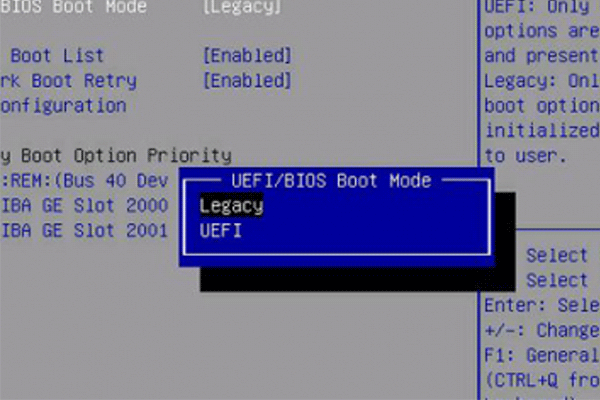
Step 4: Select the UEFI/BIOS Boot Mode, and hit the Enter key.
Step 5: In the new pop-up window, select the UEFI Boot Mode by pressing the up-arrow key, and then press Enter.
Step 6: Press the F10 key to save the change and exit the window.
Enabling UEFI mode is simple, but there is a prerequisite – GPT disk as a system disk. Therefore, if you want to boot into UEFI mode, you need to convert MBR disk to GPT disk. The following will introduce you how to convert an MBR disk to a GPT disk. Let’s take a look.
How to Convert MBR Disk to GPT Disk in Windows
How to convert a disk from MBR to GPT in Windows? Here are four methods for you. You can do that with a third-party MBR to GPT converter – MiniTool Partition Wizard, and the Windows built-in tools – MBR2GPT/Diskpart/Diak Management. Among them, it is easier to use MiniTool Partition Wizard to achieve this without data loss.
Way 1: Convert MBR Disk to GPT Disk with MiniTool Partition Wizard
MiniTool Partition Wizard is a professional partition manager that can help you convert MBR to GPT without data loss. Besides it offers plenty of powerful features to tackle diverse disk-related tasks and partition operations, including SSD data recovery, format USB to FAT32, and external hard drive data recovery, among others.
Its user-friendly interface ensures straightforward operation, making it accessible even for beginners. To convert from MBR to GPT using MiniTool Partition Wizard, start by downloading and installing the program on your computer, then follow the provided guide for seamless conversion.
MiniTool Partition Wizard DemoClick to Download100%Clean & Safe
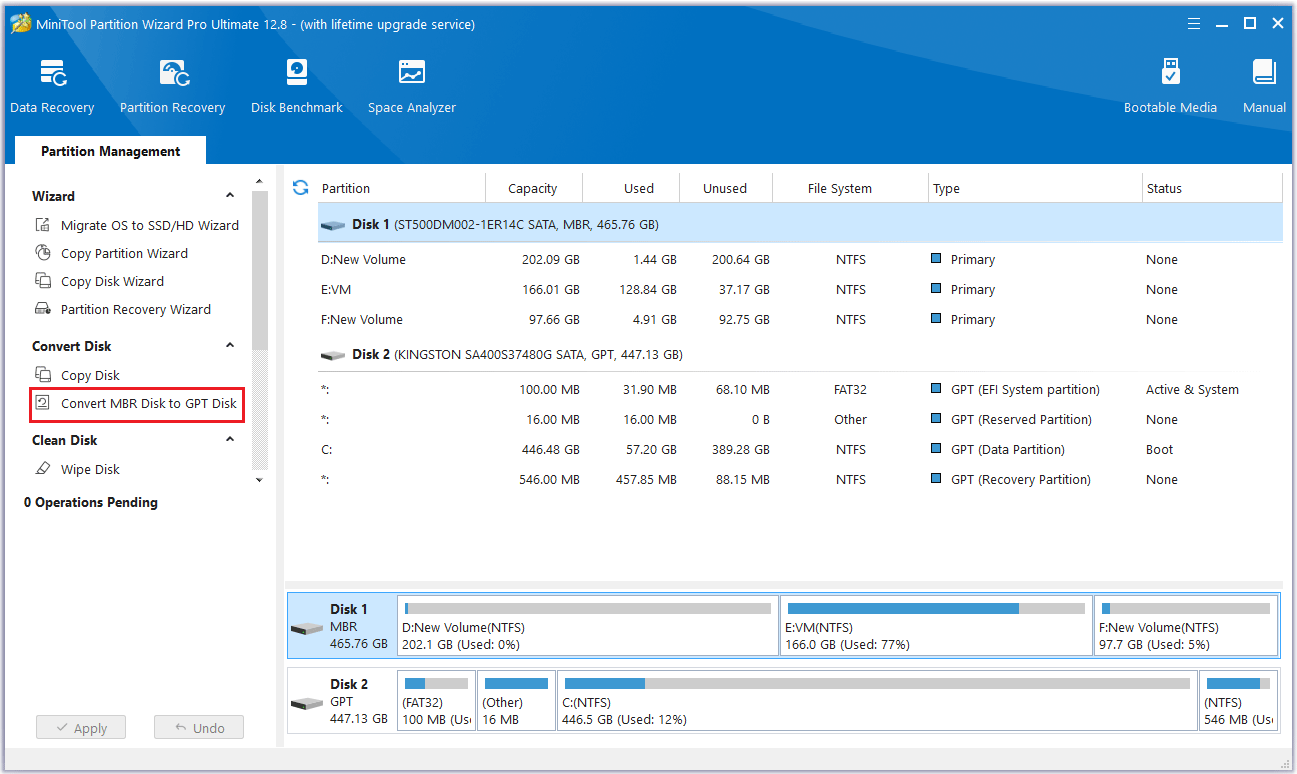
Step 1: Launch MiniTool Partition Wizard to its main interface. Then highlight the system disk to convert and click the Convert MBR Disk to GPT Disk feature in the left panel. Alternatively, you can right-click the system disk and choose Convert MBR Disk to GPT Disk.
Step 2: MiniTool Partition Wizard will return to its main interface. Here you can preview all the changes you want to convert to GPT disk. Click Apply to make the operation effective.
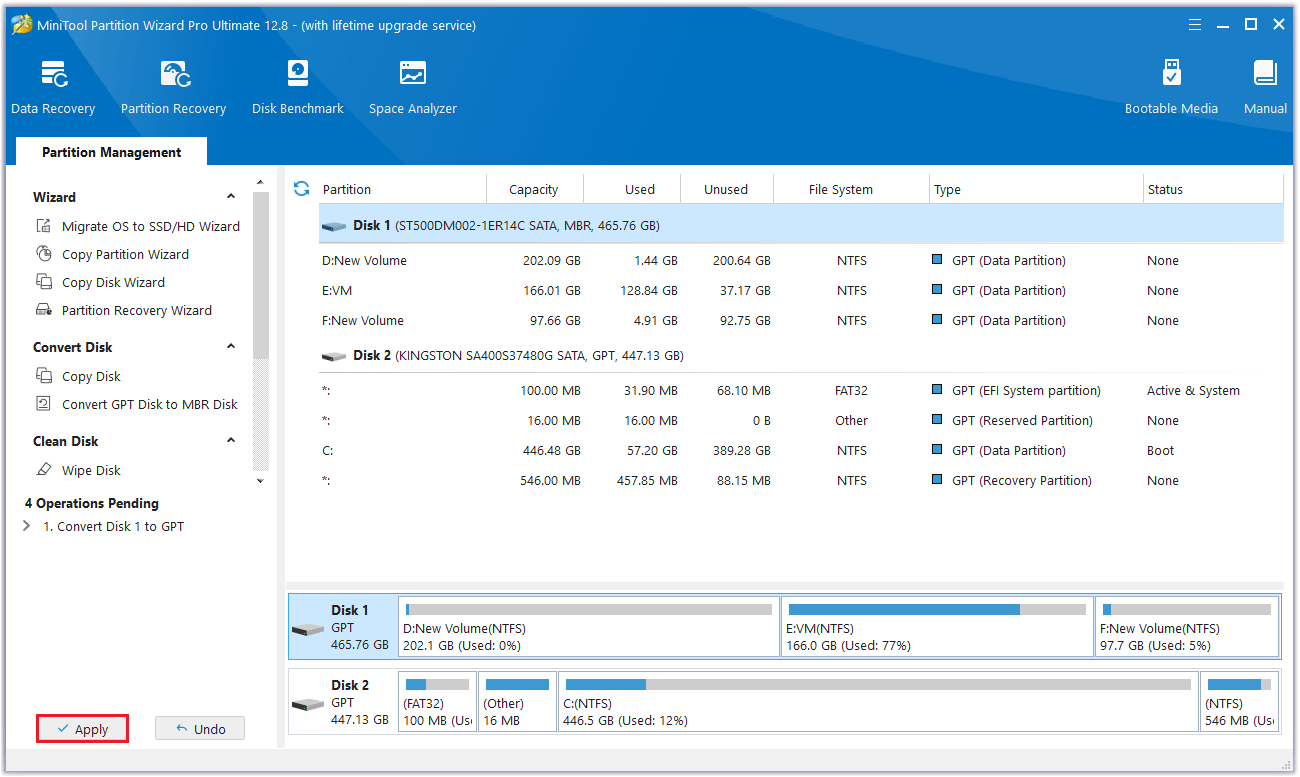
After that, you can restart your computer with UEFI boot mode.
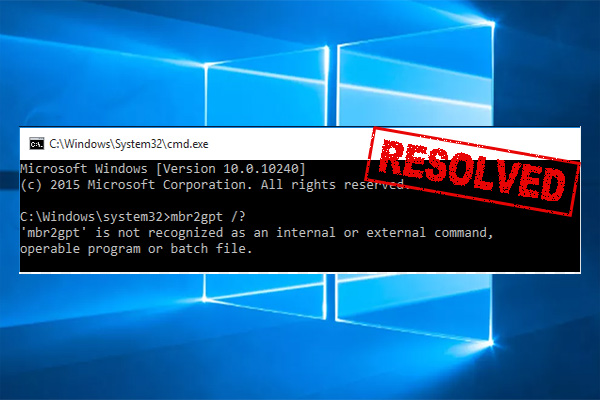
Way 2: Convert MBR Disk to GPT Disk with MBR2GPT
MBR2GPT is a utility provided by Windows, typically located in the WindowsSystem32 directory. This tool is specifically designed for use with 64-bit versions of Windows 10 from version 1703 onwards.
It facilitates the conversion of disk partitions from the legacy Master Boot Record (MBR) scheme to the newer GUID Partition Table (GPT) format, allowing systems to take advantage of modern functionalities and improved disk management capabilities offered by GPT. Users can leverage MBR2GPT to ensure compatibility and optimize their system’s storage configuration efficiently.
Step 1: Type cmd in the Windows Search box and the Command Prompt app will appear. Choose Run as administrator from the right side.
Step 2: In the Command Prompt window, type mbr2gpt /convert /disk: 0 /allowfullOS and press Enter. The MBR disk 0 (the system disk) will be converted to a GPT disk.

Way 3: Convert MBR Disk to GPT Disk with Disk Management
You can use a disk management tool to convert the disk in Windows. Disk Management is a Windows built-in utility that allows you to perform various operations related to your hard disk, including converting disks and increasing disk space. Here are the steps:
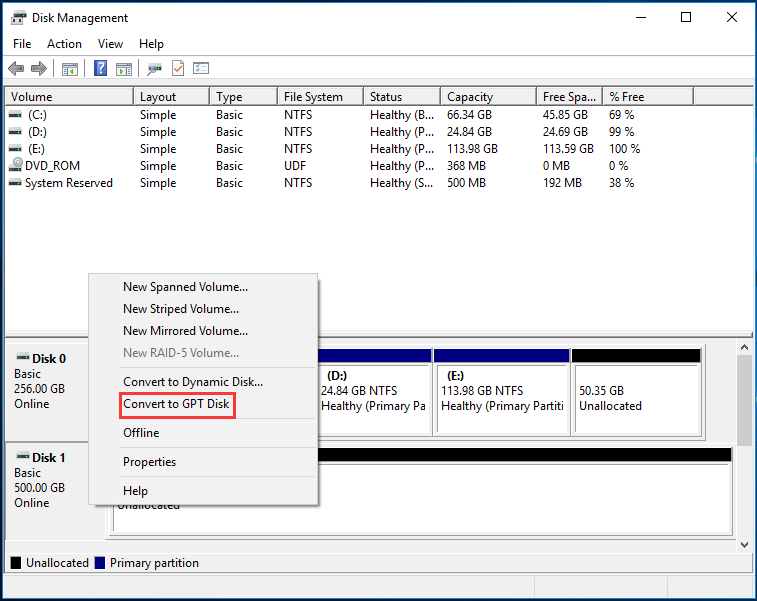
Step 1: Right-click the Start icon and choose Disk Management to open. Or you can press the Win + X keys and select Disk Management to open.
Step 2: Right-click on a partition on the disk and select Delete Volume. Then operate to delete all partitions on this disk.
Step 3: Right-click on the system disk and select Convert to GPT Disk. Then you can discover that the MBR disk is converted to a GPT disk successfully.
Way 4: Convert MBR Disk to GPT Disk with Diskpart
You can also use Diakpart to convert MBR disk to GPT disk, but this will cause data loss. Diskpart is a Windows built-in partitioning utility that uses command lines to perform various operations such as format/create/wipe/extend volumes, select disks, list disks, etc.
Before converting an MBR disk to a GPT disk, you need to delete all partitions first, and then convert the MBR disk to a GPT disk. The steps are as follows:
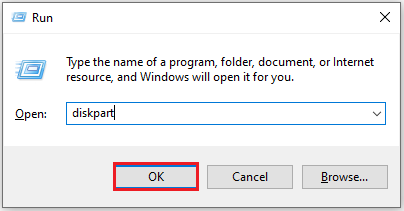
Step 1: Press the Win + R keys to open the Run box.
Step 2: Enter the diskpart command in the box and click OK.
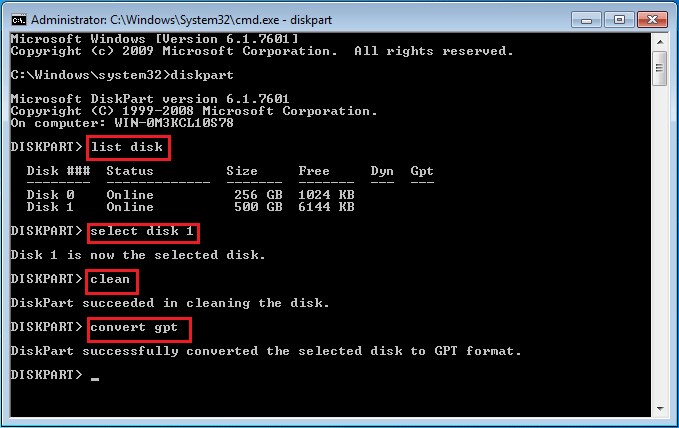
Step 3: Enter the following commands one by one:
- list disk
- select disk X (X is the number of the disk you wish to convert)
- clean (This step will delete all data on the disk, make sure you’ve made a backup of all important files)
- convert gpt
Further Reading: How to Disable UEFI Mode
How to disable UEFI mode? If you no longer need UEFI boot mode, you can follow the steps below to disable UEFI mode.
Step 1: First shut down your PC.
Step 2: Restart your Windows PC, and press the F2 key or another function key (F1, F3, F10, or F12) until you see the BIOS Setup screen.
Step 3: Press and hold the right arrow to navigate to the Boot tab.
Step 4: Under the Boot interface, click on UEFI/BIOS Boot Mode and press Enter.
Step 5: In the new pop-up window, select the Legacy Boot Mode by pressing the up-arrow key, and then press Enter.
Step 6: Press the F10 key to save the changes and exit the BIOS screen.
Bottom Line
This post ends here. This article gives us a brief introduction to UEFI and why you need to enable UEFI mode in Windows. Finally, it shows you a full guide on how to enable UEFI mode in Windows. Hope this article is helpful.
If you have any questions or suggestions while using MiniTool Partition Wizard, you can contact us via [email protected] to get a quick reply.
Enable UEFI Mode In Windows FAQ
(1) Press the F10 and ESC (or Delete) keys when booting your computer to open the BIOS Setup utility.
(2) Go to the Boot tab select the UEFI/BIOS Boot Mode by using the arrow keys, and press Enter.
(3) Select the UEFI Boot Mode by pressing the up and down arrow keys and press Enter.
(4) Press the F10 keys to save the changes and exit the window.
About The Author

Position: Columnist
Cecilia is a new member of MiniTool. She works as an English editor on the MiniTool team. She likes to learn articles about computers and is passionate about partition management and Windows operating systems. She is committed to allowing readers to use simple, efficient, and fast methods to solve the computer problems they encounter. To provide more professional solutions, she will continue to learn and master computer knowledge.
User Comments :