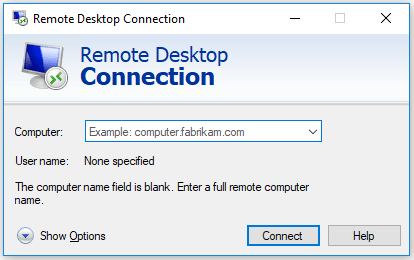
Is Remote Desktop free? Is it secure? How do you know if Remote Desktop is enabled? In this post, MiniTool answers all the above questions. Furthermore, MiniTool also shows you how to enable this feature via Command Prompt and Windows PowerShell.
Windows 10 Remote Desktop
Remote Desktop is a feature that you can use to connect two computers or other devices so that you can access another computer remotely. With this feature, you can control other’s computer as if you have local access to the system in which you can move the mouse cursor, open programs, transfer files, and so on.

The Remote Desktop feature is quite useful if you run into some computer issues and you can ask help for your friends or other people to perform troubleshooting on your system without letting them visit your place.
But there is a pithy that this feature is unavailable on Windows 10 Home, but you can find it on Windows 10 Pro and Enterprise editions.
Is Remote Desktop Free and Secure?
The good news is that Microsoft asks for no charge of this feature. In terms of security, it can be said that the Remote Desktop feature offered by Microsoft is a perfectly viable option if you want to access other’s computer.
How to Know if Remote Desktop Is Enabled?
To check whether the Remote Desktop is enabled, you just need to complete the following steps.
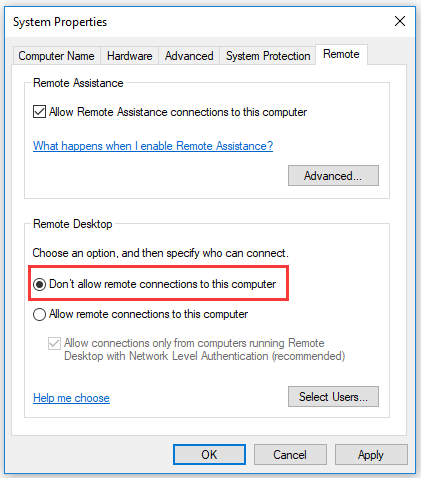
Step 1: Right-click This PC or My Computer on your desktop and then select Properties from the menu.
Step 2: On the Properties window, click Remote settings on the left pane.
Step 3: Under the Remote tab, see if the box next to Don’t allow connections to this computer is checked to check if the Remote Desktop feature is enabled.

How to Enable Remote Desktop Windows 10?
If your Remote Desktop is not enabled on Windows 10, you can enable it now. You can enable this feature via Windows Settings, but some users ran into Windows Setting not working. So, in this post, I would like to show you how to enable Remote Desktop in two different ways, namely using Command Prompt and Windows PowerShell.
Enable Remote Desktop via Command Prompt
Step 1: Run Command Prompt as administrator.
- Type Command Prompt on the Cortana’s search bar.
- Right-click the result and then select Run as administrator.
Step 2: Type the following command on the Command Prompt window and then hit the Enter to run this command.
reg add “HKLMSYSTEMCurrentControlSetControlTerminal Server” /v fDenyTSConnections /t REG_DWORD /d 0 /f
Step 3: When the above command has been executed, you need to run another command and hit Enter to execute it. This command will add and update rules in the Firewall and after that, you can use Remote Desktop.
netsh advfirewall firewall set rule group=”remote desktop” new enable=yes
Enable Remote Desktop via Windows PowerShell
Step 1: Run Windows PowerShell as administrator.
- Type Windows PowerShell on the Cortana’s search bar.
- Right-click the result and then select Run as administrator.
Step 2: Type the following command and then hit the Enter key to run it.
Set-ItemProperty -Path ‘HKLM:SystemCurrentControlSetControlTerminal Server’-name “fDenyTSConnections” -Value 0
Step 3: Type another key and hit Enter.
Enable-NetFirewallRule -DisplayGroup “Remote Desktop”
If you want to disable the Remote Desktop feature on Windows 10, you can also run the following commands in Command Prompt and Windows PowerShell. Please do not forget to hit the Enter key after typing each command.
Disable Remote Desktop via Command Desktop:
- reg add “HKLMSYSTEMCurrentControlSetControlTerminal Server” /v fDenyTSConnections /t REG_DWORD /d 1 /f
- netsh advfirewall firewall set rule group=”remote desktop” new enable=No
Disable Remote Desktop via Windows PowerShell:
- Set-ItemProperty -Path ‘HKLM:SystemCurrentControlSetControlTerminal Server’-name “fDenyTSConnections” -Value 1
- Disable-NetFirewallRule -DisplayGroup “Remote Desktop”


User Comments :