A lot of users encounter the disk column missing from Task Manager issue on Windows 11/10/8/7/2012 Server. What causes the issue? How to show disk information on Task Manager? Let’s explore the answers together with MiniTool.
Task Manager is a Windows built-in performance monitor utility that can display your computer’s system performance, including Disk, CPU, Network, and Memory. In addition, it can show detailed information about the programs and services running on your PC. With this tool, you can prioritize, enable, and disable processes easily.
Sometimes, however, this utility can run into some issues such as “End task not working”, “Task Manager not responding”, “Feeds Search application task manager using all RAM”, and the one discussed in this post. Here is a user who posted the “disk column missing in Task Manager” issue on the answers.microsoft.com forum.
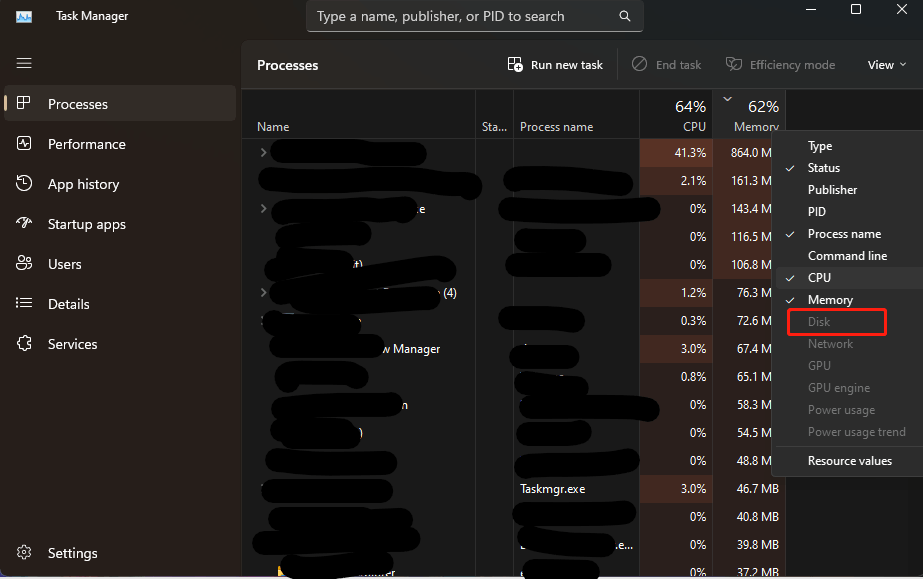
Disk and network columns are missing in Task Manager. Why are Disk and Network columns disabled in Task Manager? How to add disk performance on Task Manager? Please help me. Thanks!
https://answers.microsoft.com/en-us/windows/forum/all/disk-and-network-columns-are-missing-in-task/46f8cc7e-c9a8-46b2-9f37-980874da05c8
What Causes Disk Column Missing from Task Manager
Why is the disk performance tab missing in Task Manager? According to user reports, the “disk column missing in Task Manager” issue can occur on many operating systems, including Windows 11, 10, 8, 7, and Windows Server 2012.
The main reason behind the problem is that the Disk Performance Monitor is disabled. Another possible reason is related to a known bug or temporary glitch. Don’t worry. We explore some effective troubleshooting methods for the problem after analyzing extensive user reports.
How to Show Disk Information on Task Manager
How to fix the disk information missing on Task Manager? You can try the following 2 methods to re-enable disk performance on Task Manager.
# 1. Enable Disk Performance Monitor Using CMD
As discussed above, the main reason for the disk performance tab missing in Task Manager is the Disk Performance Monitor is disabled. Here you can follow the steps below to enable the Disk Performance monitor on Windows 11/10/8/7.
Step 1. Make sure the Task Manager window is closed on your PC.
Step 2. Type cmd in the Search box, and then right-click the Command Prompt app from the top result and select Run as administrator. Then click on Yes in the UAC window to get the admin rights.
Step 3. In the pop-up elevated Command Prompt window, type the following command and hit Enter to enable disk performance on Task Manager.
To disable the Disk Performance monitor, you can simply run the diskperf -N command.
diskperf -Y

Step 4. Re-open Task Manager and check if the disk column goes back.
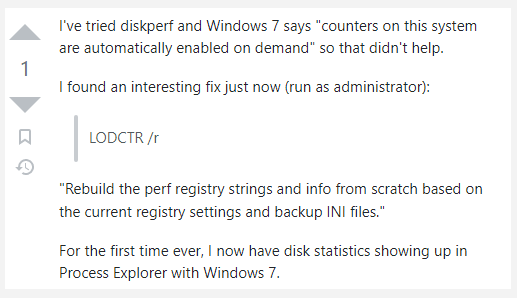
Some users from the superuser.com forum reported the “LODCTR /r” command can also help fix the disk performance tab greyed out in Task Manager issue. If you are running on Windows 7, Windows Server 2022/2019/2016/2012, and Windows Server R2, you can try this command.
# 2. Install the Latest Windows Updates
Sometimes the disk information missing on Task Manager issue just occurs due to a bug on Windows. In this case, installing the new patches released by Microsoft may help you fix the error. If there are any available Windows updates, make sure you install them. Here we take Windows 11 updates for example.
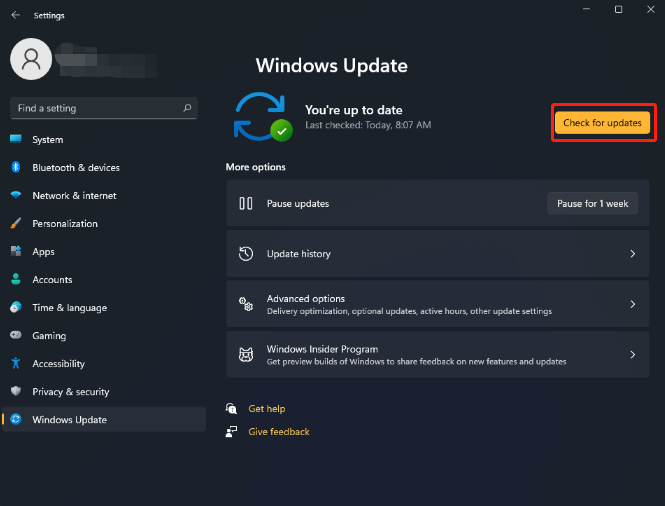
Step 1. Press Win + I keys to open the Settings window and select Windows Update from the left panel
Step 2. Click on the Check for updates button from the right panel. Then Windows automatically check for available newer updates for your device.
If you can’t find the button, you can click Advanced options and install the optional updates on Windows 11.
# 3 Perform a System Store
If the “disk performance tab greyed out in Task Manager” problem just occurs after you install a suspicious third-party driver/software or some Windows updates, you can try performing a system store. This can revert the Windows system to an earlier state where Task Manager works properly.
To know more details, you can refer to the following guide.
How to Perform a System Restore from Command Prompt Windows 10/7
How to Restore Computer to Previous Date Windows 11
Use MiniTool Partition Wizard to Monitor Your Disk Performance
If you just want to check your disk performance on Windows 11/10/8/7, there is a better alternative to Task Manager – MiniTool Partition Manager. It is a comprehensive and trustworthy disk manager that can check your disk performance easily, including read/write speed, transfer size, cool down time, etc.
Moreover, the MiniTool software can be used to extend/resize/move/wipe partitions, convert MBR to GPT without data loss, rebuild MBR, repair file system errors, migrate OS, and more. Here’s how to check disk performance using MiniTool Partition Manager.
MiniTool Partition Wizard FreeClick to Download100%Clean & Safe
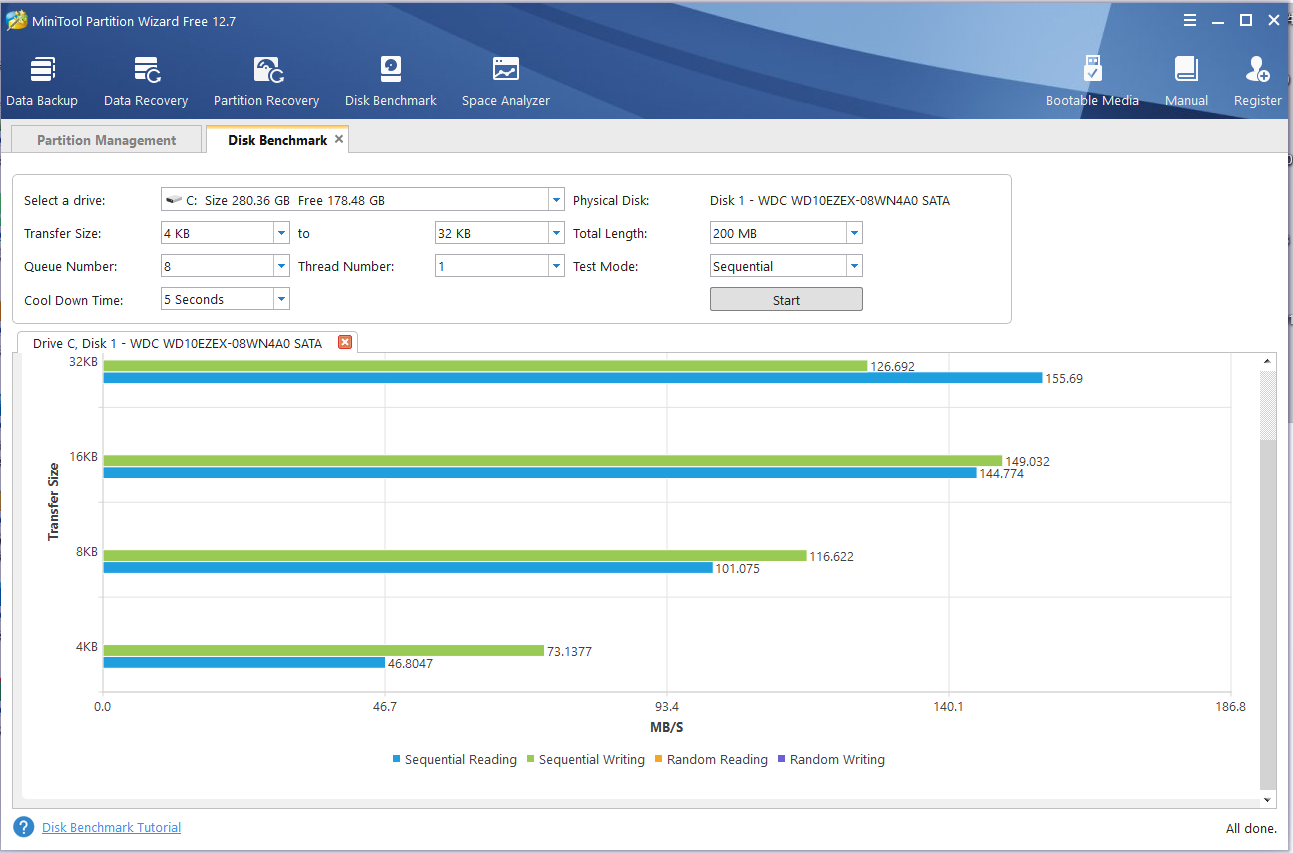
Step 1. Launch the MiniTool software to enter its main interface and click on Disk Benchmark from the top toolbar.
Step 2. Select the drive you want to check from the drop-down menu and click on Start to start checking the performance.
The larger span the transfer size has, the longer time this test will take. Here you can specify the test parameters such as Transfer size, Transfer length, and Transfer mode based on your demands.
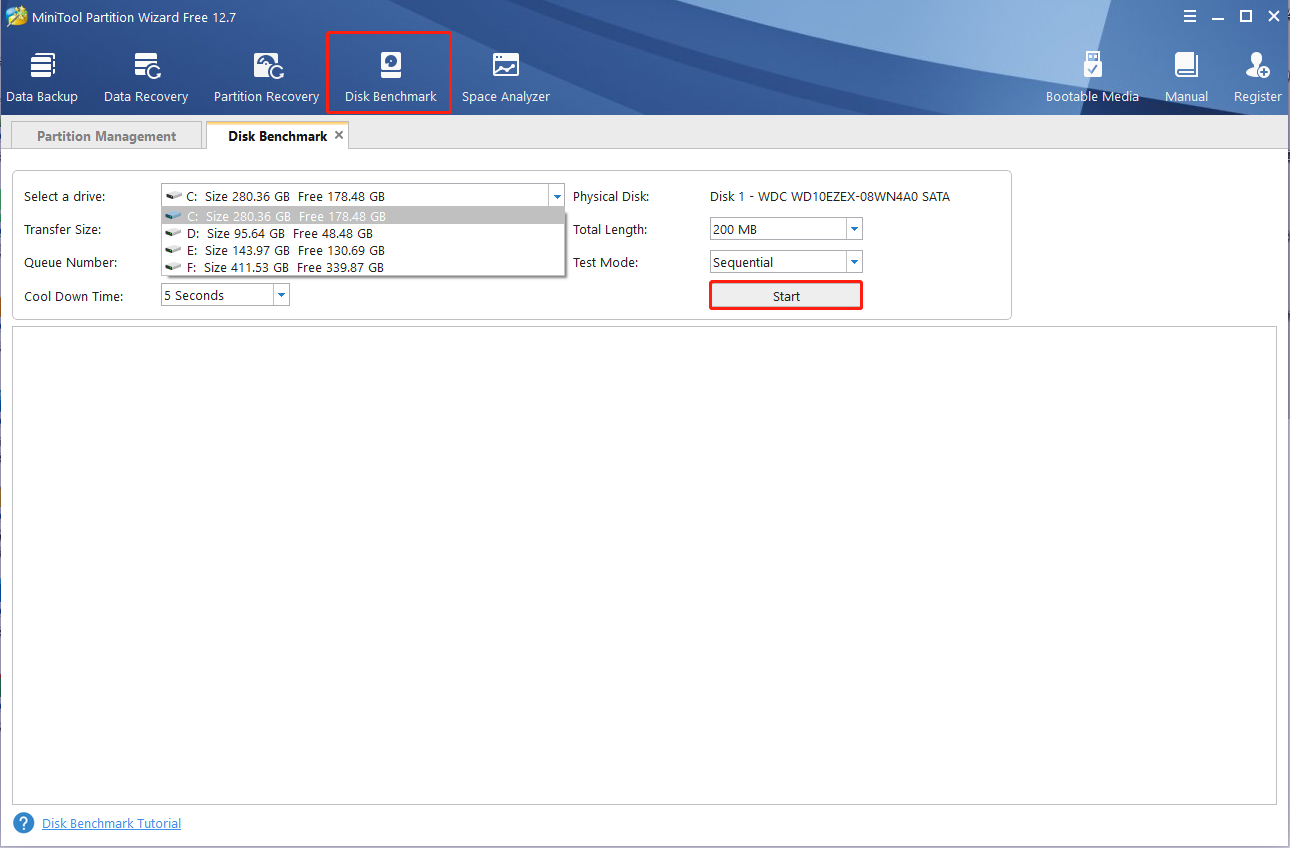
Step 3. Wait for the scanning process to complete. Once done, you can check the disk information such as transfer size, sequential reading/writing speed, etc.
Bottom Line
How to add disk performance on Task Manager? This method has explained the question in detail. If you have better solutions to the “disk column missing from Task Manager” issue, please share them with us in the following comment zone.
In addition, we highly recommend you use MiniTool Partition Wizard to check your disk performance. You can also contact us via [email protected] if you have any questions about the MiniTool software, and we will reply to you as soon as possible.

User Comments :