It’s not safe enough to use a laptop in a public situation. You may be worried about the leak or damage of our files on the computer when someone plugs their USB cable into your computer. Don’t worry! Minitool Partition Wizard introduces four ways to help you resolve the problem.
If you are an Internet cafe owner or another business owner who needs to provide your computers to other people. To keep your computers safe, you may don’t want to let others plug their U flash disks on your computers. You may want to disable USB ports on your computer.
Or if you are the one who needs to lend your computer to other people. You may be worried about the security of your computer and hope to find a way to disable USB ports on your computer.
This post shows you how to disable USB ports on your laptop using 4 ways. You can choose one of the ways to try.
Method 1: Disable USB Ports via Device Manager
Device Manager is a component of the Microsoft Windows operating system. You can use it to view and control the hardware attached to your computer. Then, you can use Device Manager to disable the USB ports on Windows 11 laptops.
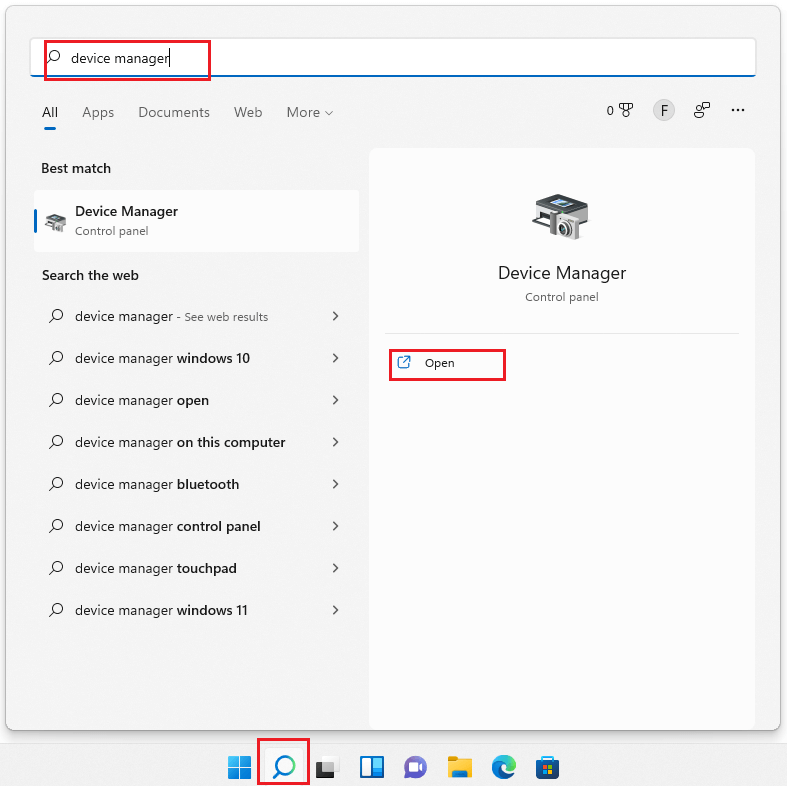
Step1: Click the Search icon on the taskbar and input “device manager”. Then click Open on the right panel of Device Manager.
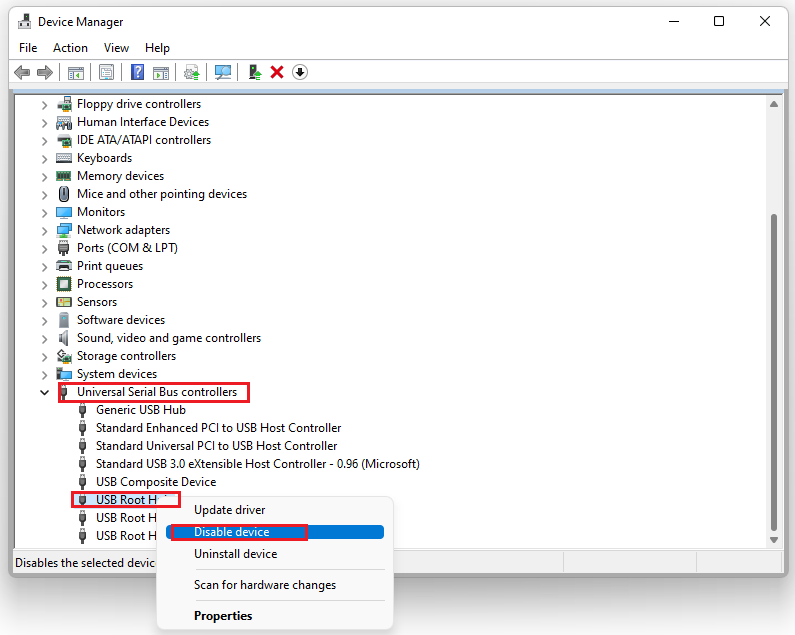
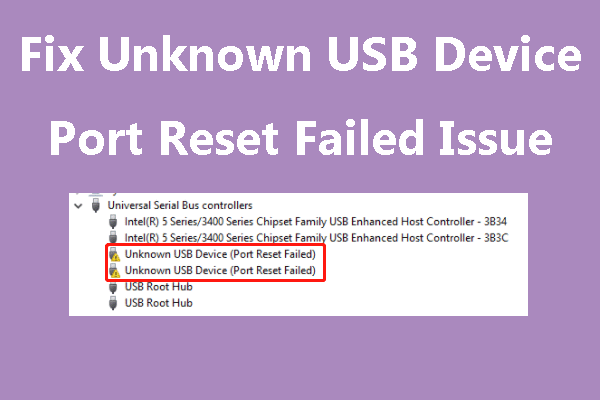
Step2: Scroll down the Universal Serial Bus controllers and right-click USB Root Hub (USB 3.0). Then click Disable device from the right-click menu.
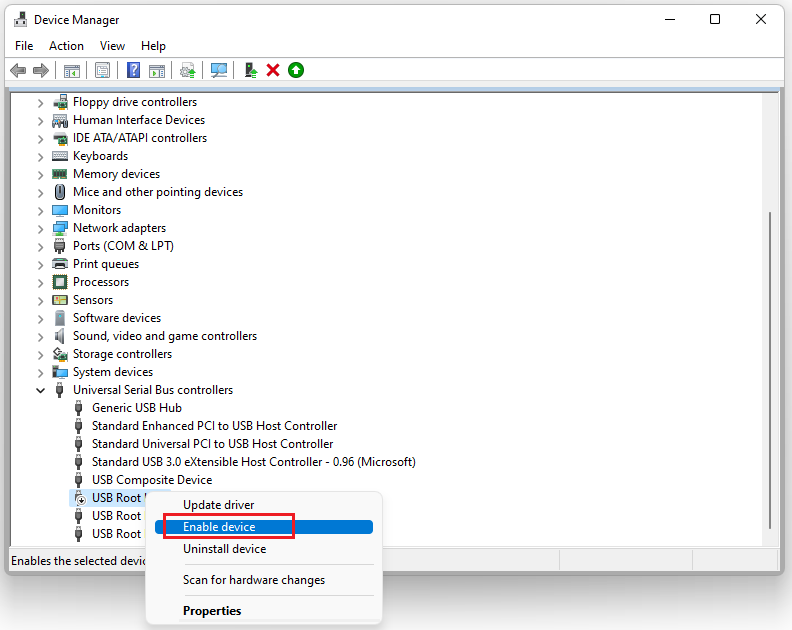
Step3: If you want to enable the USB ports again, click Enable device from the right-click menu of USB Root Hub.
Method 2: Disable USB Ports via Registry Editor
There are also some other ways. You can try to disable USB plots via Registry Editor. Here’re the steps below:
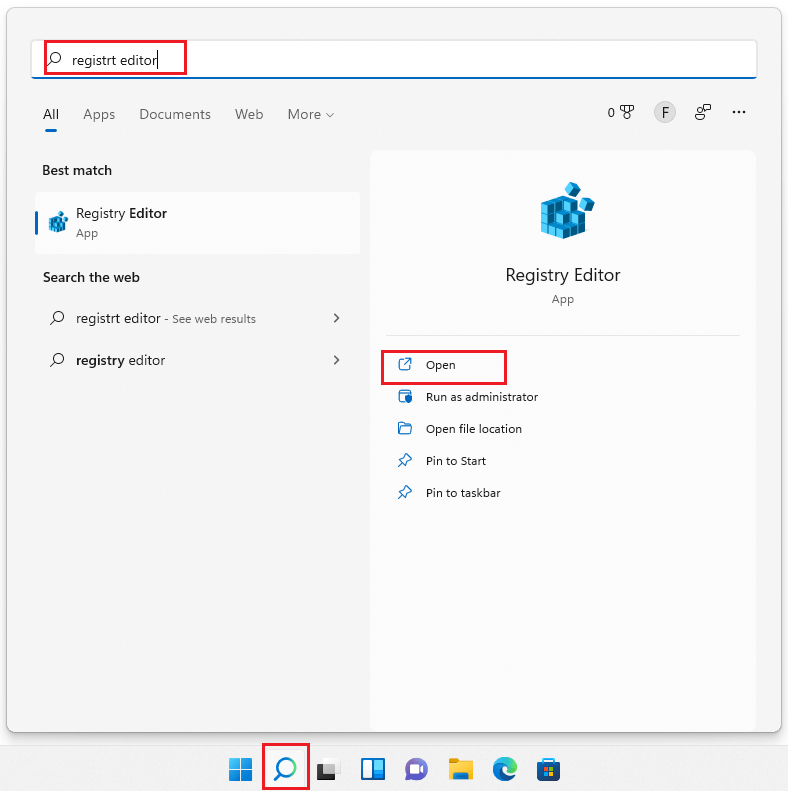
Step1: Click the Search icon on the taskbar and input “registry editor”. Then click Open on the right panel of Registry Editor.
Step2: Navigate to the path: ComputerHKEY_LOCAL_MACHINESystemCurrentControlSetServicesUSBSTOR.
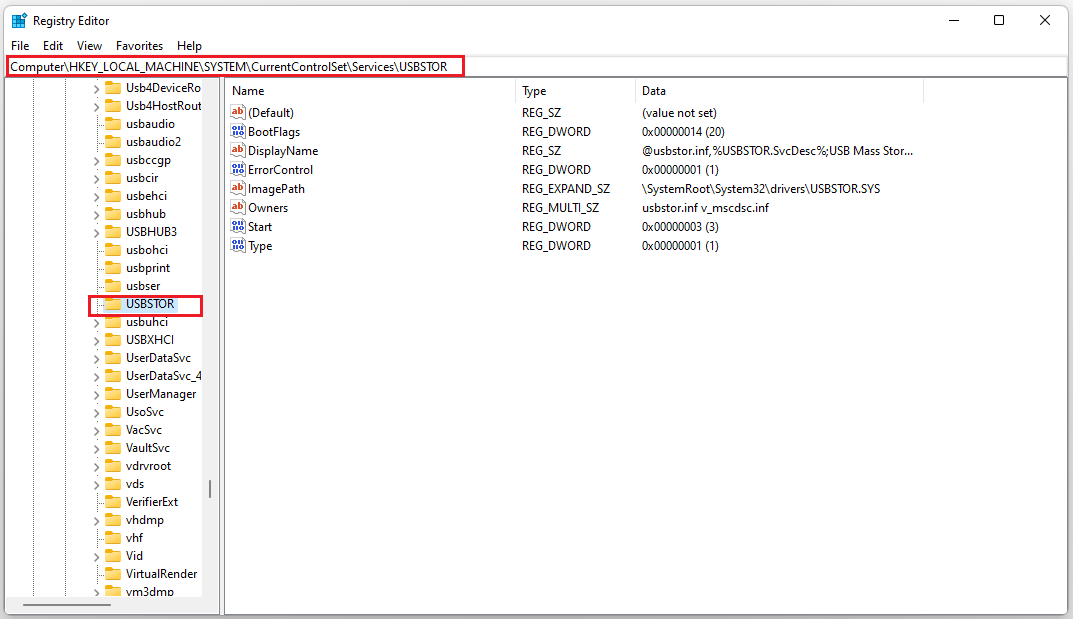
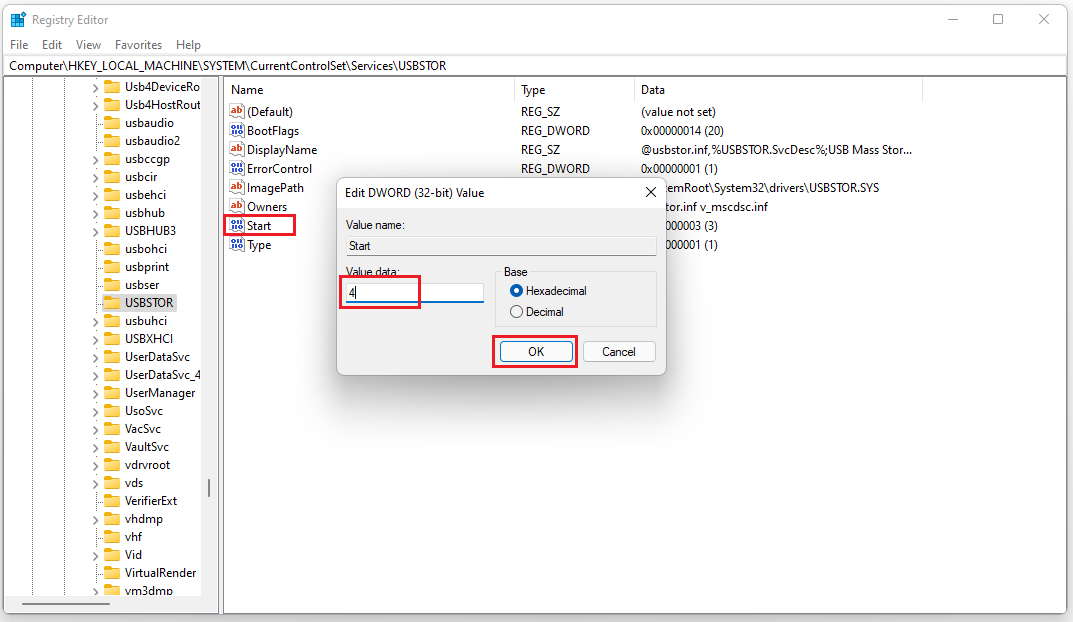
Step3: Double-click the Start DWORD key on the right panel, and change the number in the Value data box to 4. Then click OK.
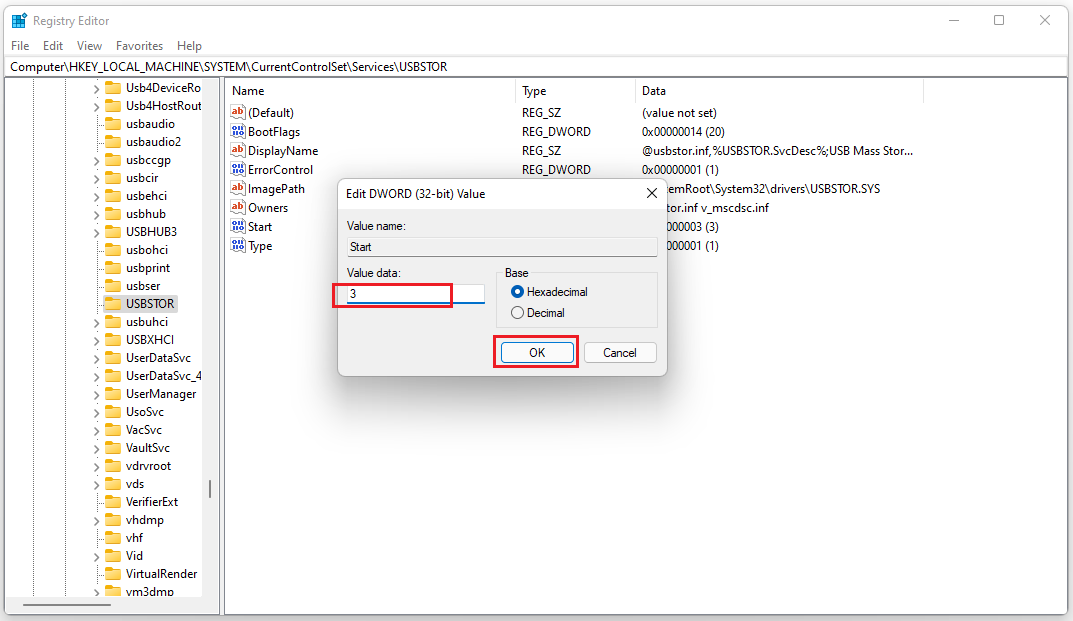
Step4: If you want to enable the USB ports again, double-click Start and change the number of Value data to 3.
Method 3: Disable USB Ports via Local Group Policy Editor
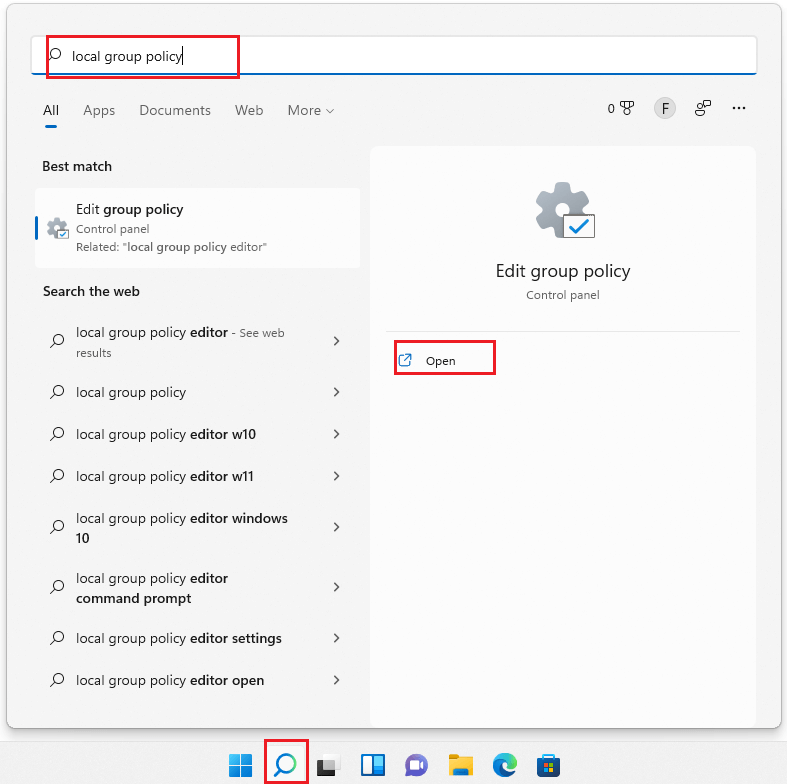
Step1: Click the Search icon on the taskbar and input “local group policy”. Then click Open on the right panel of Local Group Policy.
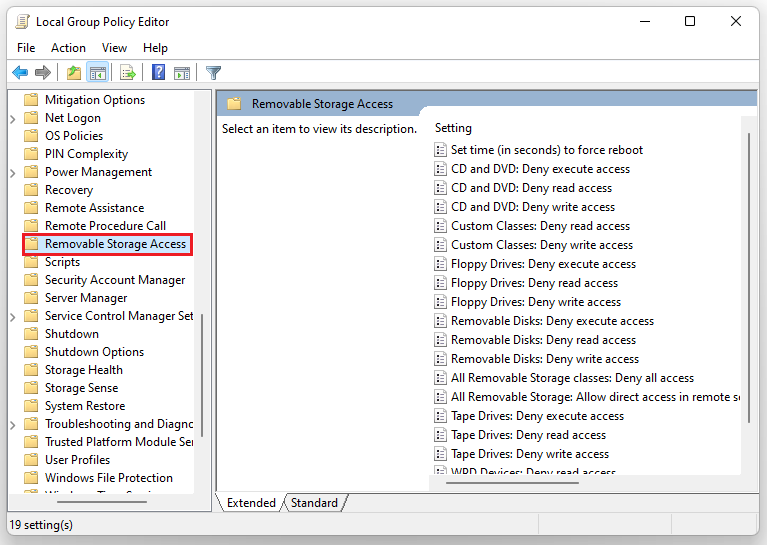
Step2: Navigate to the path: Computer Configuration Administrative Templates System Removable Storage Access.
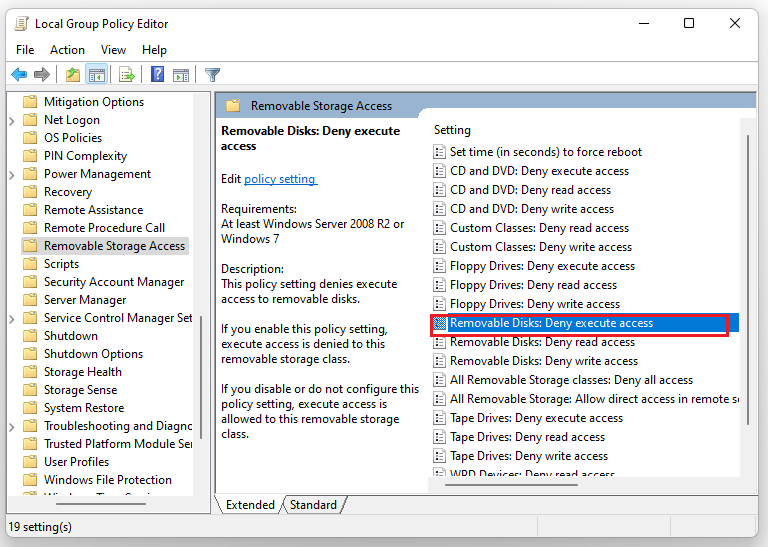
Step3: Double click on the Removable Disks on the right pane: Deny execute access.
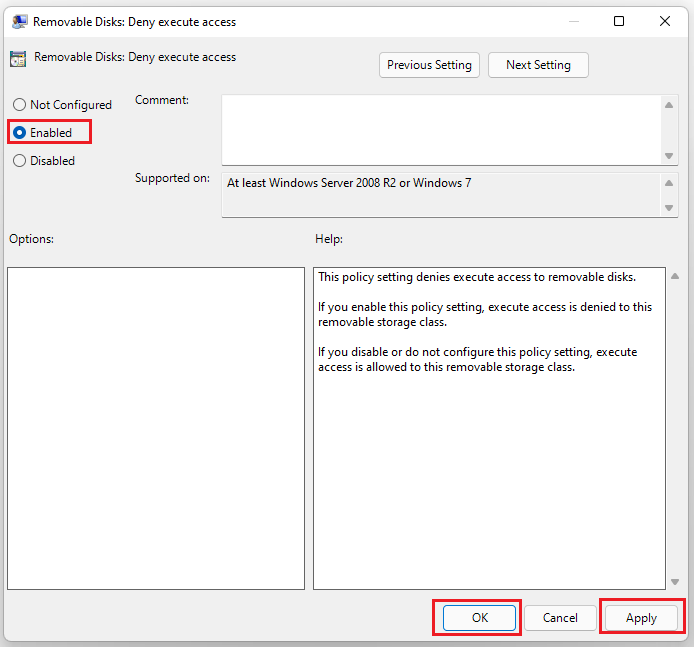
Step4: Select Enabled and click Apply, then click OK to close the dialog.
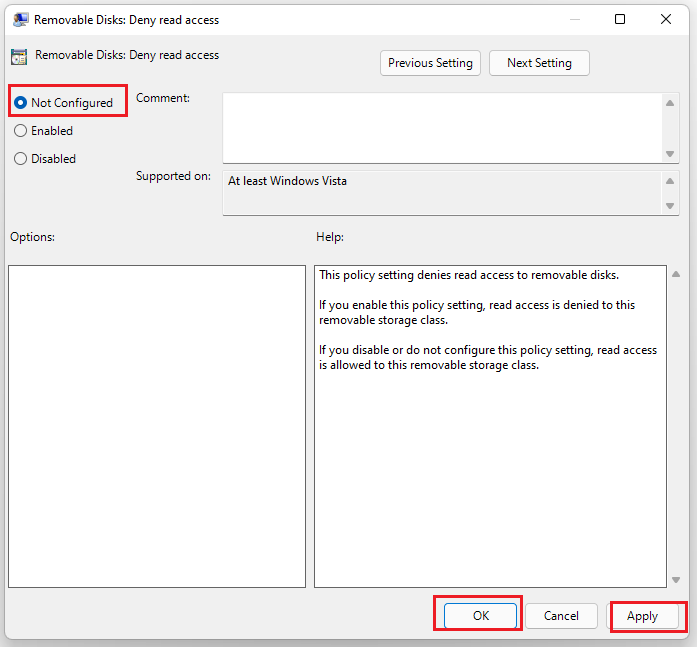
Step5: Double-click on the Removable Disks: Deny read access, and select the Enabled option.
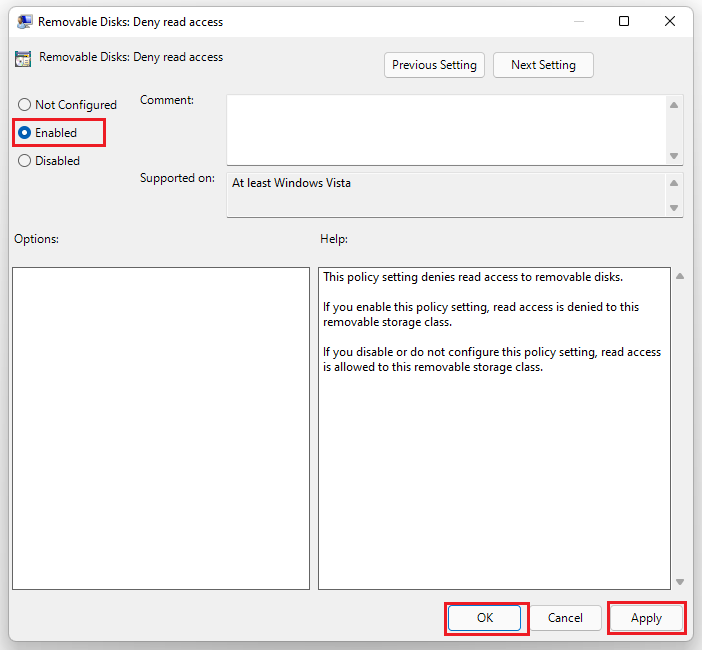
Step6: If you want to use the USB ports again, you need to select Not Configured.
Method 4: Disable USB Ports via CMD
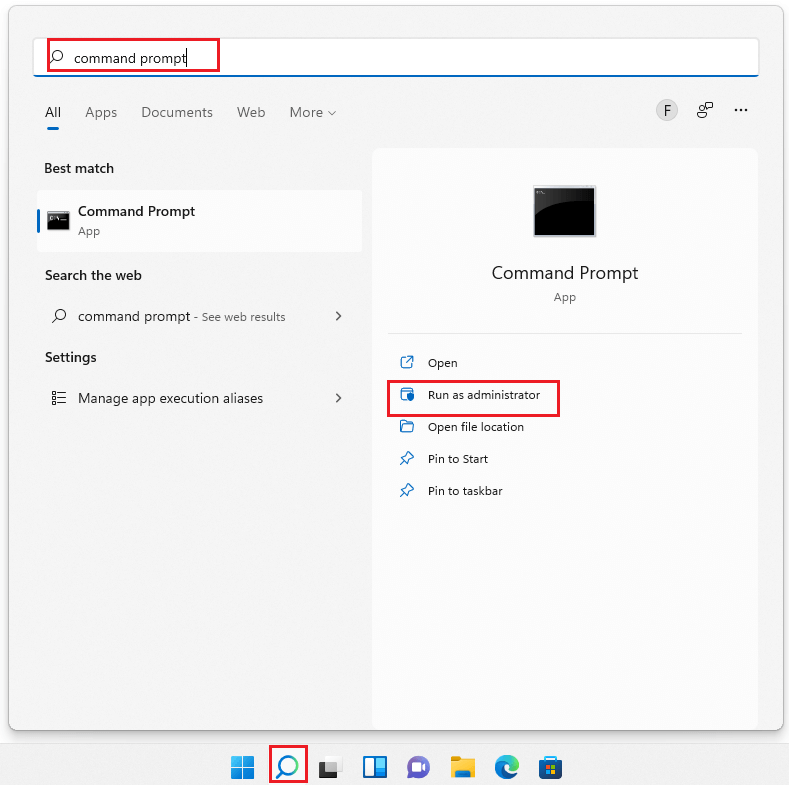
Step1: Click the Search icon on the taskbar and input “command prompt”. Then click Run as administrator on the right panel of Command Prompt.
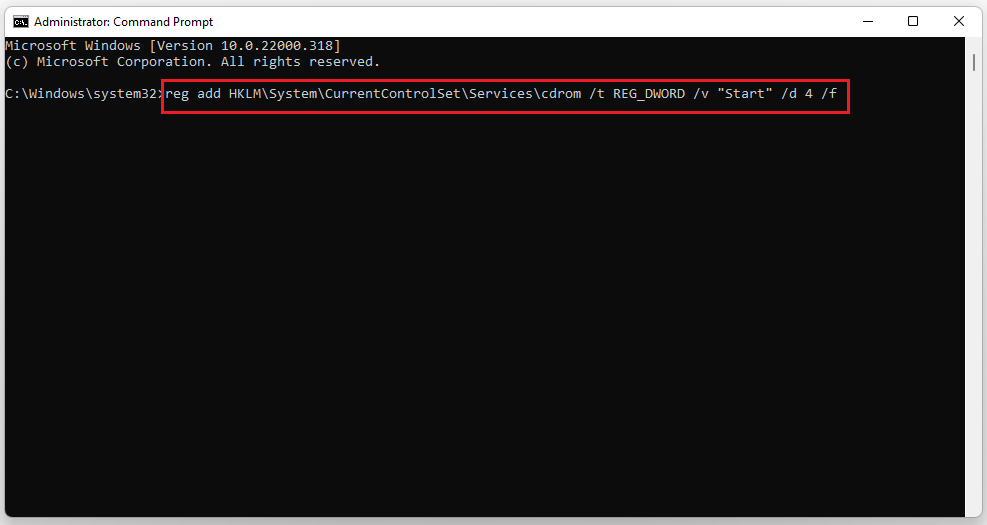
Step2: If you want to disable the USB ports on Windows 11 laptop, you need to input the command below: reg add HKLMSystemCurrentControlSetServicescdrom /t REG_DWORD /v “Start” /d 4 /f.
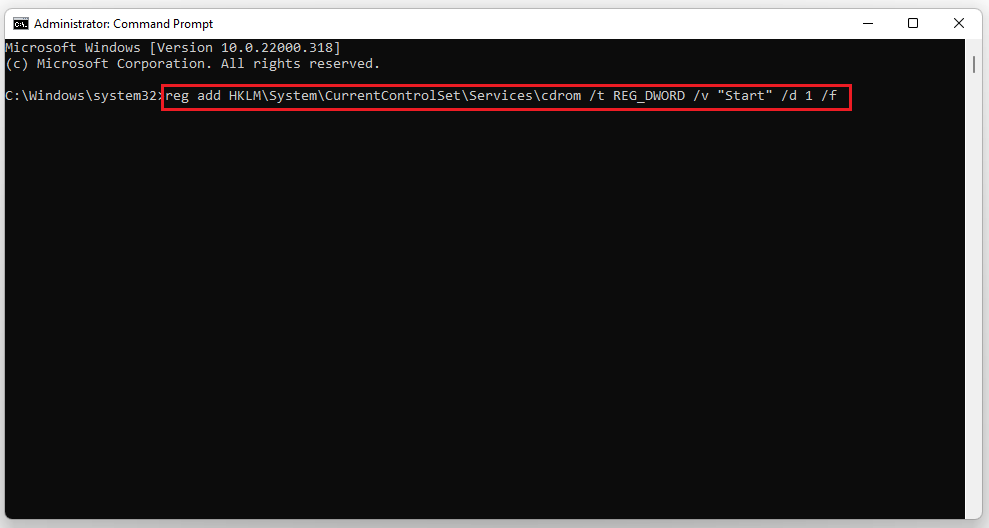
Step3: If you want to disable the USB ports on Windows 11 laptop, you need to input the command below: reg add HKLMSystemCurrentControlSetServicescdrom /t REG_DWORD /v “Start” /d 3 /f.
These are the four methods to disable USB ports on Windows 11 laptops. If you want to disable your computer’s USB ports, you can try this way. For any questions about how to disable USB ports on Windows 11 laptops, leave comments below. We will give you a solution as soon as possible.




User Comments :