Do you know how to disable Cortana in Windows 10? This article from MiniTool will show you how to disable Cortana with 3 different methods. If you don't want to use Cortana, you can follow the methods in this article to disable it.
Cortana is a virtual assistant created by Microsoft for Windows 10, Windows 10 Mobile, Windows Phone 8.1 and some other products and devices developed by Microsoft. As a digital assistant, it is capable of helping you on many tasks such as sending emails, playing music, and so on.
However, Cortana also has some defects. For example, it always launches the Microsoft Edge browser when you search something. And some Windows users also are concerned about the privacy issue. It will collect some personal information to be able to assist you more efficiently, including information about your contacts, calendar, location, internet history and favorites, and more.
Due to these reasons, many users want to disable Cortana Windows 10. Windows 10 users used to be able to disable Cortana, but Microsoft removed that simple toggle switch in its Anniversary Update.
Is there any other way to disable Cortana in Windows 10? How to Disable Cortana Windows 10? Well, read on, and then you will find the answers.
Disable Cortana Windows 10 via Registry Editor
You can disable Cortana Windows 10 completely via Registry editor if you are running Windows 10 Home Edition. You can also do it this way if you have Windows 10 Professional or Enterprise, but we do offer another way for Pro and Enterprise users in this post, which is much easier. However, if you are running Windows 10 Home edition, you can only disable Cortana via the Windows Registry.
Let’s have a look at how to disable Cortana in Windows 10 via Registry at first. Here are the detailed steps.
Step 1. Right-click the Start Menu icon and click Run, or press Windows + R key on your keyboard.
Step 2. A window will pop up, then type regedit and hit Enter.
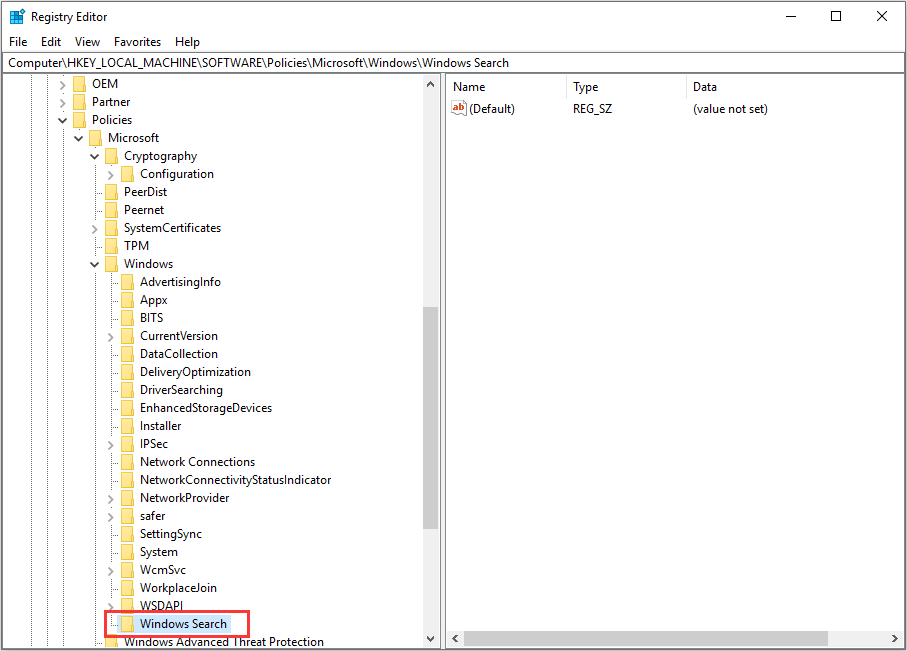
Step 3. Navigate to HKEY_LOCAL_MACHINESOFTWAREPoliciesMicrosoftWindows.
Step 4. Right-click the Windows folder and select New > Key. Then name it Windows Search.

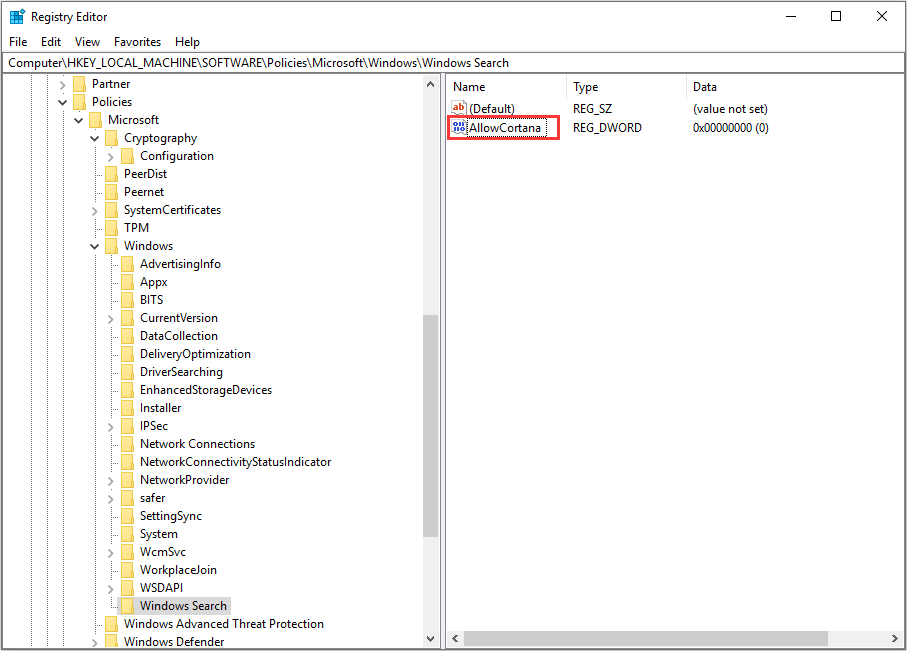
Step 5. Right-click it to select New > DWORD (32-bit) Value, and name it AllowCortana.

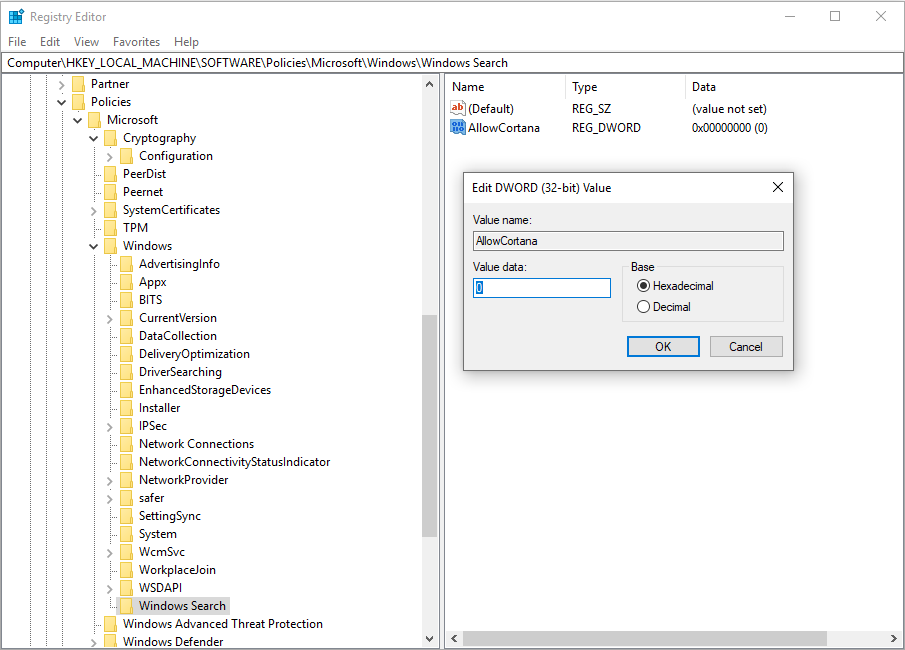
Step 6. Double click on AllowCortana and set the value to 0.

Then you can close the Registry Editor and restart your computer.
If you change your mind and want to turn Cortana back on, you can delete the AllowCortana key that you created or set the value to 1.
Disable Cortana Windows 10 via Group Policy
If you are a Windows 10 Pro and Windows 10 Enterprise user, you can also disable Cortana via the Group Policy Editor, which is a little easier and safer.
Step 1. Press Windows + R on your keyboard. Type gpedit.msc and hit Enter.
Step 2. Navigate to Computer Configuration > Administrative Templates > Windows Components > Search.
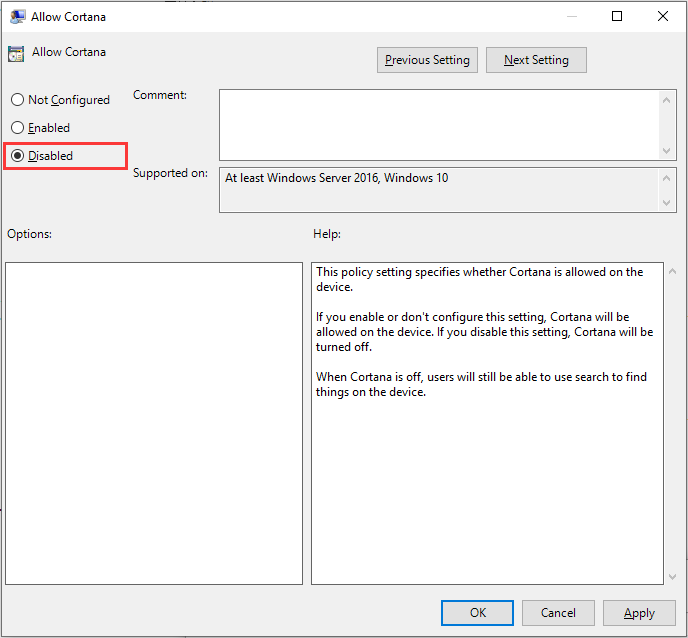
Step 3. On the right side of the window, look for the Allow Cortana setting and double click it.
Step 4. Then in the pop-up window, select the Disabled, and click OK.

Then you can disable the Group Policy Editor and restart your computer.
To turn on the Cortana in Windows 10 again, you can follow the same steps and select the Enabled radial, and click OK at last.
Conclusion
If you are a Windows 10 Pro and Enterprise user, you can choose to disable Cortana Windows 10 via the Windows Registry or Group Policy Editor. For my perspective, to disable Cortana Windows 10 with Group Policy Editor is simpler.
Many people assume that Windows 10 disable Cortana is very complicated. After reading this post, you should know how to how to disable Cortana in Windows 10 and how simple it is.


User Comments :