Do you know how to create administrator account in Windows 10? In this post, MiniTool software puts together 3 methods to help you create admin account. Keep reading to get the detailed instructions.
Commonly, a local user account will be created when you install Windows, and you will use this account to log into the computer later.
But sometimes, the administrative privileges are required when you are performing certain operations with this user account. So, you might want to create an administrator account and log in with it. Besides, creating another account with administrative rights is always a good solution to various Windows account issues.
How to create administrator account in Windows 10? Here’s the method!
Method 1: Create Administrator Account via Settings
This should be the most popular method to create admin account among ordinary users, as they can easily complete the operation all by themselves with the onscreen instructions. The detailed steps are as below.
Step 1: Press Windows + I to open Windows Settings app.
Step 2: Go to Accounts category.
Step 3: Choose Family & other users section from the left pane and click Add someone else to this PC in the right pane.
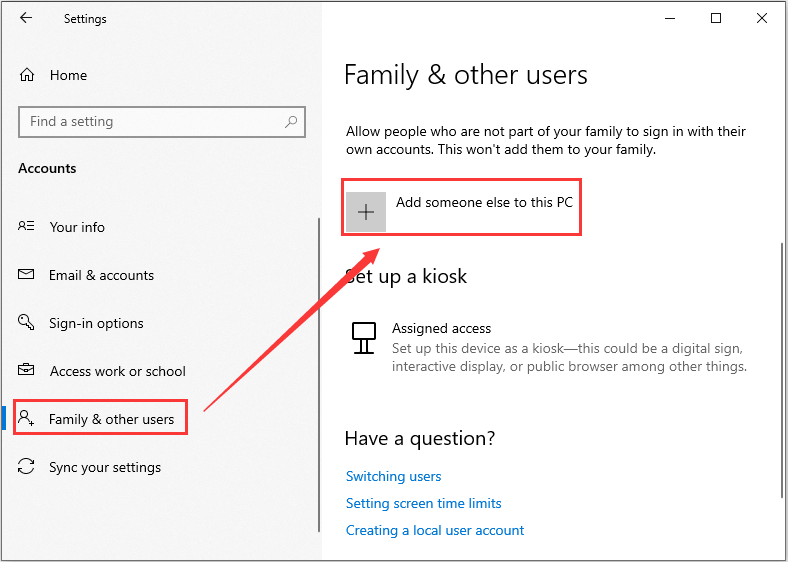
Step 4: Click I don’t have this person’s sign-in information in the pop-up window.
Step 5: Click Add a user without a Microsoft account.
Step 6: Enter a user name for the new account and assign a password as your needs. Click Next to continue.
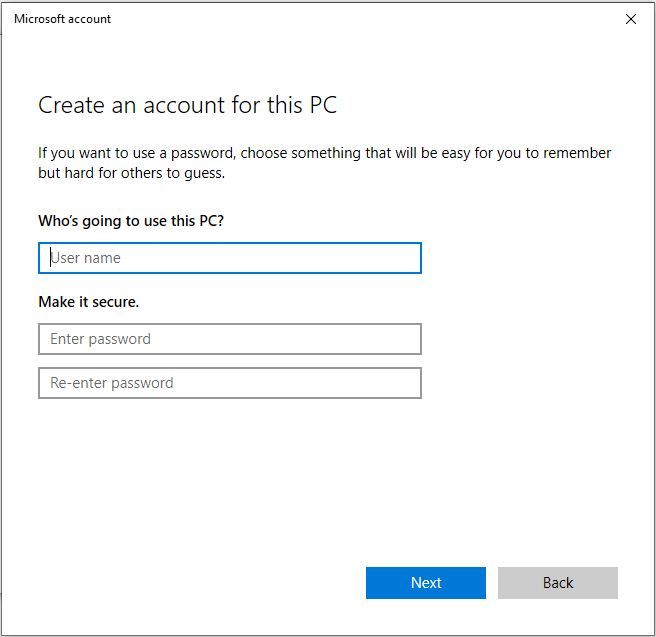
Step 7: Now, you need to set the account to administrator type, because any new account is created as a standard one by default. To do that, click Change account type and choose Administrator from the list of Account type. Click OK to save the changes.
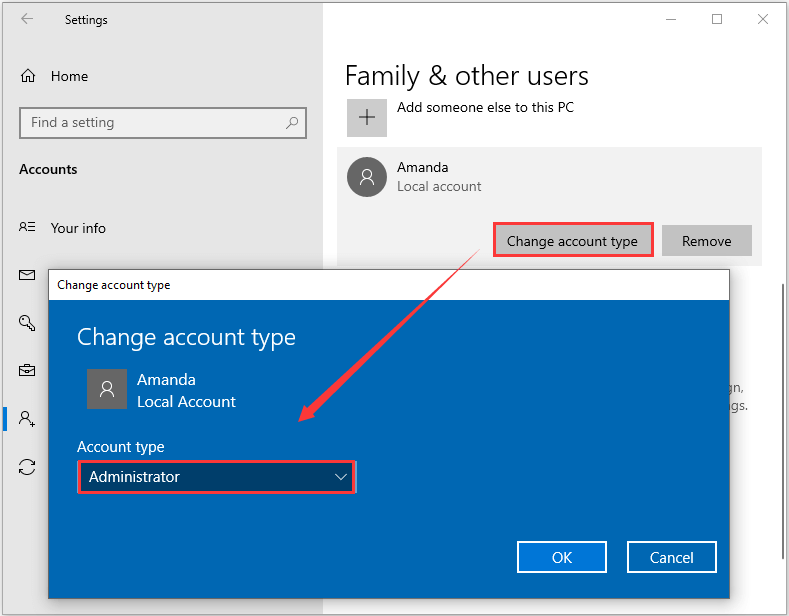
Method 2: Create Administrator Account via Command Prompt
Alternatively, you can create administrator account with certain command lines in Command Prompt, which is a rather simple method. Let’s have a closer look at this method.
Step 1: Press Windows + R to invoke Run dialog.
Step 2: Input cmd and press Ctrl + Shift + Enter to run Command Prompt as administrator.
Step 3: Input the following command lines and press Enter after each to execute them:
- net user Amanda /add (to create a local user account with the given username)
- net localgroup Administrators Amanda /add (to add the newly created account to the Administrator group)
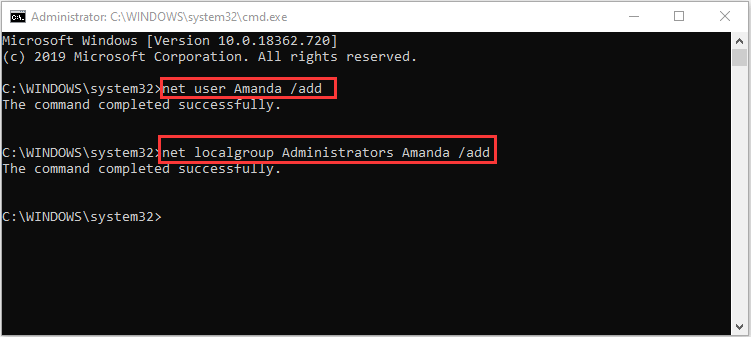
When the commands completed successfully, the new administrator account was also created successfully.
Method 3: Create Administrator Account via Local Users and Groups
Finally, you can also go to Local Users and Groups to create a new local administrator account. Just follow the steps below:
Step 1: After opening Run window, type lusrmgr.msc and click OK to enter the Local Users and Groups console.
Step 2: Right-click Users from the left pane and click New User.
Step 3: In the pop-up dialog, assign the username of the new account and enter password if needed. Click Create button.
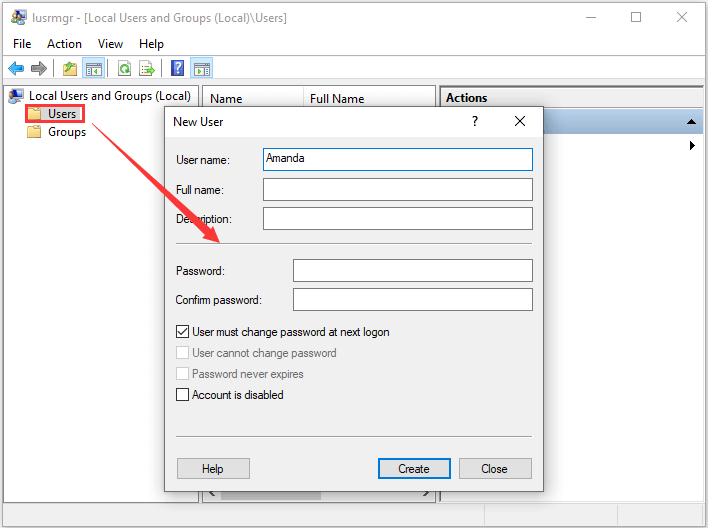
Step 4: The new account will be listed in the right pane. Double-click the account to open its Properties.
Step 5: Switch to the Member of tab and click Add. In the pop-up window, type Administrators in the empty box and click OK to add the new account to the administrator group.
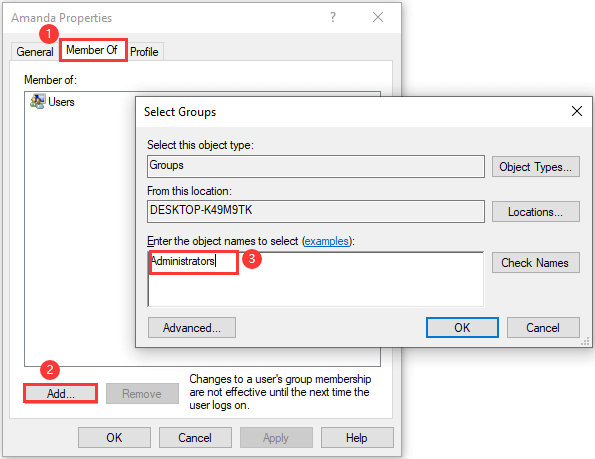
Step 6: Click Apply and OK button to save the changes you have made just now.
Here’s all about how to create administrator account in Windows 10. After successfully creating a new administrator account, you can restart your computer or log off the current account to sign into the new account.

User Comments :