Many users encounter the Corsair SSD not detected issue on their computers and don’t know how to fix it. If you are also trying to figure it out, this post from Partition Magic is worth reading. It analyzes the issues in two scenarios and offers some feasible solutions.
About Corsair SSD Not Detected
Some people encounter the Corsair SSD not detected error on their computers. This error is annoying for them because it delays their work. After investigating many reports on the Internet, I found that this error mainly occurs in the following two different situations.
- Corsair SSD not detected in Windows.
- Corsair SSD not detected in BIOS.
The first situation is caused by a variety of reasons. Here are some of the most common reasons:
- SSD is new and has not been initialized.
- SSD firmware is outdated.
- SSD is damaged.
- SSD partition is missing a drive letter.
The second situation is mainly caused by incorrect BIOS settings and incorrect SSD installation.
To solve this problem, you need to choose the appropriate method depending on the specific situation. The following content outlines several solutions for both situations.
Recover Data from Corsair SSD
Before solving the Corsair SSD not detected issue, you’d better recover data from the Corsair SSD to avoid making data unrecoverable.
How to recover data safely and easily? Here I highly recommend you use MiniTool Partition Wizard. It is a professional and reliable data recovery tool that enables you to perform SSD data recovery.
Besides, it is also a comprehensive partition manager that contains a wide range of features. For instance, you can use this program to partition a hard drive, test SSD speed, convert MBR to GPT, rebuild MBR, clone a hard drive, and more.
Here’s how to recover data from Corsair SSD with MiniTool Partition Wizard.
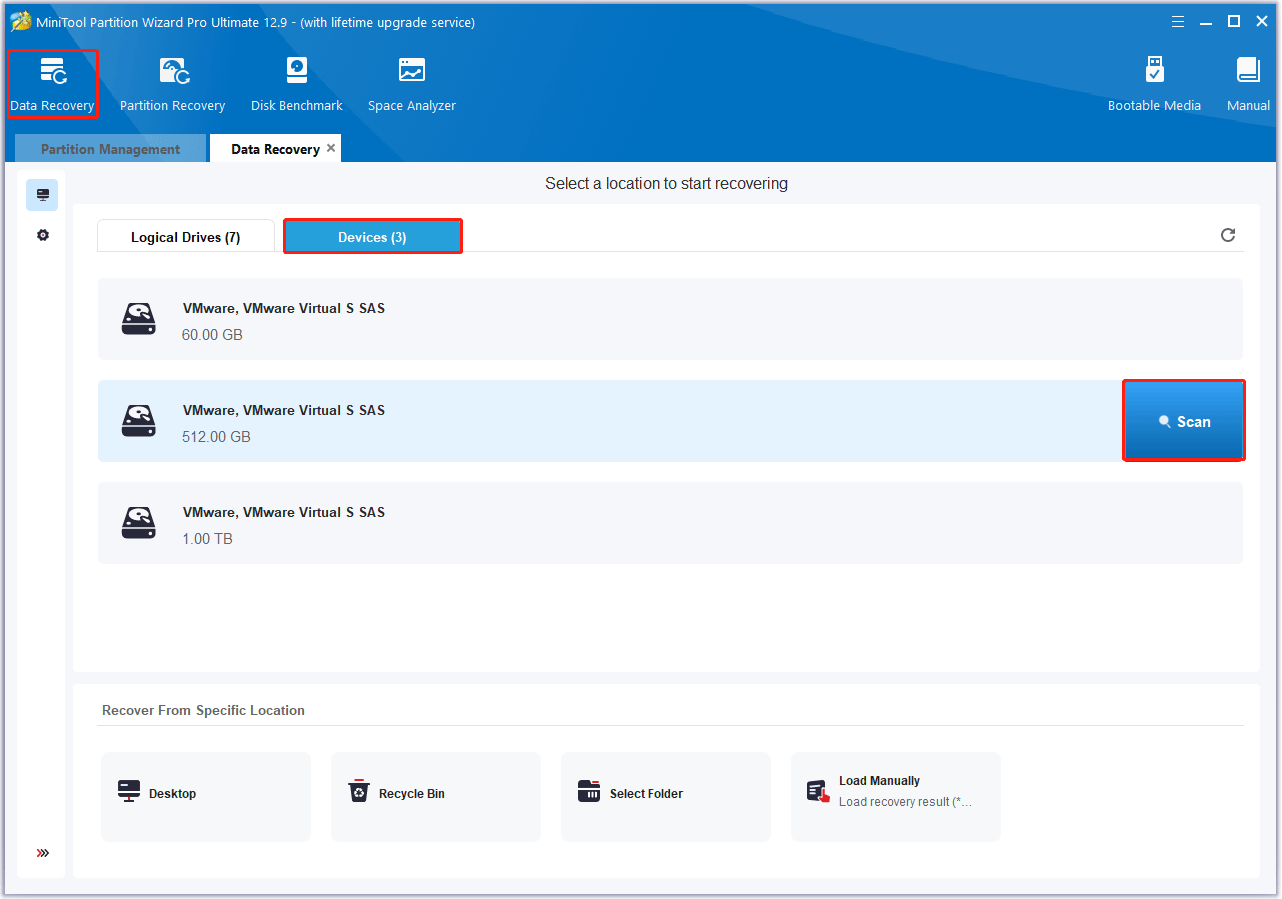
Step 1: Download and install MiniTool Partition Wizard on your PC. Then launch it to get its main interface and click on Data Recovery in the top toolbar.
MiniTool Partition Wizard DemoClick to Download100%Clean & Safe
Step 2: In the Data Recovery window, go to the Devices tab, move your cursor to the target SSD, and then click on the Scan button.
Step 3: After that, you can see the program scanning your disk. While the scan is in progress, you can preview the scanned files and click the Pause or Stop icon to end it when you find all the necessary files.
Step 4: Once the scanning is done, check the files you want to recover, and then click on Save.

Step 5: In the pop-up window, choose a directory to store the selected files. You’d better choose a different drive to save these files. Or, the lost/deleted data could be overwritten.
Now, you can take the following measures to solve the Corsair SSD not showing up problem.
Case 1. Corsair SSD Not Detected in Windows
When faced with your Corsair SSD not detected in Windows issue, you can try the following solutions.
Solution 1. Check the Connection
If there is a problem with your Corsair SSD connection, you can easily run into the Corsair SSD not detected issue. In this case, you need to check if all the cable connections are working fine.
Solution 2. Initialize Corsair SSD
If you are using a Corsair SSD for the first time and encounter the problem of the Corsair SSD not showing up, you need to check whether it has been initialized. If it has not been initialized before, you can try to initialize it and create a new partition to fix this error. Here’s how to do it:
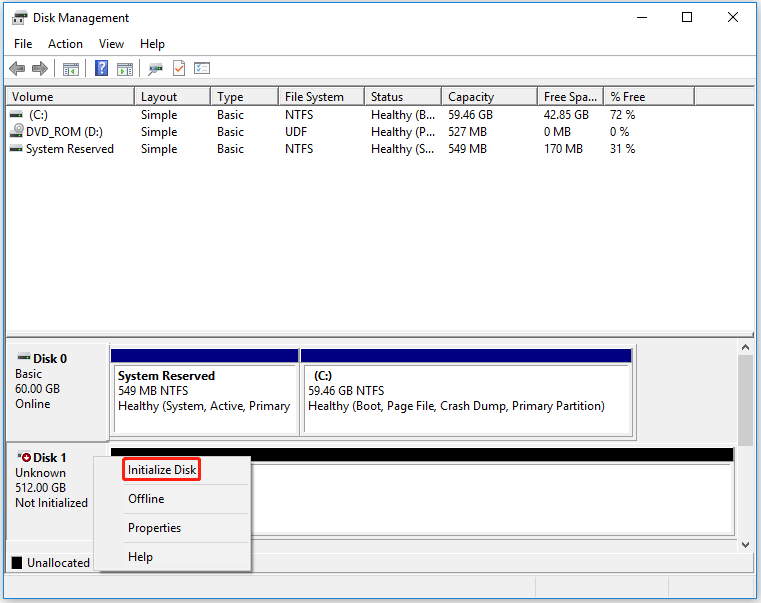
Step 1: Right-click on the Windows icon and select Disk Management.
Step 2: Find the SSD that is not showing up. If it shows “Not Initialized”, right-click on the disk and select Initialize Disk.
Step 3: In the pop-up window, choose a partition style MBR or GPT based on your situation and click on OK.

Step 4: Next, you need to create one or more partitions with assigned drive letters to make it visible. Right-click on the unallocated space and click on New Simple Volume.

Step 5: Follow the on-screen instructions to create a new volume.
Solution 3. Assign a Drive Letter to SSD Partition
Sometimes your SSD is properly connected to your PC and shows up in Device Manager, but not in File Explorer. In this case, it’s possible that for some reason the drive letter is missing on the SSD partition, so you can’t access it in Windows Explorer.
To do this, you can assign a drive letter to the SSD partition in Disk Management.
Step 1: Open Disk Management again.
Step 2: Right-click on the Corsair SSD that has no drive letter and then choose Change Drive Letter and Path from the context menu.
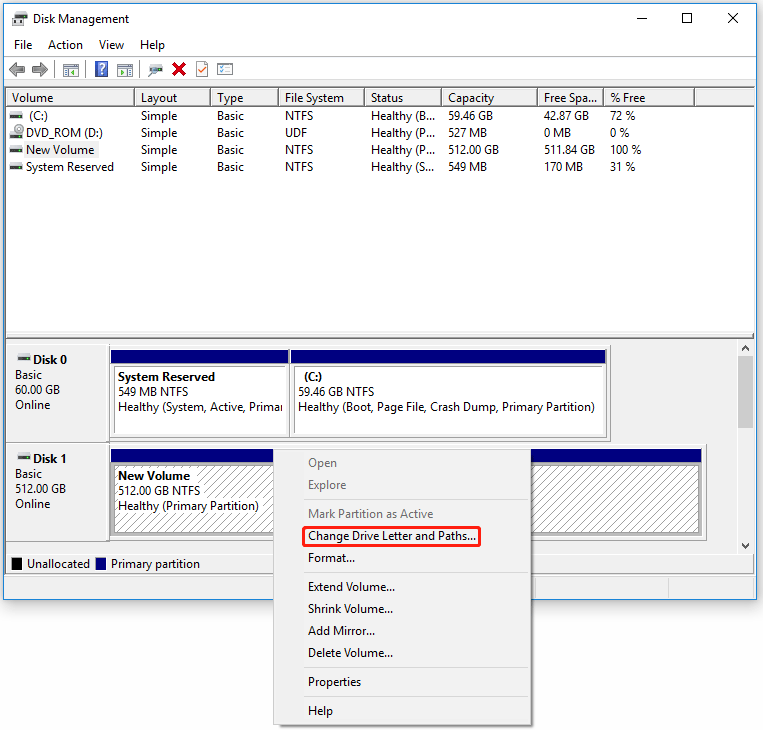
Step 3: Click the Add button to continue. Then assign a drive letter and click on OK to confirm.
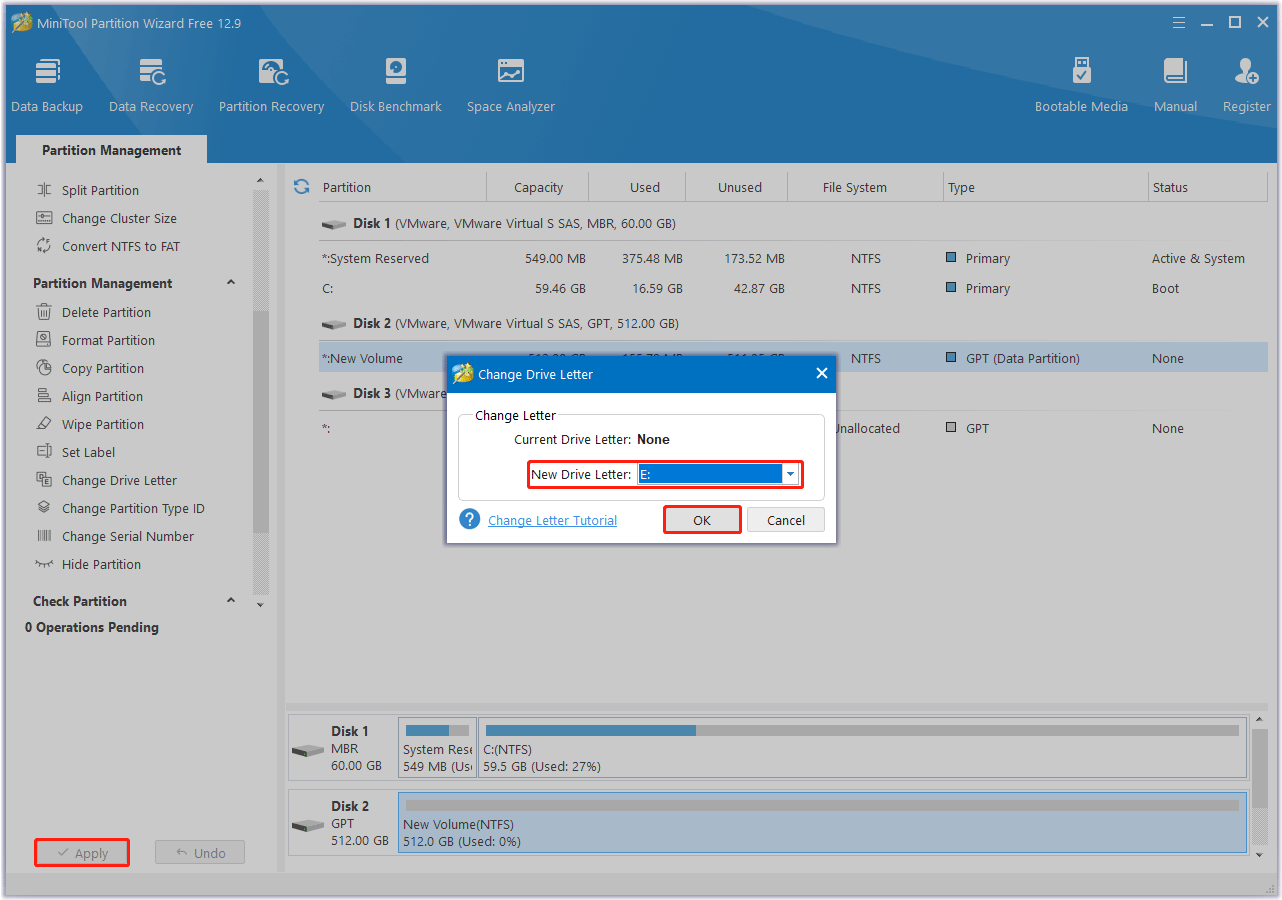
Alternatively, you can use the Change Drive Letter feature of MiniTool Partition Wizard. Here are the detailed steps:
MiniTool Partition Wizard FreeClick to Download100%Clean & Safe
Step 1: Launch MiniTool Partition Wizard to enter the main interface.
Step 2: Select the SSD partition and click the Change Drive Letter option in the left pane.
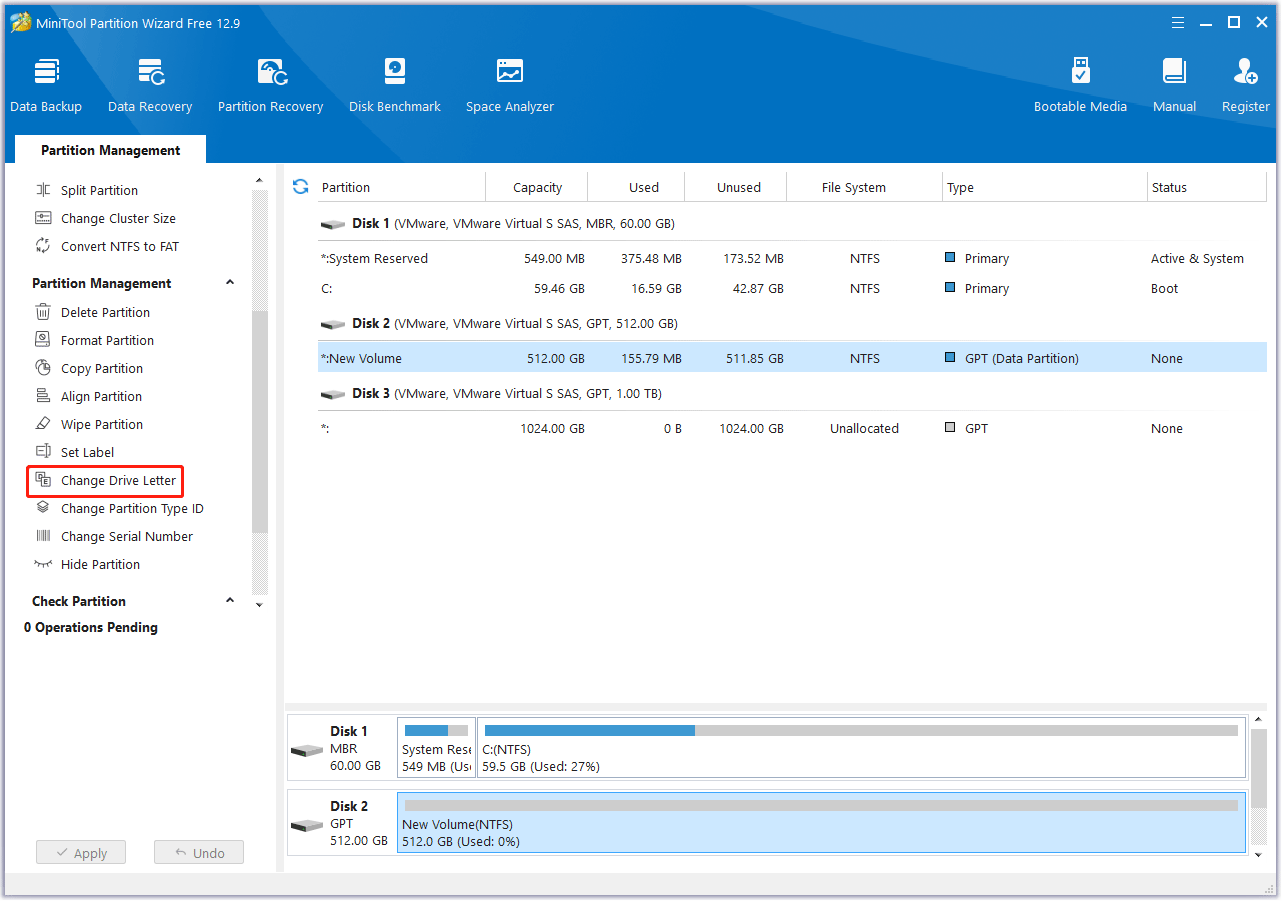
Step 3: In the Change Drive Letter window, click the down arrow to open the drop-down menu and select the new drive letter here. Then click the OK button.
Step 4: Finally, click Apply and Yes to perform the changes.
Solution 4. Scan for Hardware Changes
What to do if you find your Corsair SSD not detected in Device Manager? This may be due to the device manager not updating the hardware in a timely manner. Don’t worry. You can follow the steps below to scan for hardware changes.
Step 1: Right-click on the Windows icon and select Device Manager.
Step 2: In the Device Manager window, right-click Disk drivers and choose Scan for hardware changes.
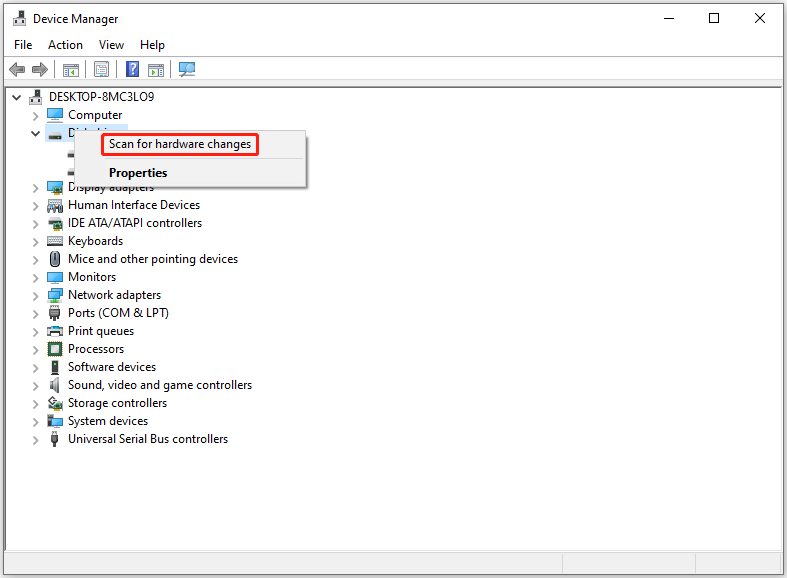
Step 3: After that, check if the target Corsair SSD appears.
Solution 5. Run the Hardware and Devices Troubleshooter
Hardware and Devices troubleshooter can be used to find and fix hardware and device problems. So, you can also use it to detect and fix the Corsair SSD not detected problem. To run the Hardware and Devices troubleshooter, you can do the following:
- Type cmd in the Search box, and then you can see the results under Best Match.
- Right-click on Command Prompt and choose Run as administrator.
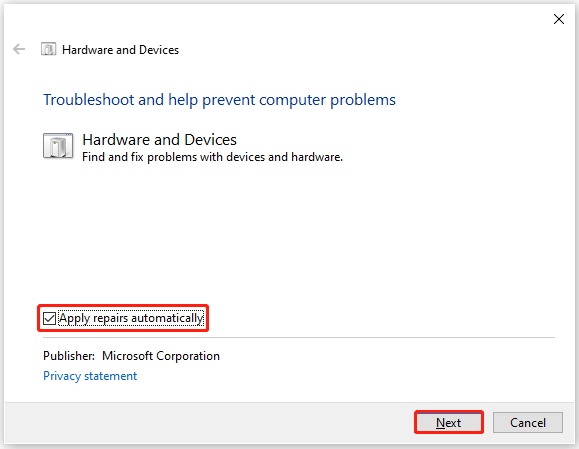
- In the Command Prompt window, type msdt.exe -id DeviceDiagnostic and press Enter.
- Click Advanced and check if the box for Apply repairs automatically is checked. If not, tick it.
- Then, click on Next to run the troubleshooter. After that, wait patiently for Windows to detect and fix the problem.
- After it’s done, check if the error has been resolved.
Solution 6. Format Corsair SSD
Your Corsair SSD does not get recognized if the file system is not compatible with your Windows PC. So, you should format it to a compatible file system.
How to format the Corsair SSD on Windows? Microsoft provides several built-in tools that you can use to format your SSD, including Diskpart, Disk Management, and File Explorer.
However, sometimes you may encounter “Diskpart has encountered an error incorrect function” and “Virtual Disk Service Error” while using Diskpart; “All options are greyed out in Disk Management”. Additionally, Disk Management cannot format SSDs larger than 32GB to FAT32.
Compared with these tools that come with Windows, MiniTool Partition Wizard has made a great breakthrough in partition management. It helps you format large drives, change drive letters, change cluster size, and more.
MiniTool Partition Wizard FreeClick to Download100%Clean & Safe
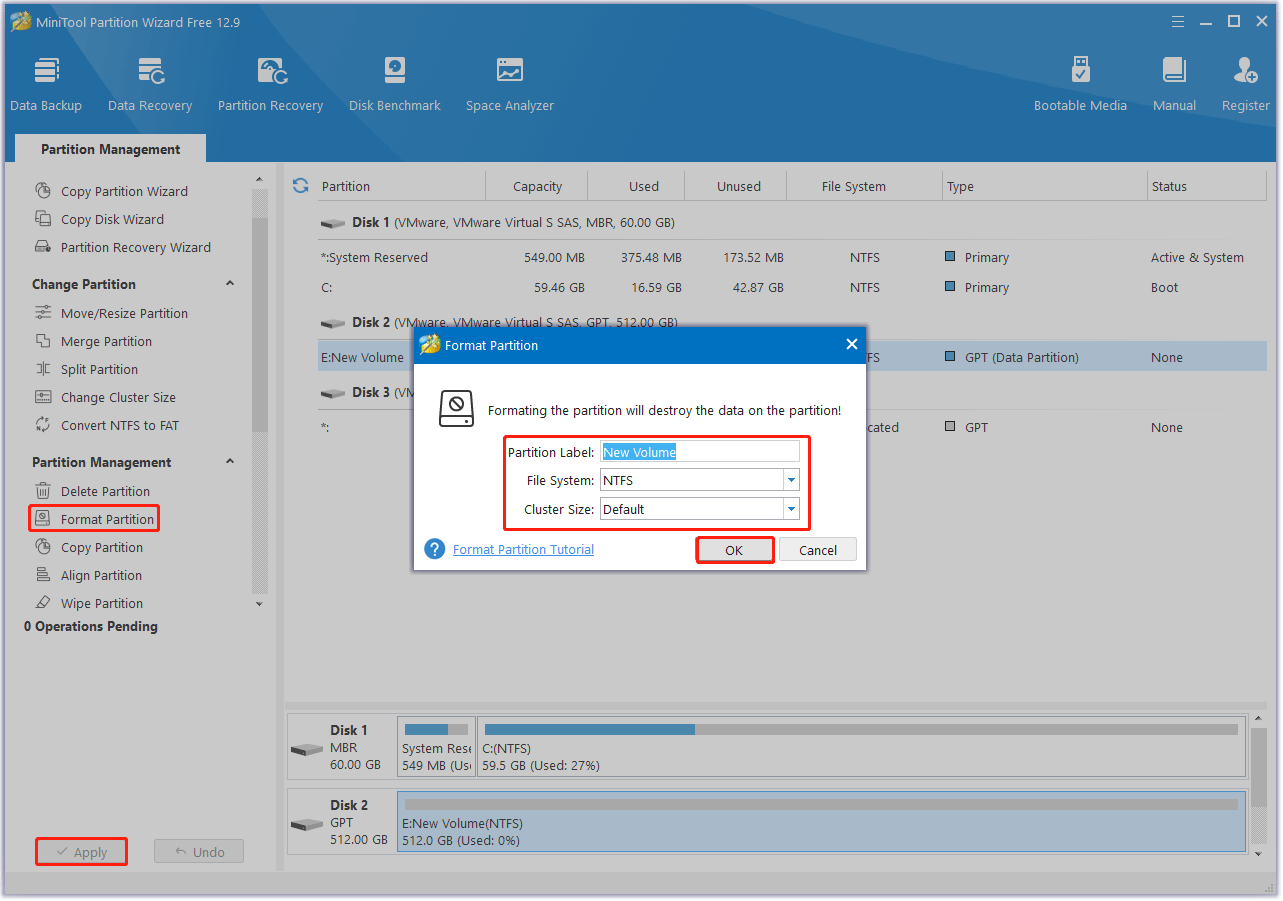
Step 1: Launch MiniTool Partition Wizard to enter its main interface.
Step 2: Select the partition on the SSD and click on Format Partition in the left panel.
Step 3: In the pop-up window, select a compatible file system from the drop-down menu and click on OK to save the changes you’ve made.
Step 4: Click on Apply to perform the formatting operation.
Case 2. Corsair SSD Not Detected in BIOS
If you encounter the Corsair SSD not detected in BIOS issue, you can try the following methods.
Solution 1. Configure BIOS Settings
Incorrect BIOS settings, such as disabling ports or incorrect boot order, can indeed cause issues with your Corsair SSD not detected in BIOS. If you want to use your SSD as a boot drive, you will need to change the BIOS settings to set your PC to boot from the drive. Here is the guide:
- Restart your computer and enter the BIOS setup. You can usually do this by pressing a specific key during the boot process, such as F2, F12, or Delete. The specific key may vary depending on the manufacturer of your computer.
- Navigate to the Advanced section in the BIOS. Make sure the SATA port to which the SSD is connected is enabled. If it is disabled, enable it.
- Go to the Boot section and confirm if the SSD is listed as a bootable device. If not, you should adjust the boot order to give priority to the SSD.
- Press F10 to save your settings and exit the BIOS. Your computer will restart.
Solution 2. Reinstall the Corsair SSD
In addition to the first method, you can also choose to reinstall the Corsair SSD to fix the Corsair SSD not detected in BIOS. Here are the steps to follow:
- Disconnect the power supply of the computer.
- Use a screwdriver to open the computer case.
- Disconnect the Corsair SSD and cables.
- Wait for a few seconds and then reinstall it.

Bottom Line
Up to now, this post focuses on 2 cases of the “Corsair SSD no detected” issue. You can try these solutions according to your situation.
If you have any suggestions or questions while using MiniTool Partition Wizard, you can send us an email via [email protected] to get a quick reply.
About The Author

Position: Columnist
Vega joined MiniTool as an editor after graduation. She enjoys helping people with computer problems, including disk management, data recovery, and more. She is constantly expanding her knowledge in related fields. And she will continue to bring more easy-to-understand professional articles to help people solve various problems on the PC. In her daily life, Vega enjoys hanging out with friends, shopping online and listening to music. She is someone who knows how to enjoy life.
User Comments :