About Chromecast
Chromecast, developed by Google, is one of the most popular media streaming devices. It allows you to watch Internet videos on your smart TV for free. Also, you can connect Chromecast to your personal computer and laptop to achieve the online videos steaming.
However, Windows 10 Chromecast users have reported some problems of this app, especially after a Windows 10 update (version 1803). For example, the Chromecast stops working, or it is unable to connect properly. Sometimes, you might encounter cast to device not working and receive the message of No devices found.
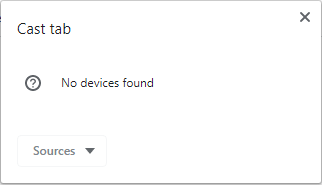
The reasons behind Chromecast not working issue could be various, including network configuration issue, Firewall blocking and so on.
If you are using a Chromecast app for Windows 10 and is experiencing the same problem unluckily, you can use the following methods to fix it.
Method 1: Update Your Chrome
As this problem usually occurs after Windows 10 update, the first thing you can do to fix Chromecast not working is keep your Chrome up to date.
You just need to open your Google Chrome and click the 3-dot icon to invoke the menu. Then, choose Help > About Google Chrome and click Check for updates button.
After that, your Google will start searching for new updates and download and install them automatically. Then, you can relaunch Chrome to see if the problem is resolved.
Method 2: Start Media Sharing Service
Sometimes, the media sharing and all the wireless file sharing are blocked automatically by your computer. This will definitely lead to Chromecast not working. In this case, you have to make sure the related service is running.
Step 1: Press Windows + R to open Run dialog.
Step 2: Input services.msc and click OK button to open Windows Services.
Step 3: Find the Windows Media Player Network Sharing Service among the list. Right-click the service and click Start to make it running. If the Status of the service is already Running, you just right-click it and click Restart.
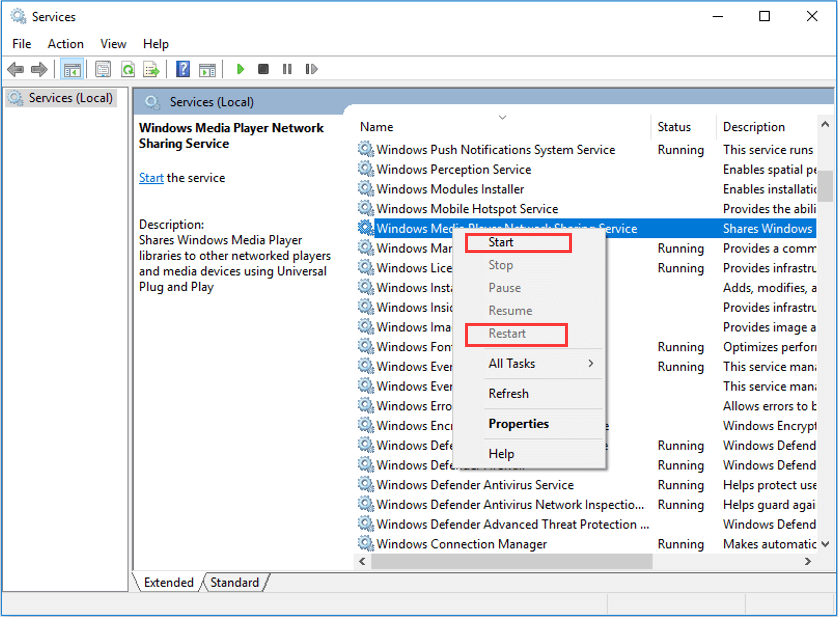
Now, you can check if your Chromecast can be connected properly or not.
Method 3: Change Sharing Options
You should also make sure that your computer and Chromecast device are on the same network. To do that, you can make some changes for sharing options in Control Panel.
Step 1: Open Control Panel and go to Network and Internet > Network and Sharing Center.
Step 2: In the left pane, click Change advanced sharing settings.
Step 3: You will get the following interface. Now, check Turn on network discovery option under Network discovery and Turn on file and printer sharing option under File and printer sharing.
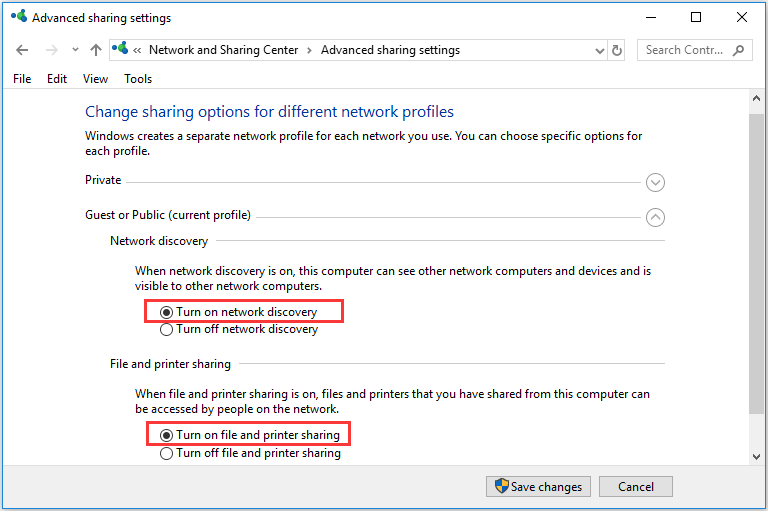
Step 4: Click Save changes button and restart your computer.
Once it’s done, your Chromecast app for Windows 10 should work properly again.
Method 4: Disable VPN
The connection of Virtual Private Network (VPN) on your device might also affect the proper work of Chromecast. If you are using VPN on your internet network, try disabling it.
You can check the online instructions offered by your service provider to disable your VPN.
Method 5: Factory Reset Chromecast
If all the methods mentioned above fail to fix Chromecast not working problem, you might need to factory reset your Chromecast device.
To do that, just hold the button on the Chromecast (next to the power) for a few seconds until the power light blinks. Then, your Chromecast will restart automatically. Now, you can use it again to see if Chromecast not working issue is fixed.

![How to Set Up a VPN on Your Windows 10 PC [Full Guide]](https://images.minitool.com/partitionwizard.com/images/uploads/2019/12/how-to-setup-a-vpn-thumbnail.jpg)
User Comments :