It is important to check and monitor the temperature of CPU. If it gets overheating, your PC may encounter various errors like crashing, black screen, unexpected system shutdown, etc. What’s worse, your computer hardware components like video cards, motherboards, memory modules, and hard drives can be damaged due to the high temperature of CPU. As a consequence, the lifespan of your PC will be shortened.
How to check CPU temperature in Windows 11? We mainly divide the methods into two categories (Windows built-in program and third-party tools). You can select one according to your preference.
Check CPU Temperature in Windows 11 via BIOS
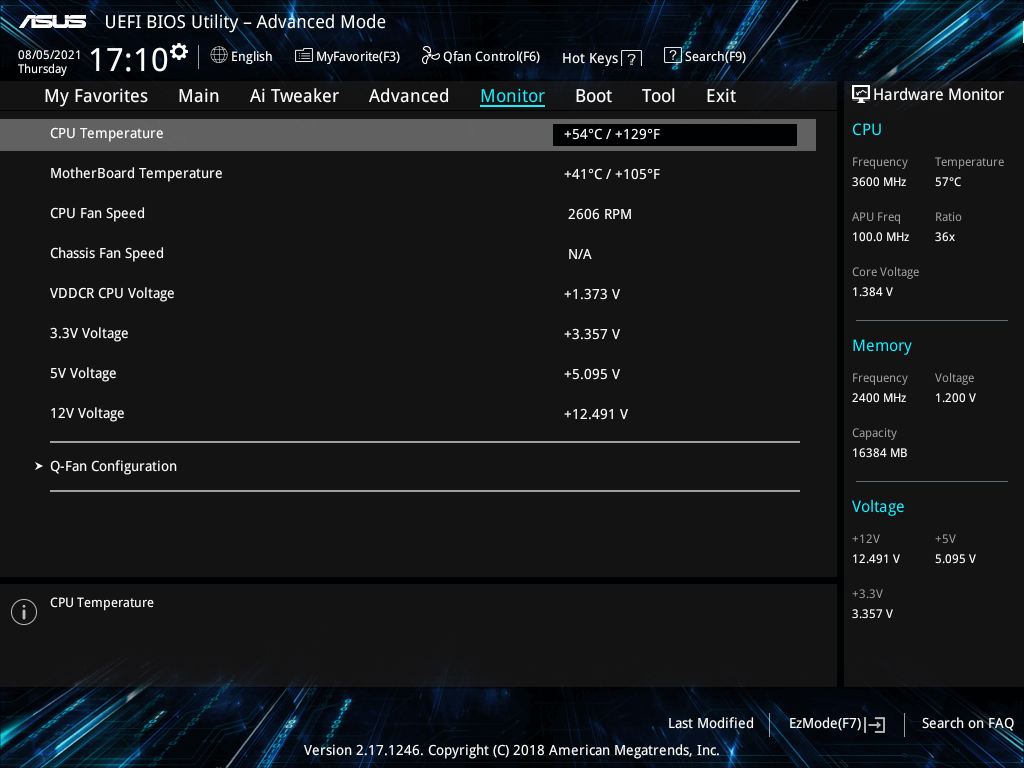
BIOS (basic input/output system) is a firmware that is built on the chip of the computer’s motherboard, which can help you check the temperature of your CPU. How to check CPU temperature in Windows 11 via BIOS? The following steps show you how to perform a CPU temperature check on ASUS laptops.
Step 1: Turn off your PC by holding the Power key. Alternatively, you can also click on the Windows > Desktop icon and then tap Shut down in the elevated menu.
Step 2: After the device is turned off, press the Power key and click on the F2 key continuously before the PC boots up to enter the BIOS.
Step 3: You can see the temperature of CPU after you enter the BIOS. To obtain more details, navigate to the Monitor tab by pressing the right-forward arrow key. As shown in the picture below, you can see the CPU frequency/temperature, motherboard temperature, CPU fan speed, and other information about your PC.

Check CPU Temperature in Windows 11 via Third-Party Programs
Third-party programs can check the temperature of your computer too. Here, we introduce you some popular and reliable CPU temperature checkers.
#1. Core Temp
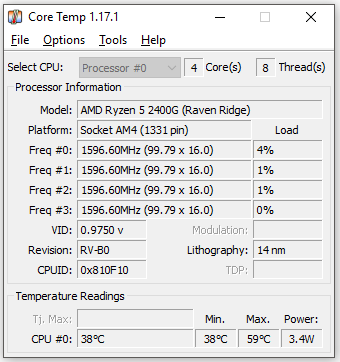
Core Temp is easy to use and works fast. It shows the temperature of all individual cores of the processor. Every central processor has a Digital Thermal Sensor (DTS) inside all its products. Compared with traditional thermal sensors, the DTS offers higher and more accurate resolution temp reading.
This CPU temperature checker enables you to conduct high-level expandability and customization. Besides, it has a platform for add-ons and plugins. It means that you can extend the functionality by adding new features.
Step 1: Click here to move to its official website and then click Download to get the installation file.

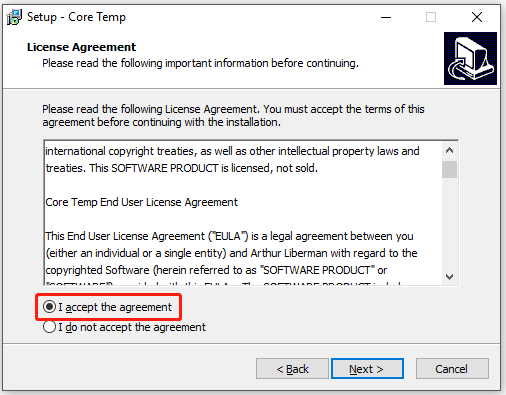
Step 2: After the download ends, open the setup file and follow the on-screen instruction to install the program.

Step 3: The program will be opened automatically after installation. You can see the condition of your CPU in the prompted window.

#2. NZXT CAM
NZXT CAM can manage temperature, devices, and performance. It is efficient and easy to use. Besides, it is fast enough and can offer you access to control everything on the PC. To be specific, this program allows you to view what is running on the computer ranging from the processor’s load to bandwidth consumption.
Hence, you can track the issues with the computer quickly and then boost the performance of the device. In a word, NZXT CAM is a good option for monitoring the CPU temperature of your PC.
#3. Speccy
Speccy can show you a quick summary of the result. You can find the details of your PC components like motherboard, CPU, graphics card, RAM, and so on. Then you can save the result as an XML, text file, or snapshot.
This program is lightweight, advanced, and fast. It can help you improve the performance of your PC without upgrading the hardware.

![[Detailed Steps] Change the Default Audio Output on Windows 11](https://images.minitool.com/partitionwizard.com/images/uploads/2021/07/change-default-audio-ouput-on-win11-thumbnail.jpg)


User Comments :