Power mode is an embedded feature in Windows device. It can bring you some benefits. The computer performs differently according to the settings of power mode. Here, MiniTool would show you how to change power mode settings in Windows 11.
What Does Power Mode Do
Power mode is a vital feature for various mobile computing devices with batteries inside. Through power mode settings, you can have the control of power consumption of your PC. Besides, the power mode helps you balance with energy consumption.
More importantly, the power mode offers you a way to improve the performance of your Windows 11 computer. Hence, it is vital to change Windows 11 power mode settings if necessary.
#1. Change Power Mode Settings in Windows 11 via Settings
A simple way to modify power mode settings on Windows 11 is to use the Settings utility. For doing that, you can follow these steps.
Step 1: Press Windows + I key to open the Settings window. Alternatively, you can also open it from the Start menu. Click on the Windows icon on the desktop and click the Gear icon from the prompted menu.
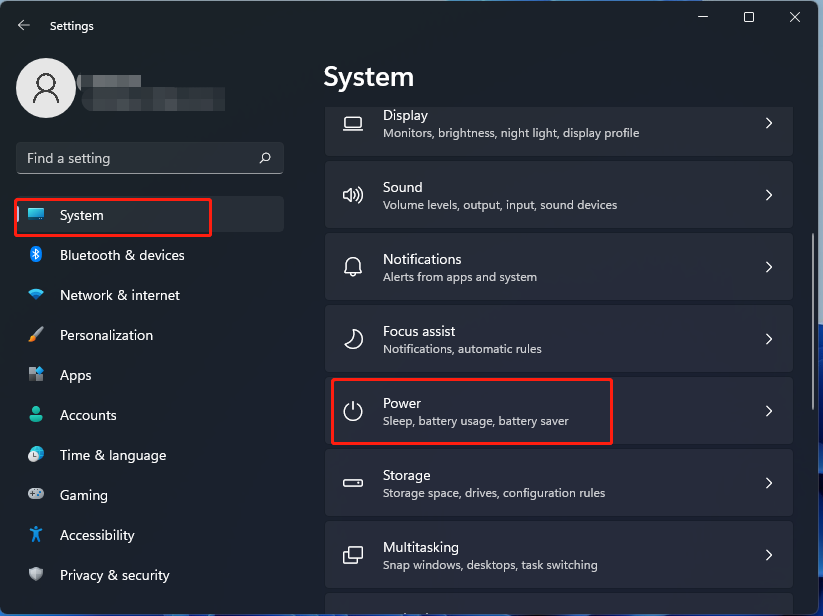
Step 2: Click the System option in the left pane, and then move to the right side of the window and scroll down the content to find and click the Power option.
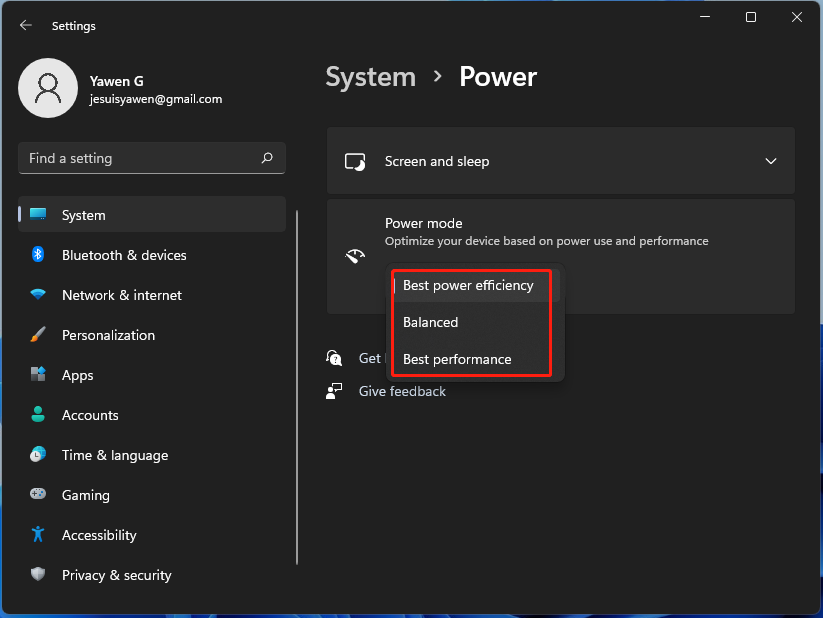
Step 3: Select a power mode setting from the drop-down menu of Power mode based on your demand.
#2. Change Power Mode Settings in Windows 11 via Control Panel
Through Control Panel, you can change Windows 11 power mode settings as well. Here’s the tutorial for you.
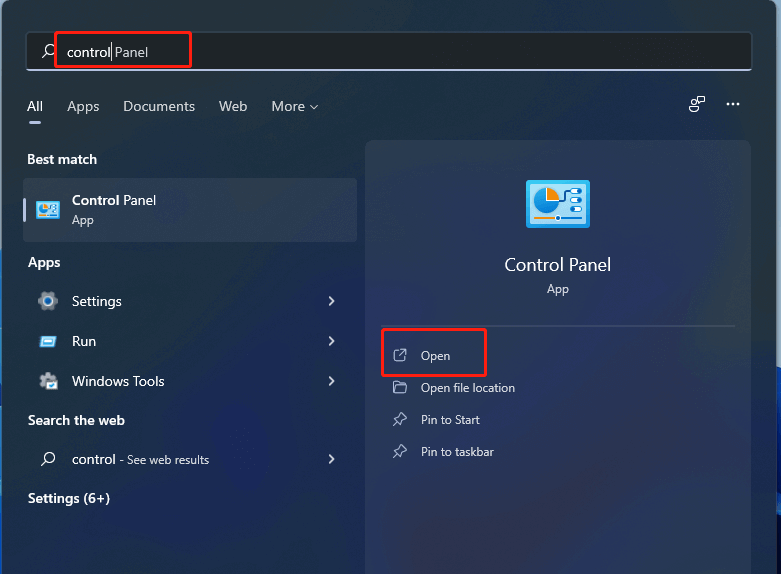
Step 1: As shown in the picture below, click on the Search icon on the desktop, and then type control and click Open.
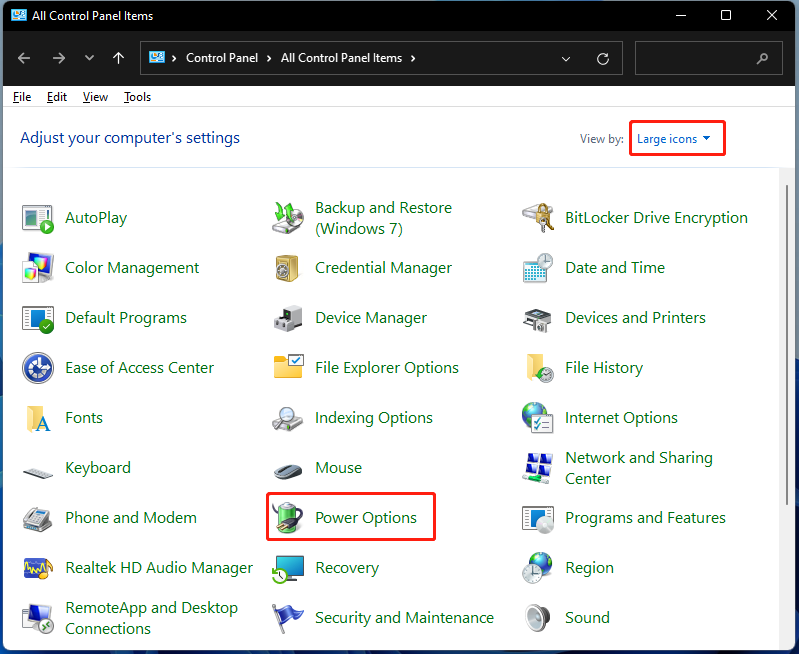
Step 2: In the Control Panel window, set the View by to Large/Small icons and then click on Power options to continue.
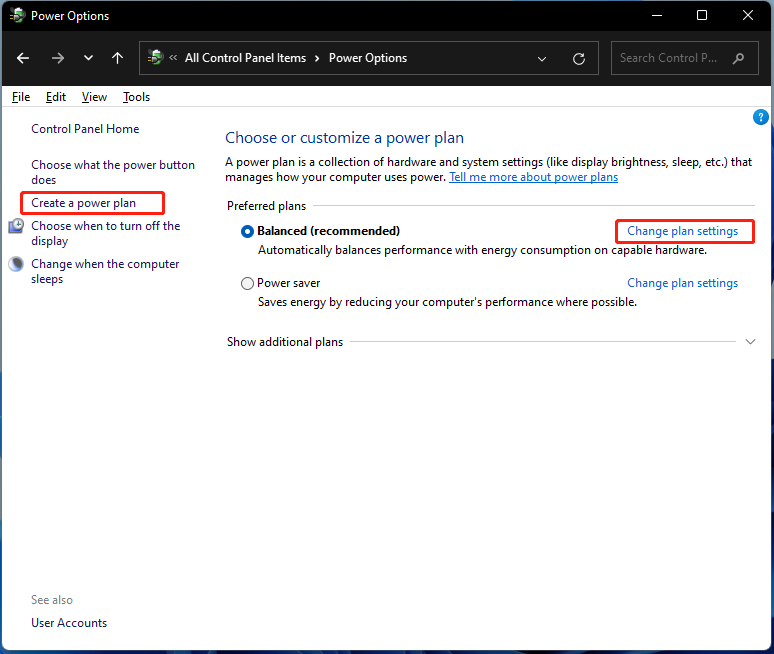
Step 3: In the Power Options window, you can see the available power options (Balanced, High performance, and Power Saver). To modify power mode settings, click on the Change plan settings link to do that.
1.You can create a power plan by clicking the Create a power plan option in the left pane and following the on-screen to finish the process.
2. If any of the three plans are invisible on the window, click Show additional plans to view it.
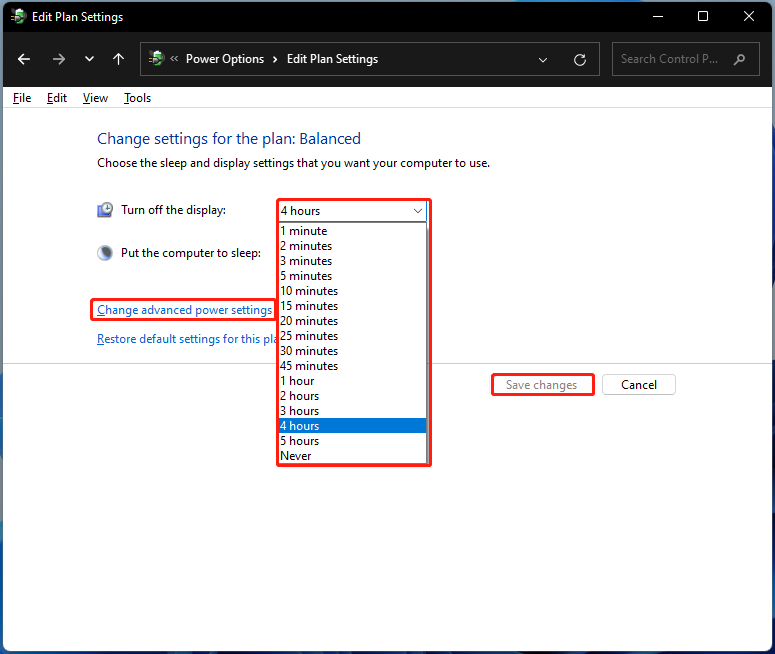
Step 4: After you click Change plan settings, you can configure the time that your computer will keep idle before it goes to sleep or the screen is turned off. Set the specific time for turning off the display from the drop-down menu. If you want to make other changes to the power plan further, click Change advanced power settings to move on. At last, click Save changes to complete the operation.

![[Answered] How to Check CPU Temperature in Windows 11](https://images.minitool.com/partitionwizard.com/images/uploads/2021/08/check-cpu-temperature-in-win11-thumbnail.jpg)
User Comments :