This post shows you how to change administrator on Windows 10 via several different programs on the computer. Detailed steps and screenshots are provided for you. Now, read this post of MiniTool for details.
How to Change Administrator on Windows 10 via Settings
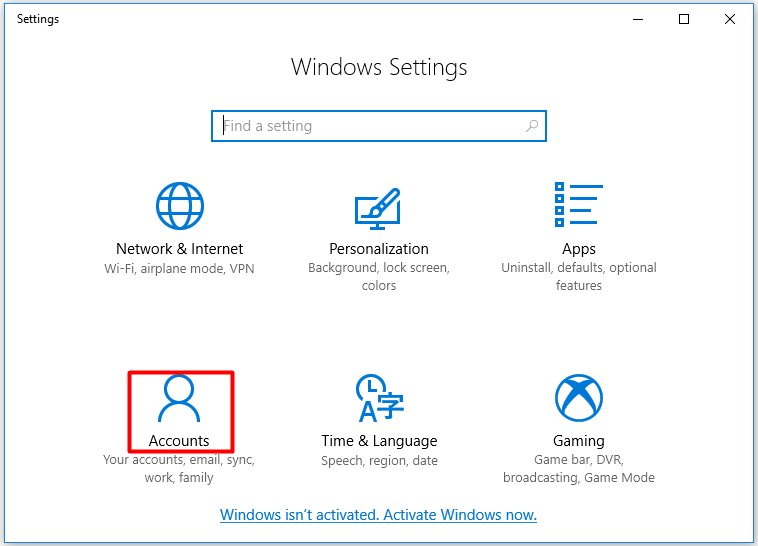
Step 1: Open Settings by pressing Windows and I keys and then click Accounts on the home menu of Settings.
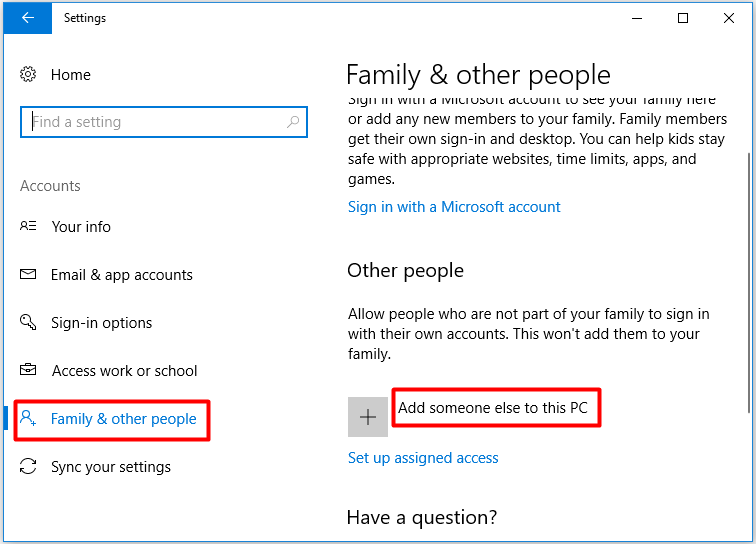
Step 2: In the next window, click Family & other people in the left pane and then move to the right side of the window. Scroll down the content to locate to the Other people section. As there’s no other accounts, you need to add one. For that, click Add someone else to this PC and then follow the prompted instruction to finish the operation.
Step 3: Then click on the newly created account and click Change account type.
Step 4: In the Change account type window, you will see the name and type of the chosen user account. Open the drop-down menu by clicking the down arrow under Account type and choose Administrator. Then click OK to save the changes.
Also read: How Windows 10 Change Account Picture? Here Are Detailed Steps
How to Change the Administrator on Windows 10 via Control Panel
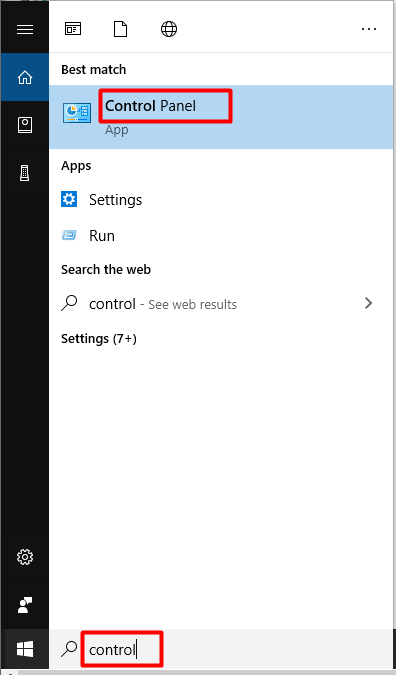
Step 1: Type control in the search box and click on Control Panel under Best match.
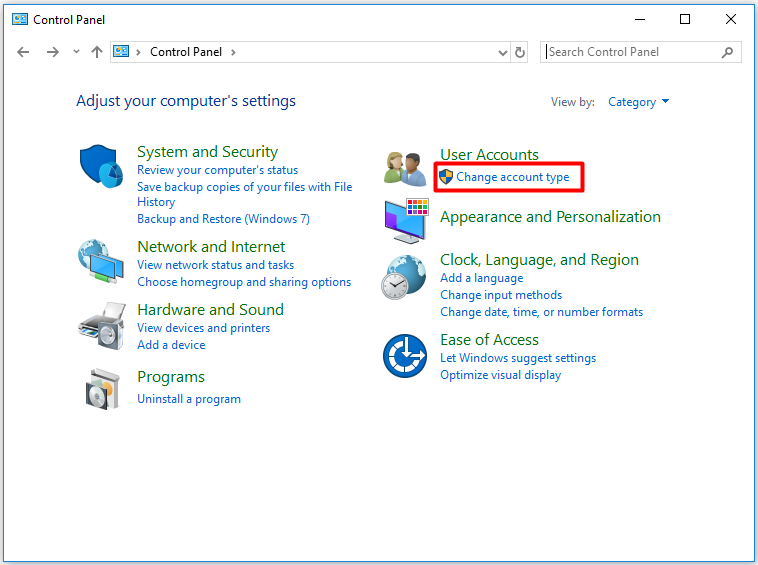
Step 2: In the Control Panel window, change the View by to Category and then click Change account type link under User Accounts.
Step 3: In the Manage Accounts window, click Add a new user in PC settings to add an administrator.
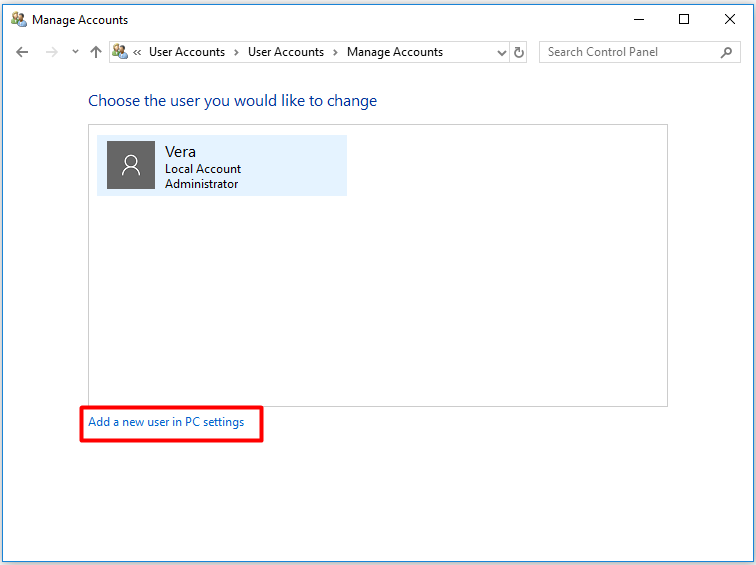
Step 4: Follow the elevated instruction to complete the process.
Step 5: Click on the newly created user account to continue.
Step 6: Click on the Change the account type in the left pane.
Step 7: Choose Administrator and then click Change Account Type to save the changes.
How to Change Administrator on Windows 10 via PowerShell
Step 1: Right-click on the Windows icon on the desktop and then click Windows PowerShell (Admin) in the pop-up menu.
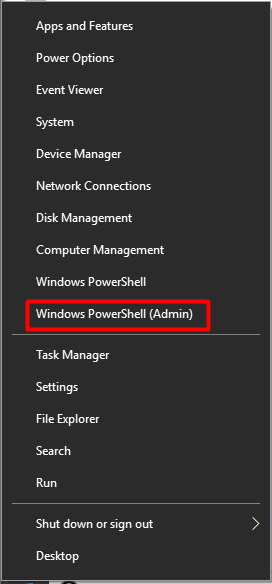
Step 2: In the elevated window, type the command below and hit Enter to change the account to administrator. After that, your Windows 10 administrator will be changed to the target user.
add-LocalGroupMember -Group “Administrators” -Member “ACCOUNT-NAME”
How to Change the Administrator on Windows 10 via Netplwiz
Step 1: Open the Run window by pressing Windows and R keys, and then type netplwiz and hit Enter.
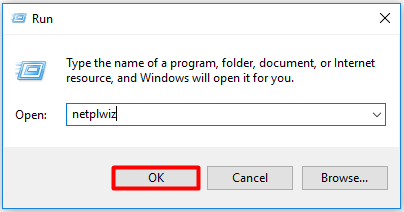
Step 2: In the User Accounts window, click the Add button and then follow the on-screen instruction to add the new user.
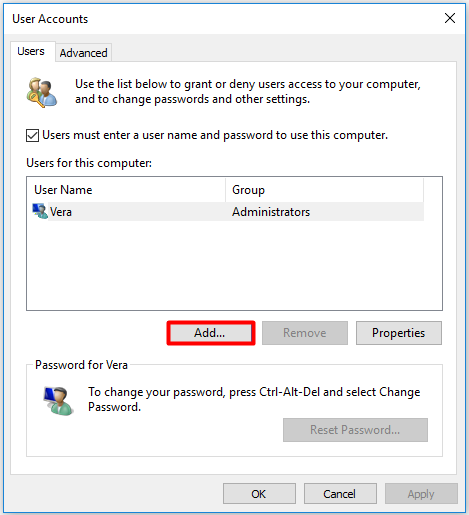
Step 3: Then back to the User Accounts window and click on the newly added account. Click on Properties to continue.
Step 4: Navigate to the Group Membership tab and highlight the Administrator option. Finally, click OK and Apply to execute the operation. Now, your Windows 10 administrator is changed successfully.
How to Change Administrator Account on Windows 10 via Computer Management
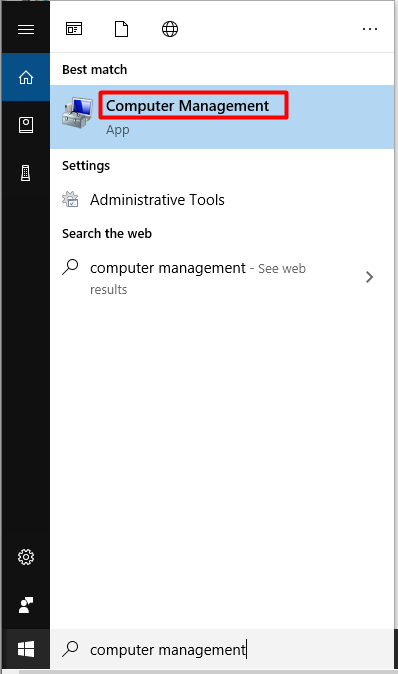
Step 1: Type computer management and click on Computer Management under Best match.
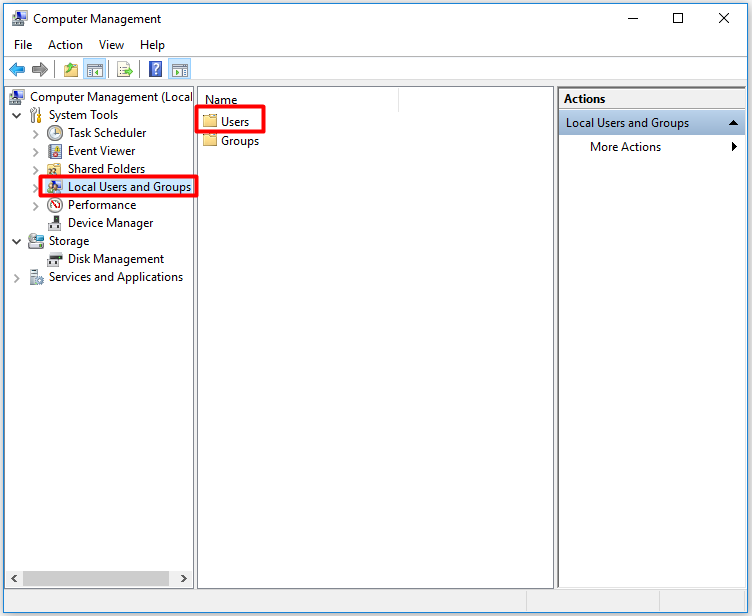
Step 2: Click on Local Users and Groups and then click Users.
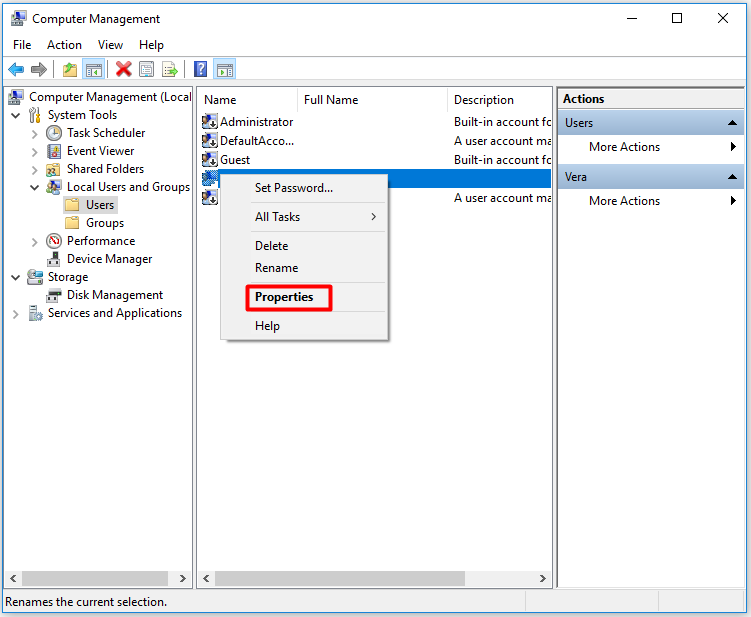
Step 3: Right-click on the user entry you would like to edit and click Properties. Alternatively, you can also double-click on the entry to open the properties.
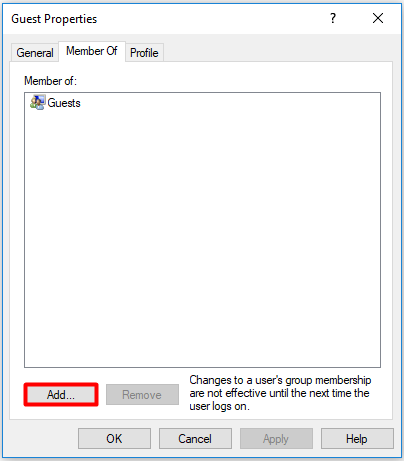
Step 4: Navigate to the Member of tab in the Guest Properties window and click the Add button.
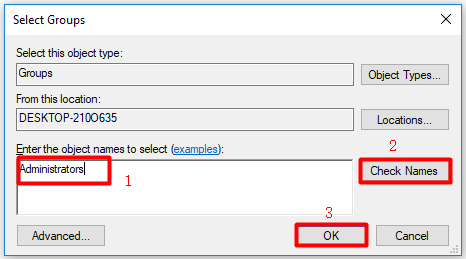
Step 5: In the pop-up window, type Administrators in the text field and click Check Names. At last, click OK to save the changes.
How to change administrator on Windows 10? If you are still seeking for answers, read this post now! Top 5 methods are discussed.


User Comments :