As a new operating system, Windows 11 comes with a new outlook and many new features, compared with previous versions of Windows operating systems.
To help you get familiar with Windows 11, I’d like to share you with some function guides. And today the topic is about how to change account name in Windows 11. If you want to use another account name or manage multiple user accounts on your computer, you can have a try.
Method 1: Change Account Name Windows 11 via Settings
An easy way to change account name in Windows 11 is to use Settings, a built-in tool in Windows 11. Here are the detailed steps with pictures. You can try it if you are using a Microsoft account.
Step 1: Press Win + I to open Windows 11 Settings quickly.
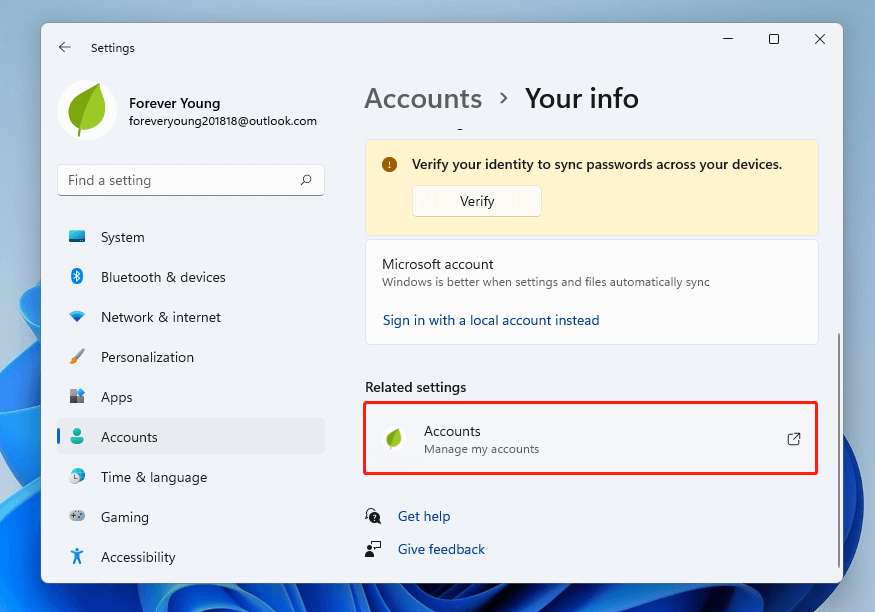
Step 2: In the left pane, select Accounts. In the right pane, select Your Info, scroll down and click Accounts (Manage my accounts) under the Related settings section.
Step 3: Open this link with Microsoft Edge and sign in with your account.
Step 4: Choose the Your info tab.
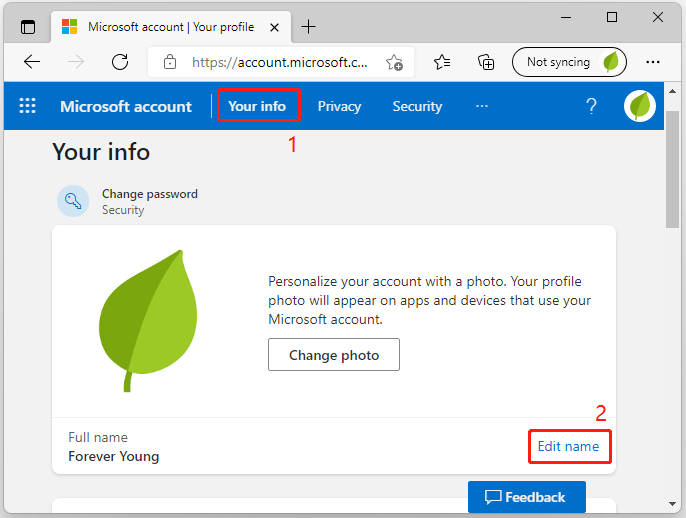
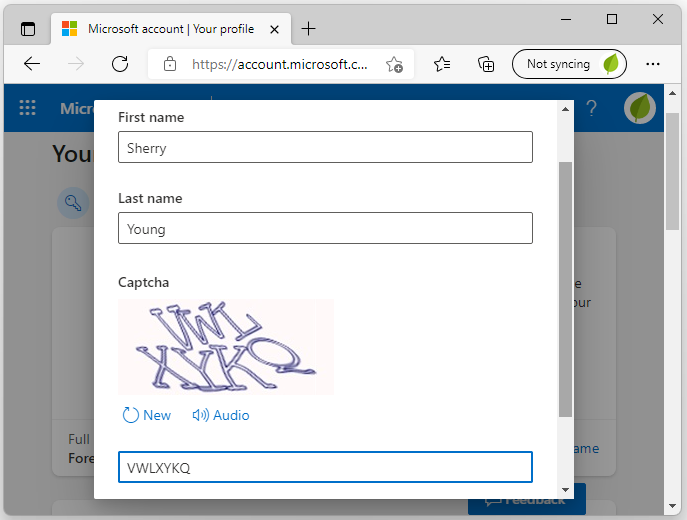
Step 5: In the pop-up window, type a new name and the captcha on the page. Then click the Save button to keep the changes.
Wait for a while and your account name will be changed. You can check it in Settings. If you don’t see your new name, you can try signing out and signing in again or restarting your computer to solve the problem.
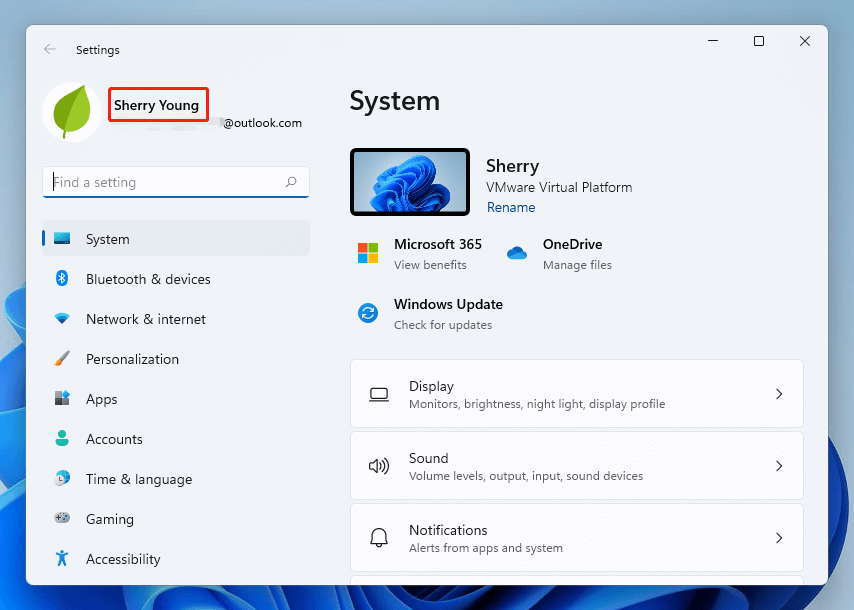
With the above steps, you can change user name Windows 11 easily.
Method 2: Change Account Name Windows 11 via Control Panel
Another way to change username in Windows 11 is to visit Control Panel. It can be used to rename a local account in Windows 11. Control Panel cannot be used to change name for Microsoft Accounts, but it has a hyperlink that leads you to Windows Settings to change account name.
Step 1: Open Control Panel in Windows 11.
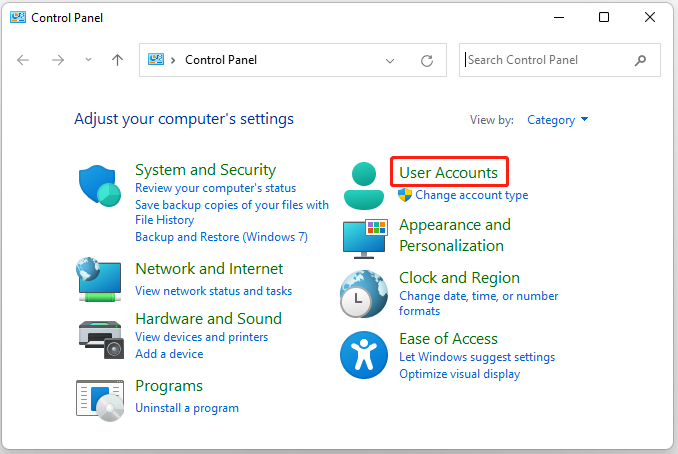
Step 2: Select View by Category from the upper right corner. Then click User Accounts. On the next page, click Usesr Accounts again.
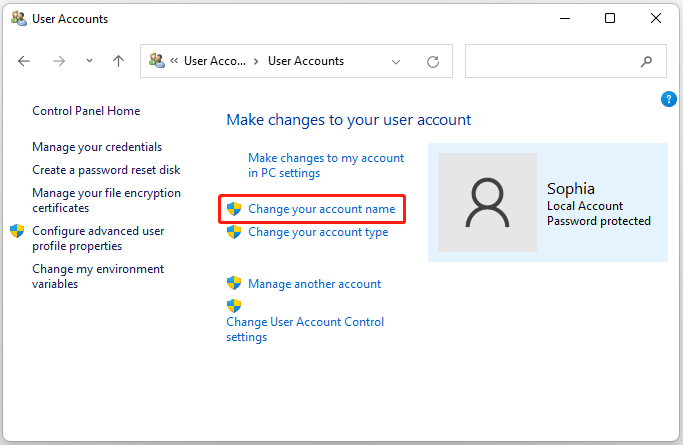
Step 3: Under the “Make changes to your user account” section, click Change your account name.
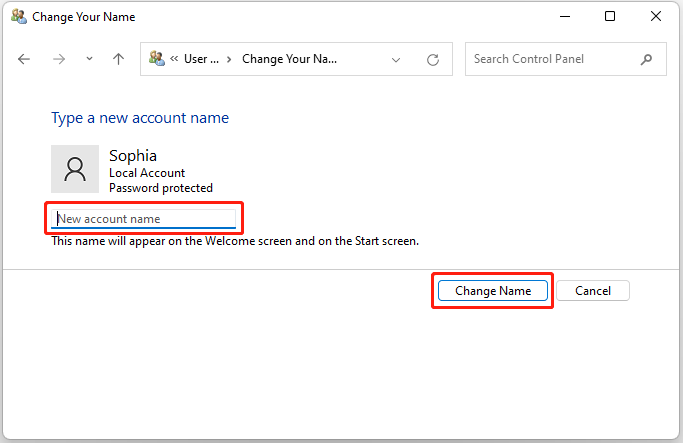
Step 4: On the next page, type a new name for your account and click the Change Name button. Then restart your computer.
Method 3: Change Account Name Windows 11 via Netplwiz
Alternatively, you can also change account name in Windows 11 with the steps below:
Step 1: Press Win + R to invoke the Run window. Then type netplwiz in the box and press Enter.
Step 2: In the pop-up window, make sure you selected the Users tab and click the account whose name you need to change. Then click the Properties button.
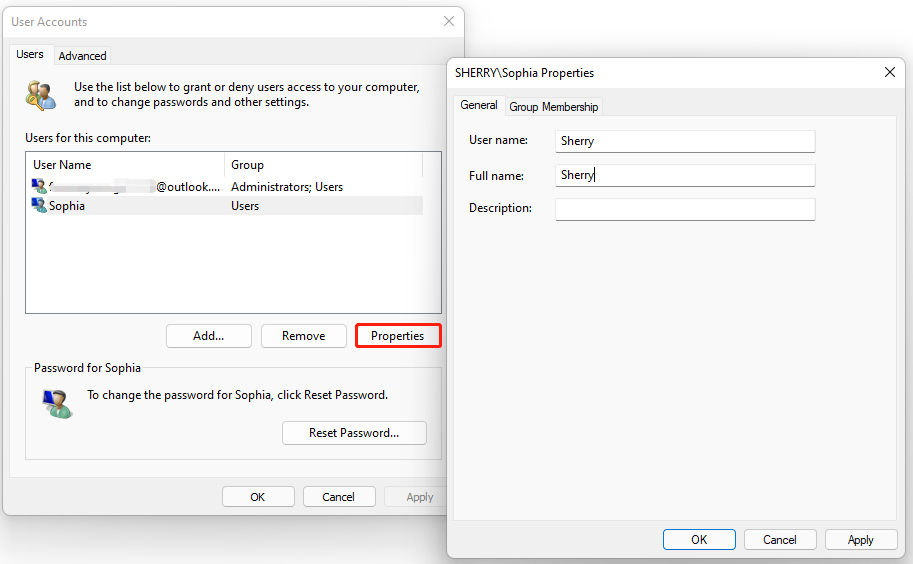
Step 3: Input a new name and click Apply > OK to save the changes you have made. After that, restart your computer. Then check if you change user name Windows 11 successfully.
Method 4: Change Account Name Windows 11 via Command Prompt
You can also rename a local account in Windows 11 using Command Prompt. Please be careful and make sure you type the required commands correctly while using this tool.
Step 1: Run Command Prompt as administrator.
Step 2: Input wmic useraccount get name and press Enter. Then Command Prompt will provide you with a list of all user accounts on this computer.
Step 3: Type wmic useraccount where name=’Sophia’ rename Sherry. In your case, you need to replace Sophia with your old account name and replace Sherry with your new account name. Then press Enter.
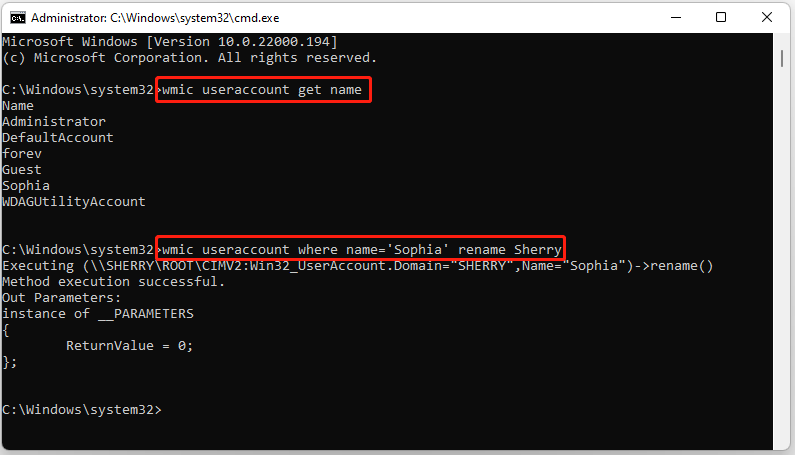
Step 4: When your account name is changed successfully, close Command Prompt, and restart your computer.
How to change user name Windows 11? Top 4 methods have been shown to you. Now, it’s your turn to make a choice and follow the given steps to fix the issue.

User Comments :