Some people say they can't delete files from NVMe SSD. Have you encountered this issue? If so, this post is what you need, in which Partition Magic shows you how to solve this issue in 5 ways.
Why Are You Unable to Delete Files from NVMe SSD?
An SSD (solid-state drive) is a type of solid-state storage device that uses integrated circuits to store data persistently.
Unlike traditional hard disk drives (HDDs), SSDs have no moving parts, allowing them to deliver faster data access speeds, reduced latency, increased resistance to physical shock, lower power consumption, and silent operation.
Nowadays, SSDs are very popular, especially for NVMe SSDs, because NVMe SSDs are much thinner and faster than SATA SSDs. Many people will use NVMe SSDs as the system disk or the data disk.
However, some people find that they are unable to delete files from NVMe SSDs. The possible reasons are as follows:
- You don’t have full control of the files.
- The default location of the folder has not been changed.
- The SSD is in read-only mode.
What to Do If You Can’t Delete Files from SSDs
If you can’t delete files from NVMe SSDs, you can try the following methods to solve the issue.
Method 1. Get the Full Control of the Folder or File
If you can’t delete files from NVMe SSDs because of the error “Folder Access Denied – you’ll need to provide administrator permission to delete this folder” or “Folder Access Denied – you require permission from xxx to make changes to this folder,” it means that you don’t have the full control of the folder for the file.
Then, you can follow the guide below to get the full control.
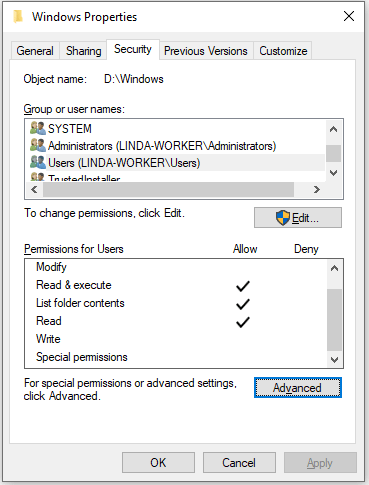
Step 1: Open Windows File Explorer and find the folder or file that can’t be deleted. Right-click it and select Properties. Go to the Security tab and click the Advanced button under the Permissions for Users section.
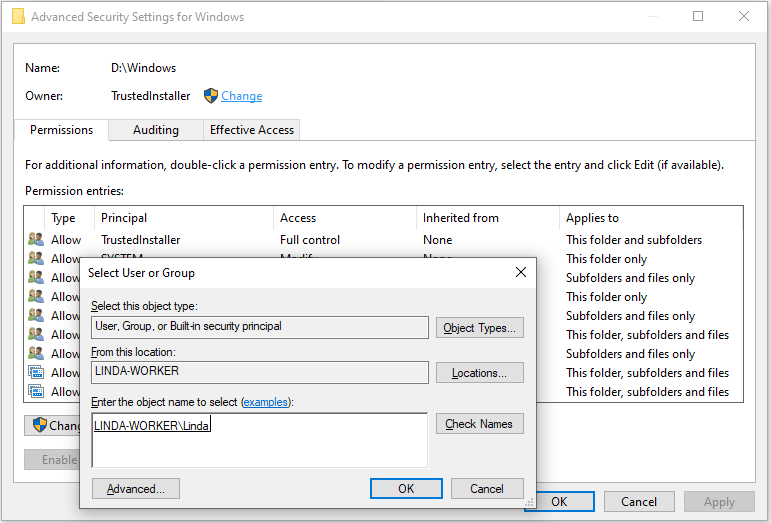
Step 2: On the pop-up window, click Change in the Owner section. Under the Enter the object name to select section, type your account name and then click Check Names. Then, click OK.
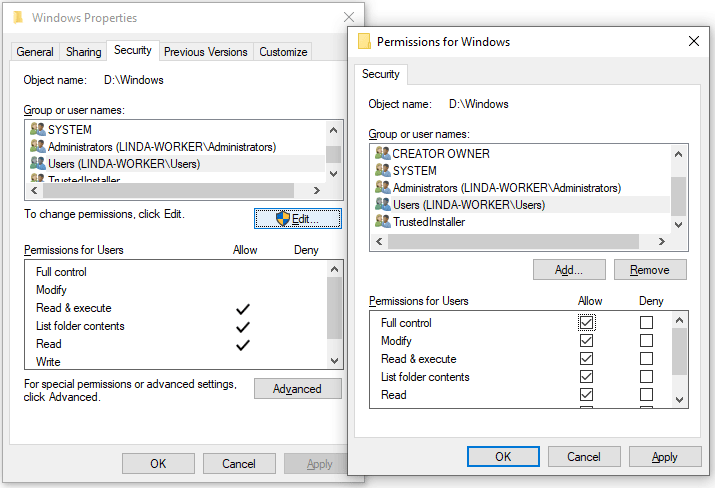
Step 3: Now, you can see the owner of the folder or file has been changed. Click OK to go back to the Properties window. Click the Edit button. On the pop-up window, select your account under Group or user names and then tick the Full control option under Permissions for users. Then, click OK twice to save the changes.
Then, you can try deleting the folders or files on the SSD again to see if the issue has been solved.
Method 2. Change the Default Location of the Folder
Some folders like the Documents folder have their default locations. If you delete them, they will come back. You need to change their default locations before deleting them. Taking the Documents folder as an example, I will show you how to change the default location of the folder.
- Open Windows File Explorer and then create a Documents folder in another place.
- Now, right-click the Documents folder in the navigation sidebar and select Properties.
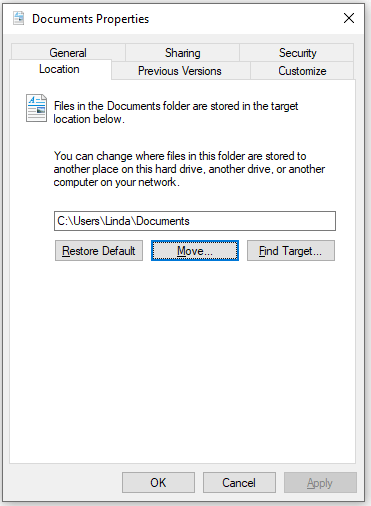
- Go to the Location tab and click the Move button.
- On the pop-up window, navigate to the new Documents folder and select it. Then, save the changes and you can delete the original Documents folder.
Method 3. Delete the Files Using Third-Party Software
If Windows doesn’t allow you to delete some files on the SSD, you can try using third-party software. For example, you can try MiniTool Partition Wizard. It can find some hidden files and allow you to delete them. Here is the guide:
MiniTool Partition Wizard FreeClick to Download100%Clean & Safe
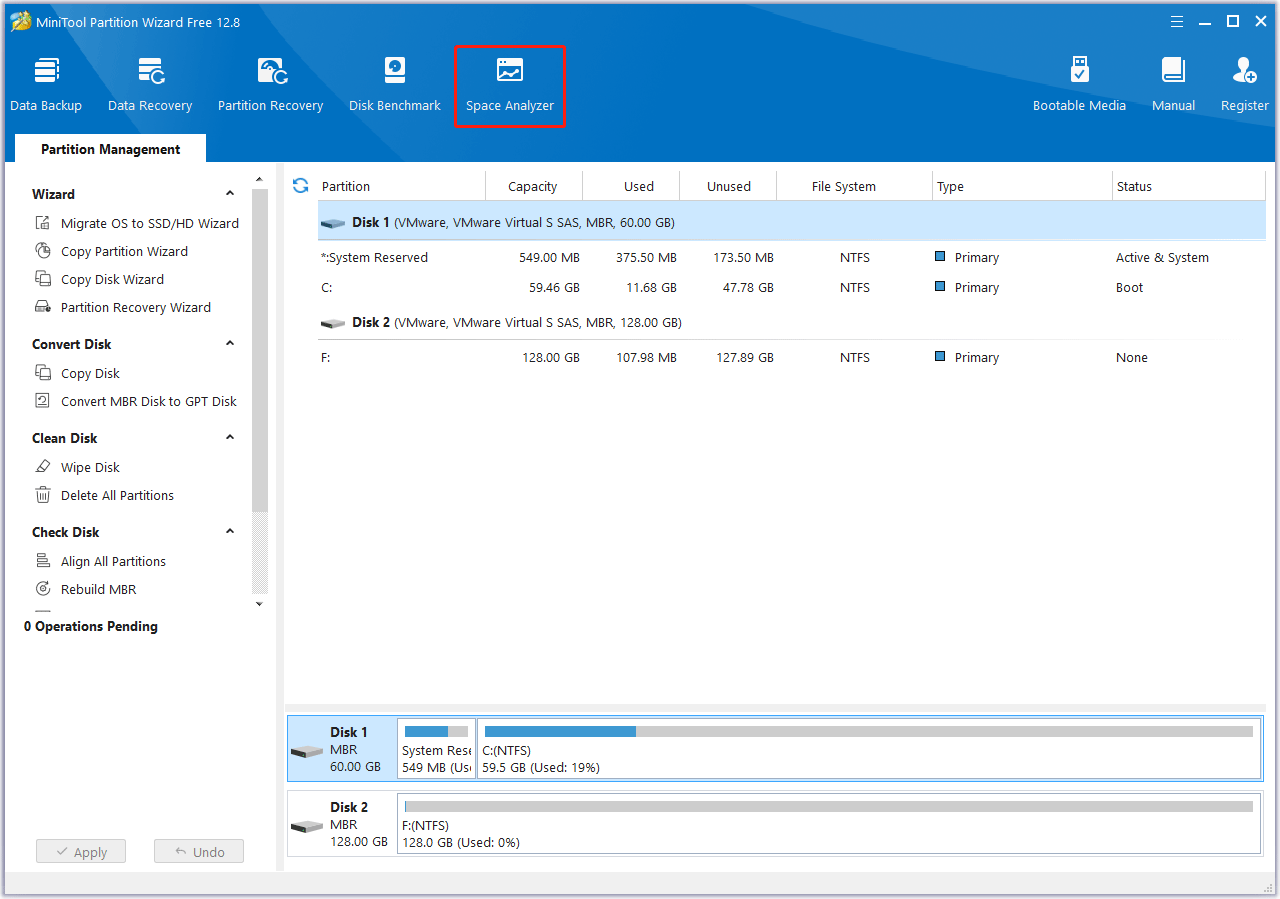
Step 1: Launch MiniTool Partition Wizard and click Space Analyzer.
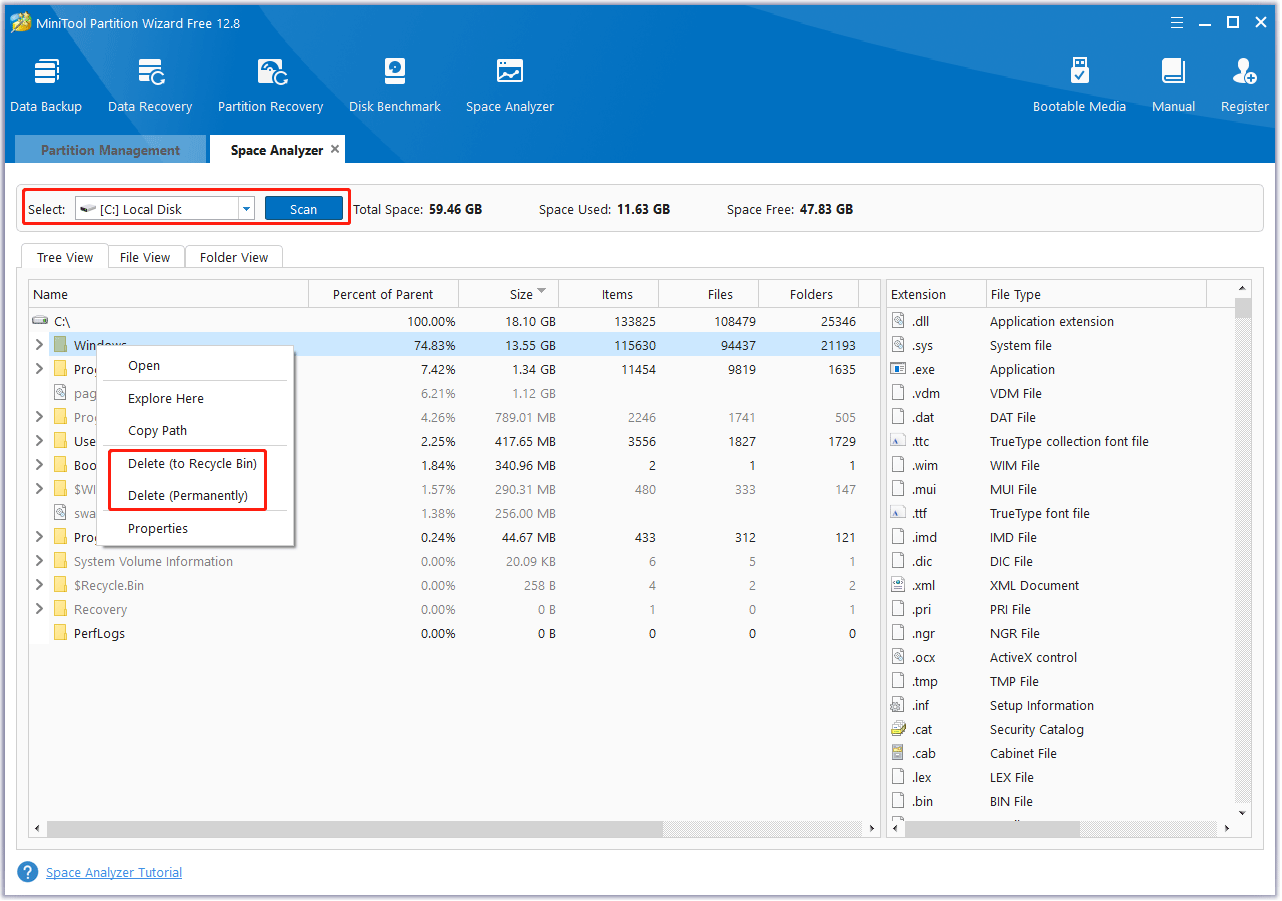
Step 2: Select the drive where the files that you want to delete are located and click Scan. After the scanning process is completed, find the files you want to delete. Right-click on it and select Delete (to Recycle Bin or Permanently).
Besides, MiniTool Partition Wizard can partition a hard drive, format FAT32, clone hard drives, convert MBR to GPT, recover hard drive data, etc. It’s worth trying.
Method 4. Format the SSD
This method is very simple but it only works on a data drive. You just need to back up all your important files to another hard drive and then you can format the SSD in this way:
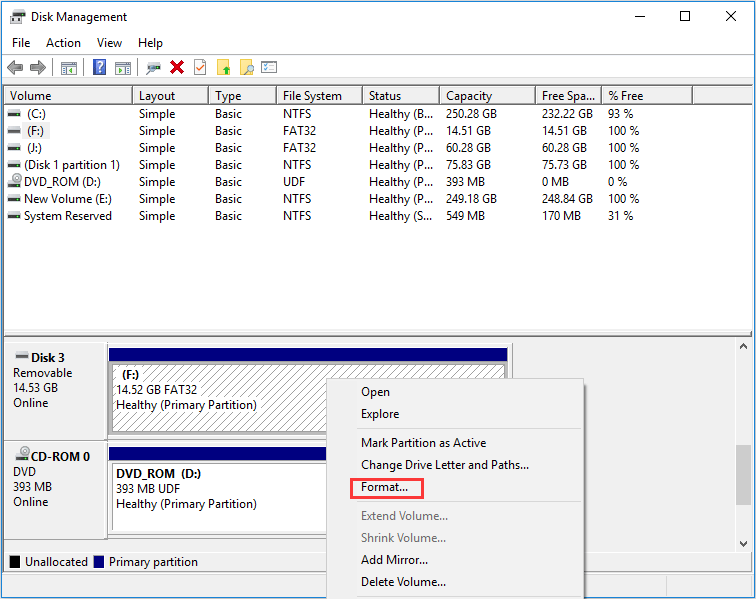
- Press the Windows logo key + X and then select Disk Management from the menu. On the tool, right-click a partition on the NVMe SSD and click Format.
- Choose a proper file system and keep other parameters as default. Then, click the OK button. Once a warning window pops up, read it and click OK.
Method 5. Check the Hard Drive for Errors
If an SSD becomes read-only, it usually means that the SSD is to be failing. Then, you can check if the SSD has bad blocks using MiniTool Partition Wizard. Here is the guide:
MiniTool Partition Wizard FreeClick to Download100%Clean & Safe
Step 1: Launch this software. Right-click the NVMe SSD and choose Surface Test.
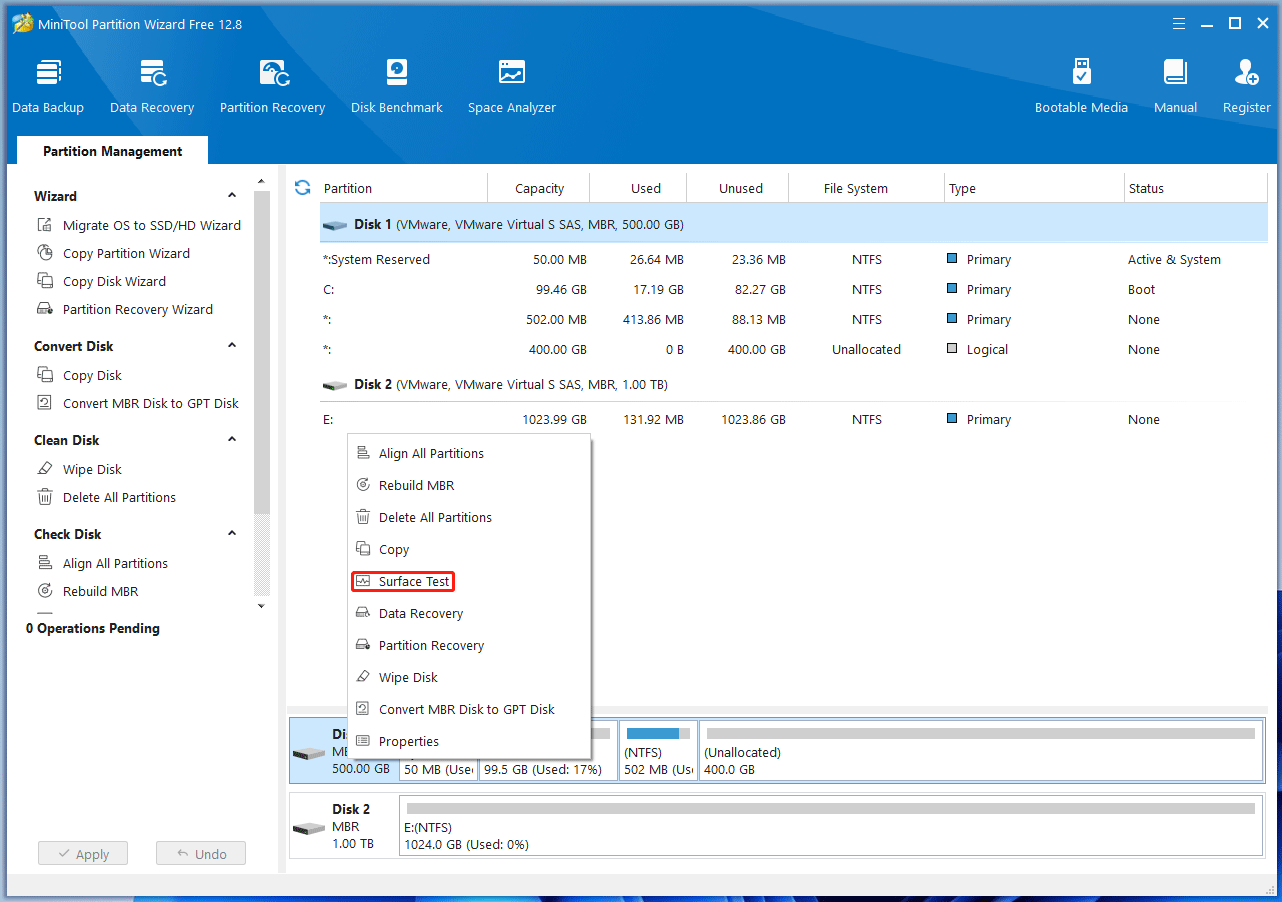
Step 2: On the pop-up window, click Start Now. If bad blocks are found, they will be marked with red color.
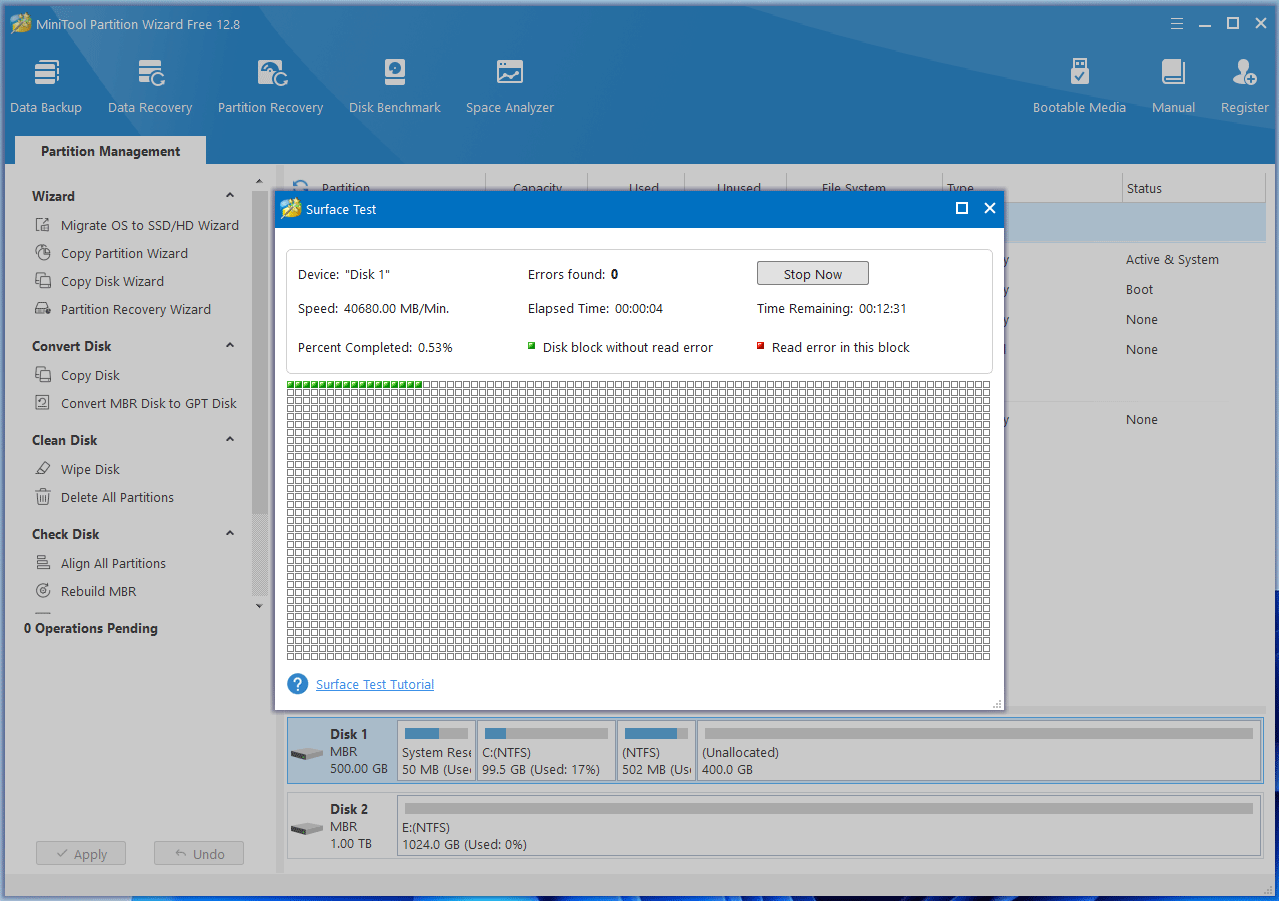
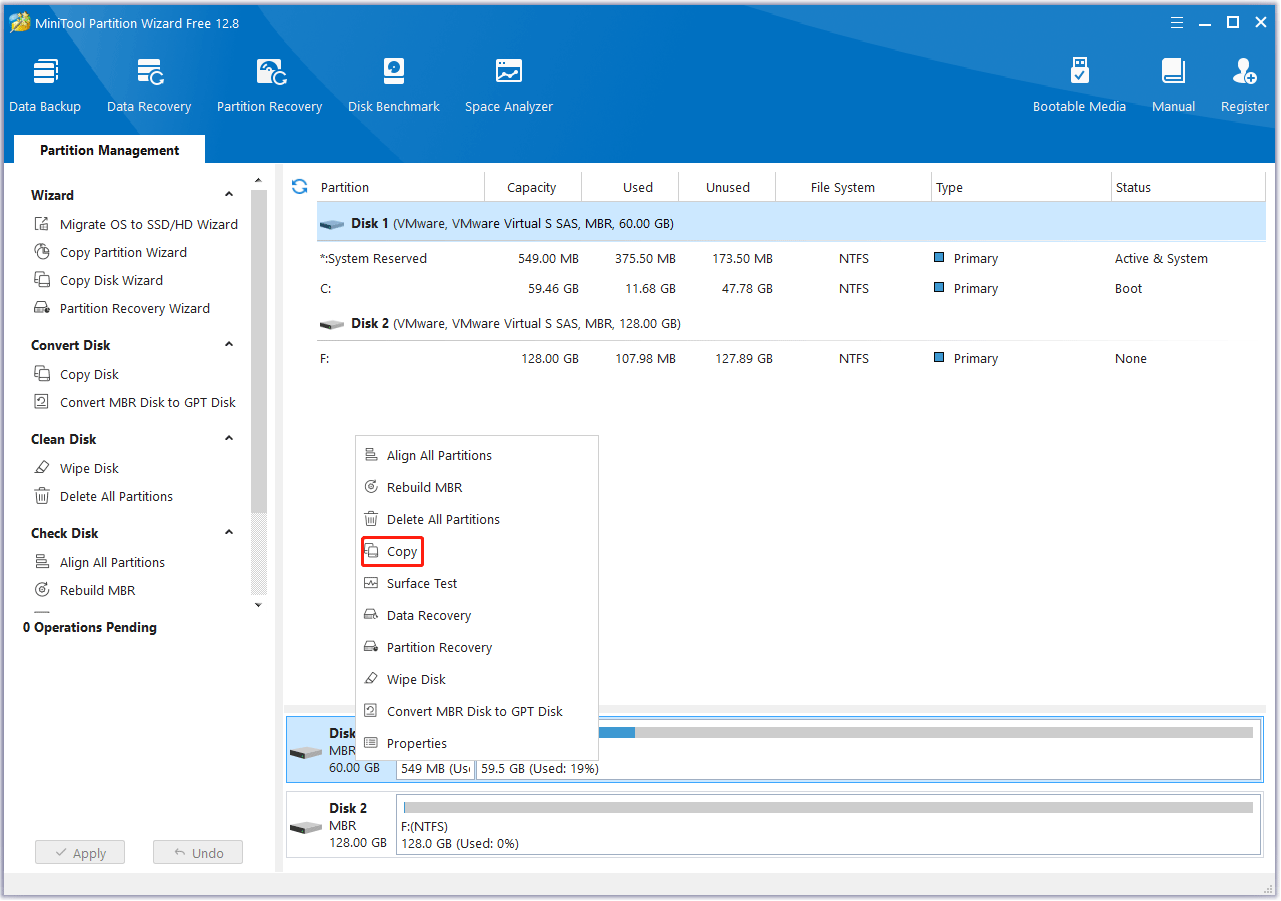
If bad blocks are found, it means that the SSD is indeed failing. Then, you need to back up your data or use MiniTool Partition Wizard to clone the hard drive to another one. Note that the Copy Disk feature is free for non-system disks and paid for system disks.
Bottom Line
Sometimes, you may find that you can’t delete files from NVMe SSDs. This post tells you the causes and solutions to this issue. If you encounter issues when using MiniTool Partition Wizard to solve the issue, contact us via [email protected]. We will get back to you as soon as possible.

User Comments :