What can you do when Bluestacks keeps crashing Windows 10? If you are searching for answers now, this post is suitable for you. It provides you with several troubleshooting methods. Now, explore the content with MiniTool.
Are you bothered by Bluestacks game crashing error? This post offers you 4 solutions. Try them now!
Solution 1: Update Graphics Card Driver
If you have an outdated graphics card driver, you may encounter Bluestacks app keeps crashing issue. For that, you should update the driver with the steps below.
Step 1: Right-click on the Windows icon on the desktop and click Device Manager.
Step 2: Double-click on Display adapters to expand it. Then, right-click on the graphics card driver and choose the Update driver option.
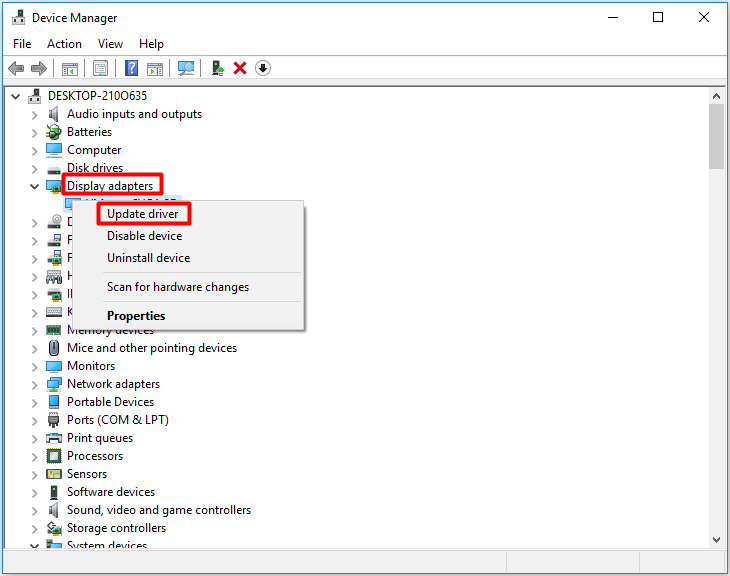
Step 3: In the next window, choose a driver update method based on your demand and then follow the prompted instruction to finish the process.
Solution 2: Change Game Settings
With improper game settings, Bluestacks keeps crashing Windows 10. For instance, you need to ensure that RAM allocated for the game is enough. How to check and change game settings? Follow these steps.
Step 1: Open Bluestacks and click the gear button at the lower right corner to open Settings.
Step 2: After the Settings page appear, highlight the Engine tab.
Step 3: Move to the right side of the window and then configure the settings to match the following requirements.
- CPU:4 cores
- Graphics Engine: Performance
- Graphics Renderer: OpenGL
- GPU Settings: Prefer dedicated graphics (NVIDIA only)
- ASTC: Hardware decoding
- RAM: 4GB (this requires a restart)
Step 4: Click on the Save button at the bottom of the page. After that, Bluestacks will be restarted. Check if Bluestacks keeps crashing now. If so, try other solutions.
Solution 3: Disable the Hyper-V Service
Hyper-V service can cause conflicts with most Android emulators including the crashing issue. Disabling this service can stabilize Bluestacks client and avoid crashing. You can disable it quickly with the following steps.
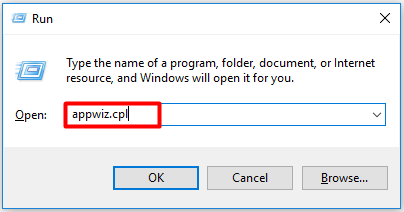
Step 1: Press Windows + R key to open Run window, and then enter appwiz.cpl and click Enter.
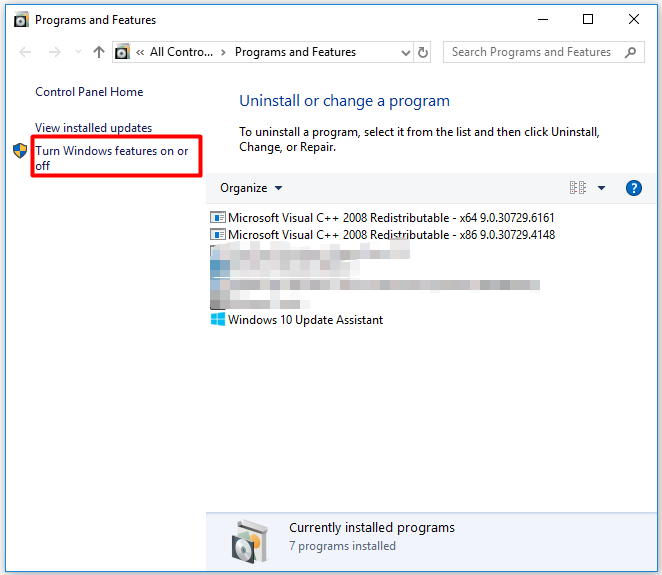
Step 2: In the next window, click on the Turn Windows features on or off option in the left pane.
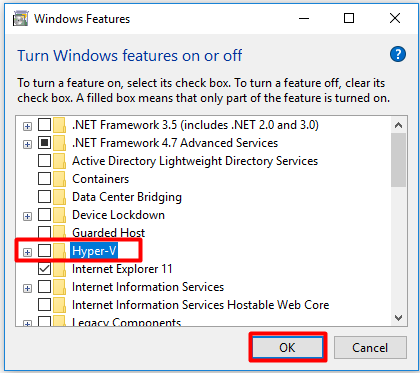
Step 3: In the pop-up window, uncheck the checkbox of Hyper-V and click OK to save the change.
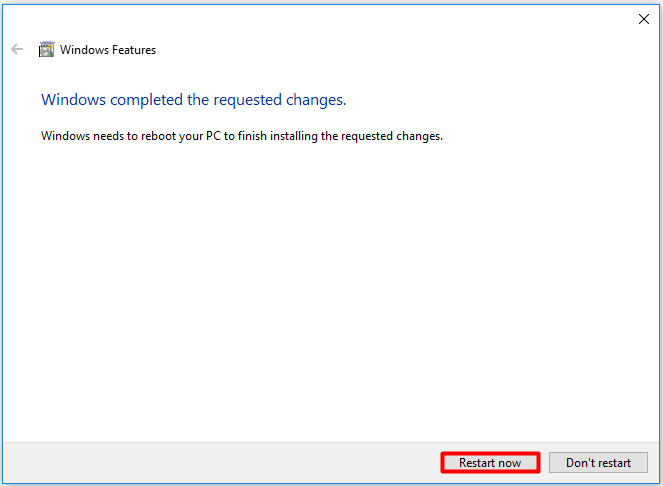
Step 4: After finishing the process, click Restart now to make the action into effect.
Solution 4: Uninstall Antivirus Programs on PC
Antivirus programs on your computer like AVG, Avast, and Malwarebytes can interfere with the running of Bluestacks. Based on that fact, you can try uninstalling antivirus programs.
Step 1: Navigate to the Programs and Features section by executing the Step 1 in Solution 3 again.
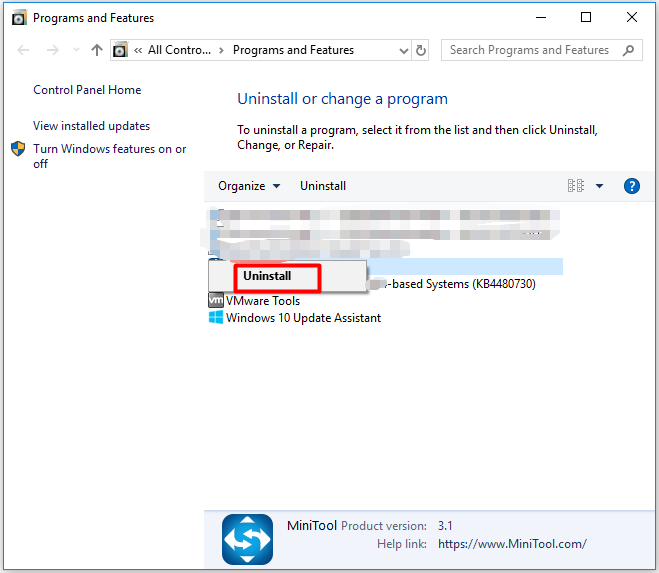
Step 2: Right-click on your antivirus program from listed programs and click Uninstall. Then confirm and finish the process.
Step 3: Now, check if Bluestacks app keeps crashing.
Solution 5: Reinstall Bluestacks
If Bluestacks keeps crashing after executing the above solutions, reinstall Bluestacks to fix the issue. For that, you should uninstall Bluestacks with the steps (1 and 2) in Solution 4. After that, click here to move to the official website of Bluestacks and click on the Download button in the page to download and install Bluestacks.
Now, you may run Bluestacks smoothly without crashing.


![Top 8 Solutions to Fallout 4 Crashing Issue [New Update]](https://images.minitool.com/partitionwizard.com/images/uploads/2020/09/fallout-4-crashing-thumbnail.jpg)
User Comments :