A great many users complain about the Blue Snowball not working issues on Windows 10 PC. Are you also struggling to fix the issue? Don’t worry. This post of MiniTool will provide you with several effective troubleshooting methods.
Blue Snowball is a widely popular microphone brand for those streamers and YouTubers. However, lots of users encounter Blue Snowball not working after upgrading their operating system to Windows 10. According to a survey, many possible factors including improper sound settings and corrupt device drivers can trigger the problem.
Solution 1. Disable the Audio Device and Reconnect Blue Snowball Mic
If it is the first time you encounter Blue Snowball not working Windows 10, you can manually disable the audio devices and reconnect Blue Snowball Mic. Here’s how to do that:
Step 1. Disconnect your Blue Snowball Mic from any USB ports on your computer.
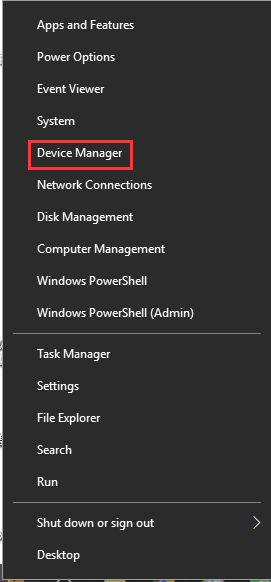
Step 2. Right-click the Start menu on the left side of your desktop and select Device Manager.
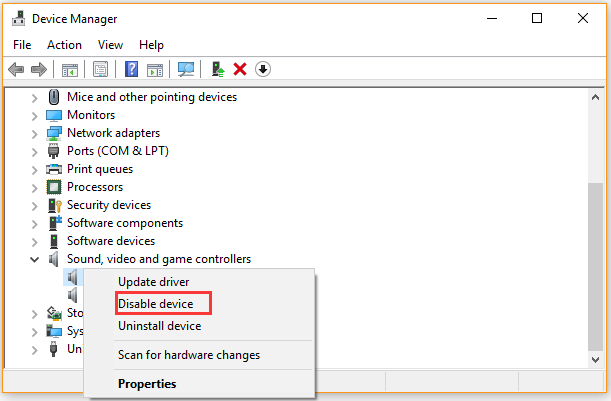
Step 3. Expand the Sound, video and games controller section, and then right-click the connected microphone from the list and click on Disable device.
Step 4. Once the device is disabled, reboot your computer and reconnect the Blue Snowball Mic to a USB port.
If this operation can’t fix the Blue Snowball mic not working, move on to the following methods.
Solution 2. Reinstall the Audio Device Driver
As mentioned above, the corrupted or improper device driver is also responsible for Blue Snowball not working Windows 10. To fix this issue, you can try reinstalling the device driver.
Step 1. Open your Device Manager just like in the above solution, and then navigate to the Audio Inputs and Outputs section.
Step 2. Right-click the Blue Snowball Microphone and select Uninstall device. Then follow the on-screen prompts to complete the process.
Step 3. Navigate to the Sound, video and games controller section and uninstall the Blue Snowball Drivers from here.
Now, you can re-plug the Blue Snowball microphone into your computer and see if it can be recognized.
Solution 3. Troubleshoot Sound Problems
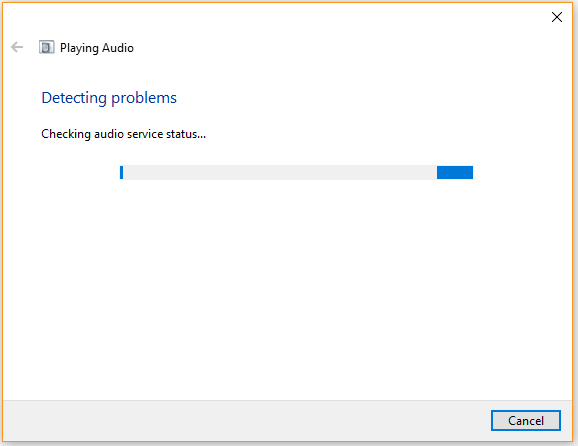
Another simple and direct solution is to use the Windows built-in tool. If the Blue Snowball microphone is not listed in Device Manager, you can try troubleshooting sound problems. To do so, right-click the Sound icon from the right bottom of the taskbar and select Troubleshoot sound problems. Then this tool will automatically detect any sound problems on your computer and help you fix them.
Solution 4. Set Sound Settings to Default
The improper sound settings can also trigger the Blue Snowball not showing up issue on Windows 10. To fix the issue, you can try resetting the sound settings. For that:
Step 1. Right-click the Sound icon from the right bottom of the taskbar and select Open Sound Settings.
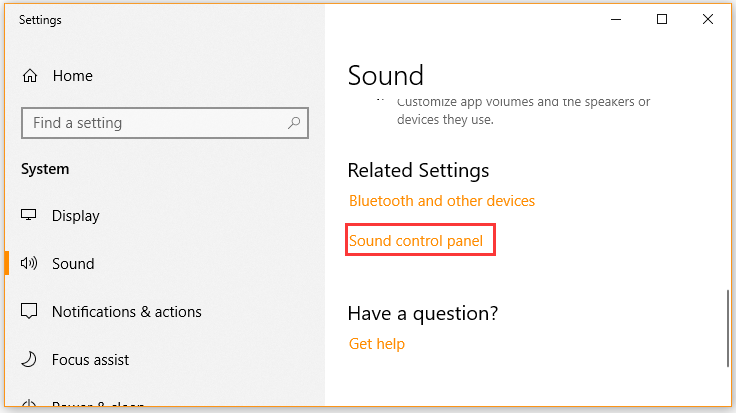
Step 2. Scroll down the right sidebar and click on the Sound control panel.
Step 3. In the pop-up window, navigate to the Recording tab and you will found the Blue Snowball microphone along with other recorders.
Step 4. Disable all other devices other than the Blue Snowball Mic by right-clicking them and selecting Disable.
Step 5. Select the Blue Snowball Mic and click on the Set default button.
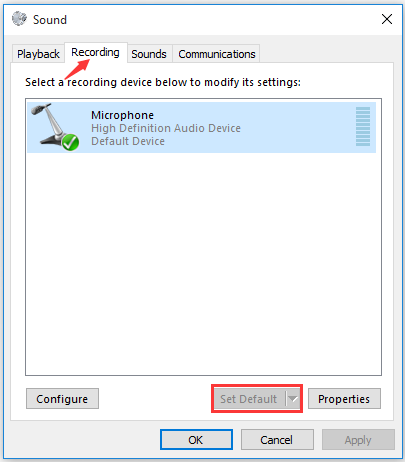
Now, you can check if the Blue Snowball not recognized issue is resolved or not.
Solution 5. Check Privacy Settings for Microphone
The privacy settings will be automatically changed and some apps won’t be allowed to use the microphone after installing Windows 10 update. To fix Blue Snowball not showing up issue, you can check your privacy settings for the microphone.
Step 1. Press Win + I keys to open the Settings app and click on Privacy.
Step 2. Scroll down the left sidebar to Microphone section, and then click on the Change button at the right pane and make sure the Microphone for this device option is enabled.
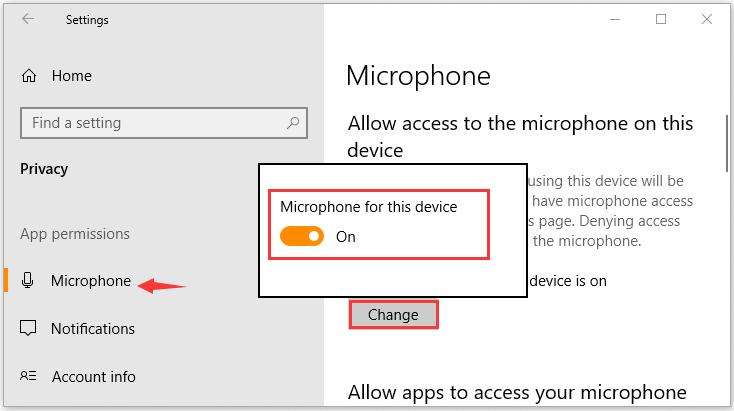
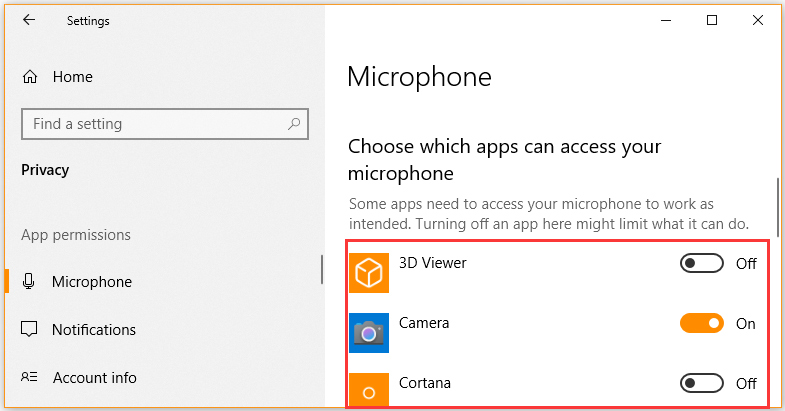
Step 3. Scroll down the right sidebar to choose which apps can access your microphone. If you want to use an app for the microphone, make sure you enable it by toggling on the switch. At this time, the Blue Snowball not working issue should be fixed.

![Volume Mixer Won’t Open Windows 10 [Full Fix]](https://images.minitool.com/partitionwizard.com/images/uploads/2020/09/volume-mixer-wont-open-thumbnail.jpg)
User Comments :