If you are a game lover, you might be using Bethesda.net Launcher. Unfortunately, some users report that they encounter the Bethesda Launcher not working issue on PC? Don’t worry if you are bothered by the same problem. MiniTool Partition Wizard puts together some solutions to it in this post.
If you love games like Fallout 67, Rage 2, Doom External, and Dishonored: Death of the Outsider, you might use Bethesda.net Launcher to download, manage, and play them.
Supporting 12 languages, Bethesda.net Launcher is one of the most popular game platforms besides Steam. It is available on various operating systems, including, Windows 7, 8, 8.1, and 10. And it requires only 1GB RAM and 250 free disk space to install.
However, similar to other applications, Bethesda.net Launcher also has some bugs and issues. According to users, they get a black screen and the Bethesda.net Launcher won’t launch sometimes. Some users report that Bethesda.net Launcher doesn’t work at all.
To solve the problem, you can try the following solutions.
Solution 1: Run Bethesda.net Launcher as administrator
An easy way to solve Bethesda Launcher not working is to run the application as administrator, as the problem might happen due to privilege issues. Here are the detailed steps.
Step 1: Press Shift + Ctrl + Esc to open Task Manager.
Step 2: Under the Processes tab, right-click Bethesda.net Launcher and select End task.
Step 3: Right-click the shortcut for Bethesda.net Launcher on your desktop and select Properties.
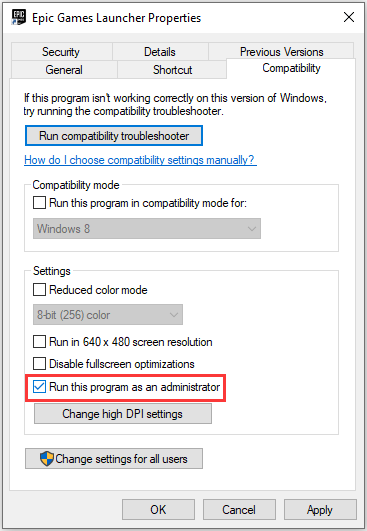
Step 4: In the Properties window, switch to the Compatibility tab and check the option Run this program as an administrator.

Step 5: Click Apply and OK to save the changes.
After setting the application to run as an administrator, you can double-click its shortcut to launch the launcher and check if it works properly. If you still encounter Bethesda.net Launcher black screen, you should move on to the next solution.
Solution 2: Update Your Graphics Card Driver
An outdated or corrupted graphics card driver could also lead to the Bethesda.net Launcher not working issue. To solve the problem, you should try updating your graphics card driver to the latest version. You can follow the steps below.
Step 1: Right-click the Start button and select Device Manager.
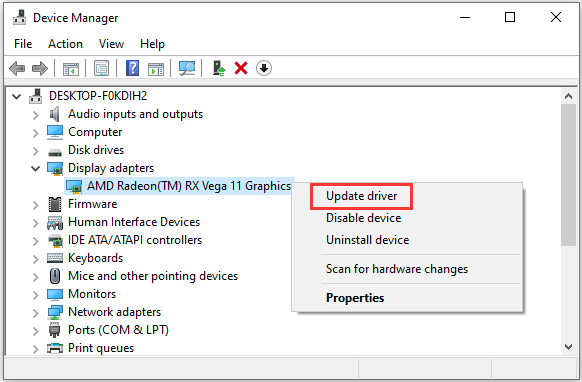
Step 2: Double-click Display adapter to expand the category. Then right-click your graphics card and select Update driver.

Step 3: In the pop-up window, select Search automatically for updated driver software. Then wait until Windows finishes installing the latest driver for your graphics card.
When the process is finished, you will be required to perform a restart. Then you can run Bethesda.net Launcher and hope it works without any problems.
Solution 3: Run your Bethesda.net Launcher in Compatibility Mode
You can also try running the launcher in compatibility mode to fix Bethesda Launcher not working.
Step 1: Right-click the Bethesda.net Launcher shortcut and select Properties.
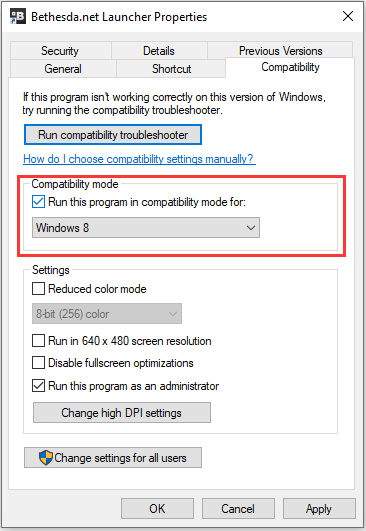
Step 2: Go to the Compatibility tab again.
Step 3: Check Run this program in compatibility mode for, and select a previous version of Windows from the drop-down menu.

Step 4: Click Apply and OK to save the settings.
Then you can check if the problem has been solved. If it doesn’t work again, you might need to uninstall the program and then visit the official website of Bethesd.net to download and reinstall the Bethesda.net Launcher.


User Comments :