A large number of people are unclear about the Azure Storage Explorer application. In this post, MiniTool will introduce the definition, main benefits, prerequisites, and download guide of this app.
Azure Store Explorer Overview
Before the Azure Storage Explorer download, it’s necessary to figure out something important. Here we summarize several frequently asked questions and explain them one by one.
What Is Azure Storage Explorer
Azure Storage Explorer is a practical and user-friendly application that can be used to manage your Azure Cloud Storage resources in a clean graphical interface. It can not only be installed on all Windows editions that support Microsoft Azure but on Linux and macOS.
The Azure Explorer is a cloud-based storage manager that boasts many powerful features. Here we summarize them as follows:
- Deal with various types of files, including documents, images, videos, etc.
- View, edit, and delete Azure cloud storage resources.
- Organize Azure Blobs, files, tables, and queues.
- Create, edit, delete, and query table entities.
- Import and export table entities to file.
- Upload, download, open, rename and edit files.
- Access local and attached accounts.
- Import and manage SSL certificates.
- Supports multiple UL languages.
- Queue storage messages and view a list of the blob containers.
- …
Is Microsoft Azure Storage Explorer Free
Of course, yes. Microsoft Azure Storage Explorer is 100% free of charge and has no feature restrictions, time limitations, or hidden fees. Moreover, it is free not only for Windows operating systems but for Linux and macOS.
Azure Storage Explorer System Requirements
Before you download Storage Explorer, make sure that your computer meets the following system requirements:
Here we take Windows systems for example.
- Operating System: Windows 10 (recommended), Windows 11, Windows 8, Windows 7
- .Net Framework: .NET Framework 4.7.2 at a minimum
- Storage Space: at least 400MB free of disk space
- Others: at least 1 Azure account and internet connection
Azure Storage Explorer Download and Install for Windows 10/11
How to download Azure Storage Explorer for Windows 10/11? Here is a full guide for you.
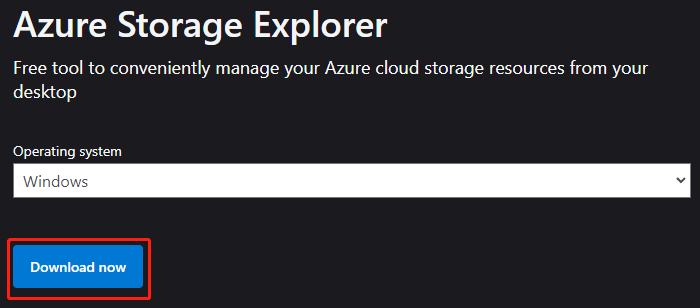
Step 1. Click here to open the Azure Storage Explorer download page, select Windows from the Operating system drop-down menu, and click on Download now.
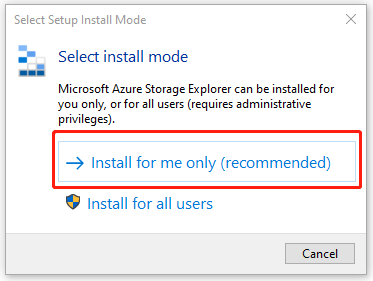
Step 2. Once downloaded, double click the StorageExplorer.exe file to run it and select Install for me only (recommended).
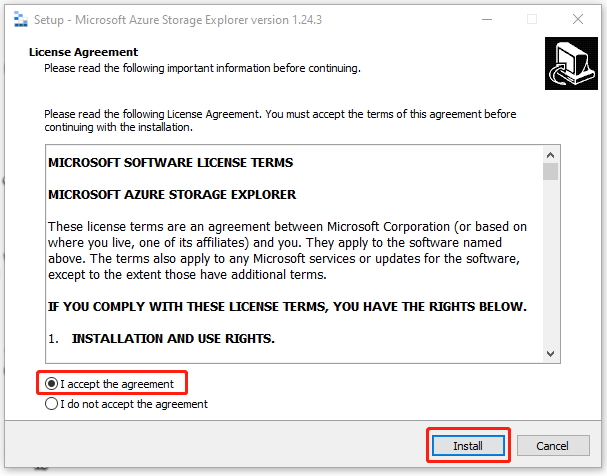
Step 3. Select I accept the agreement in the Microsoft Azure Storage Explorer Setup wizard and click on Install.
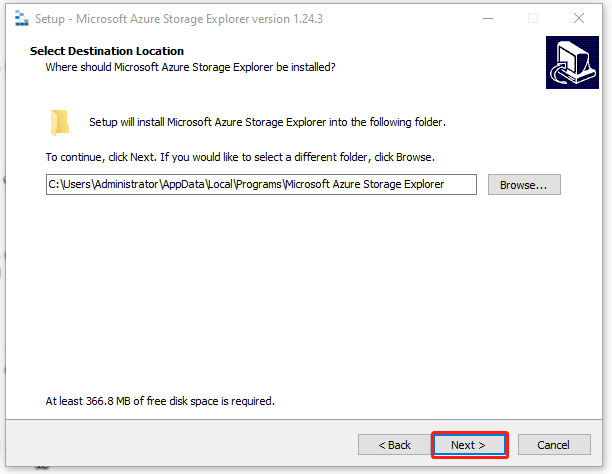
Step 4. Click on Browse to select a location for the Microsoft Storage Explorer installation package and click on Next.
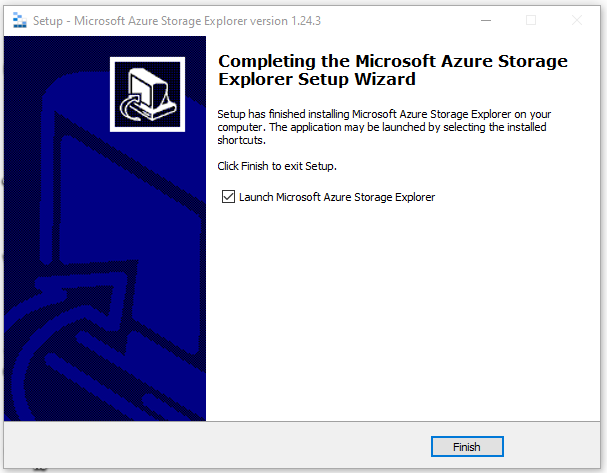
Step 5. Wait for the Setup to install Microsoft Azure Storage Explorer and click on Finish when the setup is complete. Here you can tick the checkbox next to Launch Microsoft Azure Storage Explorer to launch it immediately or untick the box to launch it later.
How to Connect to Azure Storage Explorer
If you don’t know how to connect to Azure Explorer, you can refer to the quick guide below:
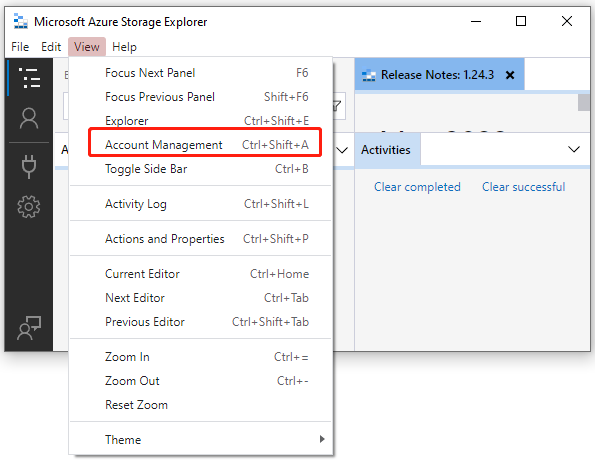
Step 1. In the main interface of the Storage Explorer, select View from the top menu and click on Account Management.
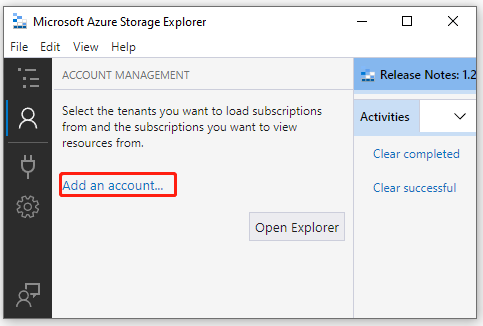
Step 2. Then it will show you all the Azure accounts you’ve signed in to. If you want to connect to another account, click on Add an account.
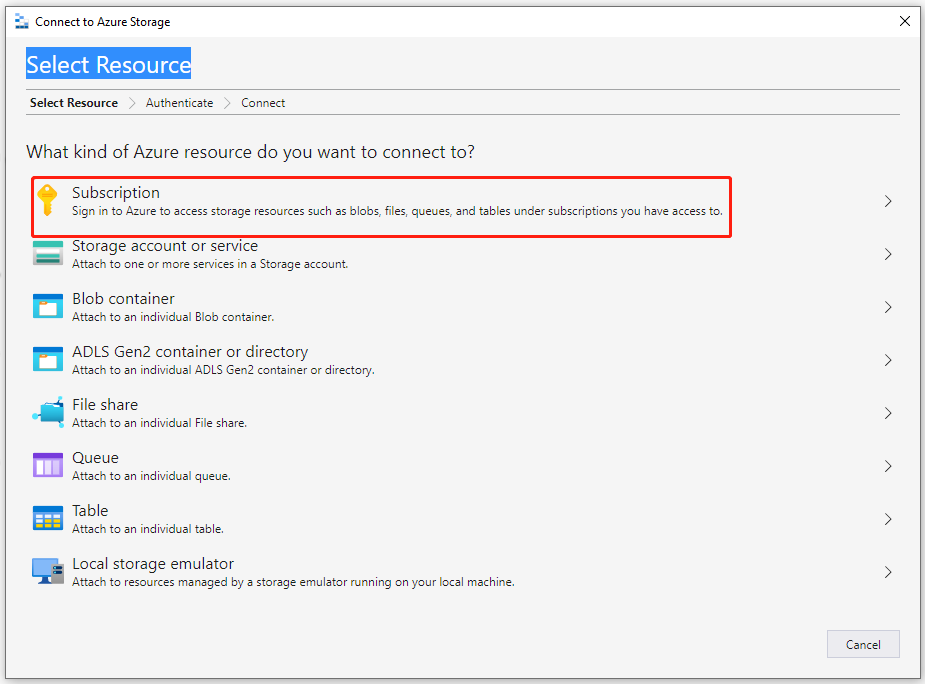
Step 3. In the Select Resource window, click on Subscription to connect to Azure Storage.
Step 4. Select an Azure environment that you want to sign in to and click on Next.
Step 5. Then Azure Storage Explorer will open a webpage for you to sign in. Once signed in, select the Azure subscriptions that you want to use and click on Apply. Then you should connect to Azure Explorer successfully.

User Comments :