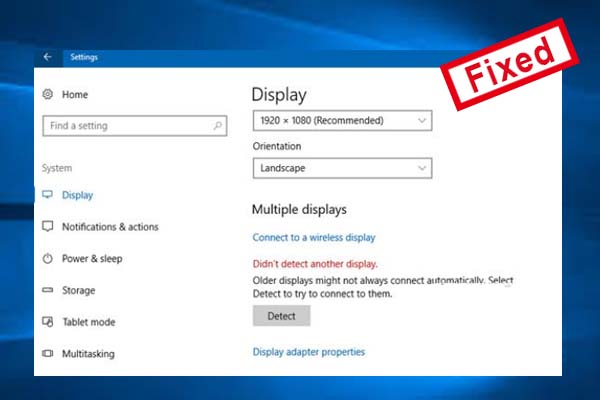
Do you feel that the fonts or icons displayed on the computer screen are too small for you to see clearly? Well, this article from MiniTool Partition Wizard shows how to adjust display scale settings in Windows 10/11.
Adjusting the display scale settings can magnify the screen to make things easier to see and use, which is friendly for people with poor eyesight and avoids stressing your eyes.
Windows 11 can automatically configure display scaling settings to ensure that elements (text, icons, navigation, and others) are properly sized and readable, but this is not perfect and may sometimes require manual adjustment of settings. So, how to adjust display scale settings in Windows 10/11?
How to Adjust Display Scale Settings in Windows 10/11?
To change display scale settings in Windows 10/11, you need to perform the steps below (Windows 11 is similar to Windows 10).
Step 1: Press Windows + I key to open Settings and navigate to the System > Display option.
Step 2: Under the Scale & layout section, click the Scale drop-down menu and select the scale setting. There are several recommended settings (100%, 125%, 150%).
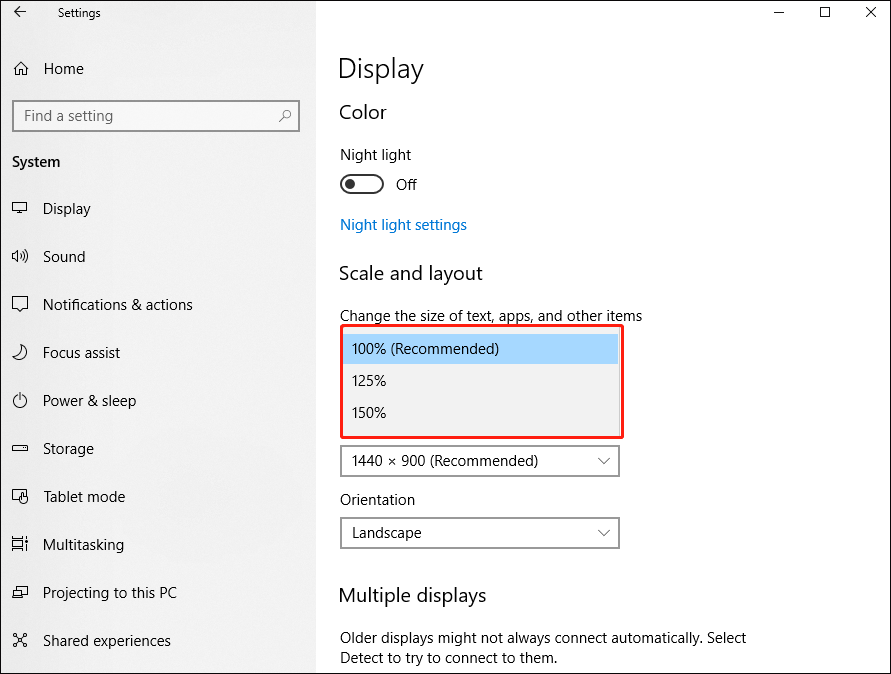
After completing these steps, the new screen display will be applied.
If you connect an external monitor, using the custom scale setting can also help increase the size of text, icons, and menus on the monitor. Changing the Windows 10/11 display scale settings can also improve desktop viewing when displaying PowerPoint presentations on a projector.
How to Adjust Display Scale with Custom Settings in Windows 10/11?
Custom Display Scale Settings in Windows 10
To adjust display scale with custom settings, you can refer to the following steps.
Step 1: Press Windows + I key to open Settings and navigate to the System > Display option.
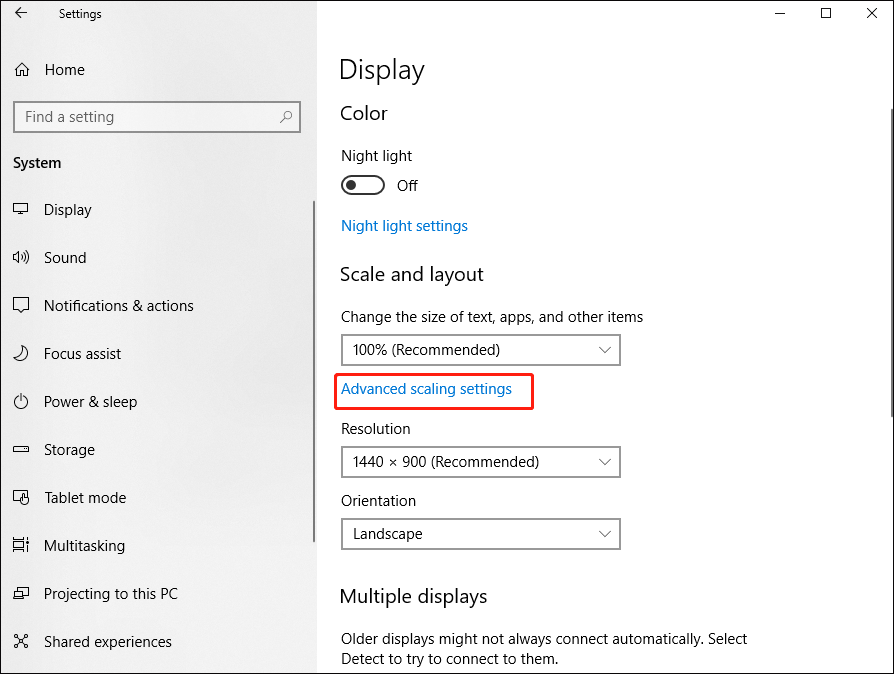
Step 2: Under the Scale & layout section, click Advanced scale settings.
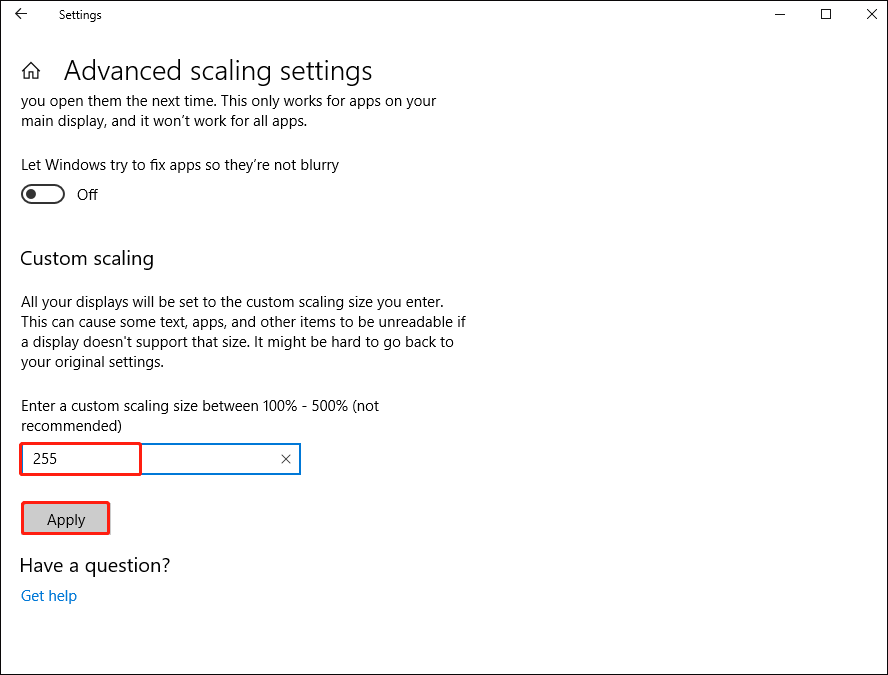
Step 3: Enter a custom scaling size between 100% – 500% and click the Apply button.
Custom Display Scale Settings in Windows 11
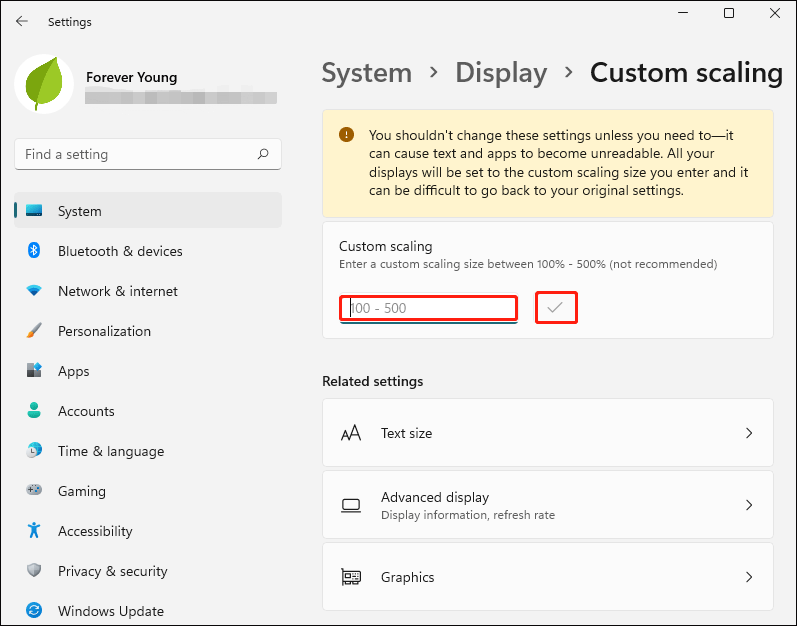
To adjust display scale with custom settings, you can refer to the following steps.
Step 1: Open Settings and navigate to the System > Display option.
Step 2: Under the Scale & layout section, choose Scale and click it.
Step 3: Enter a custom scaling size between 100% -500% and then click ✓ next to it to apply it.
How to Make Text Larger Without Changing Scale Settings in Windows 10/11?
Make Text Larger in Windows 10
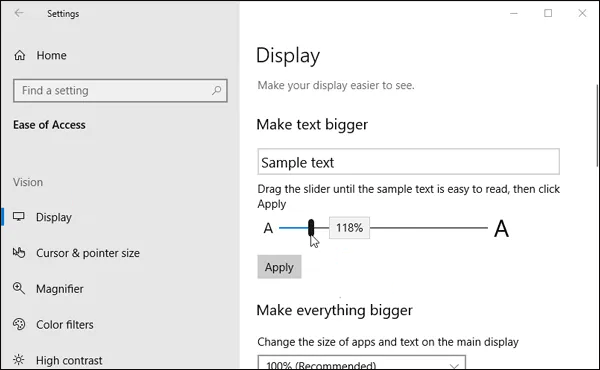
To make text bigger on the desktop in Windows 10, you use the following steps.
Step 1: Open Settings and navigate to the Ease of Access > Display option.
Step 2: Drag the slider under the Make text bigger section, and then click Apply.
Make Text Larger in Windows 11
To make text bigger on the desktop in Windows 11, you use the following steps.
Step 1: Open Settings and click the Accessibility option.
Step 2: Click the Text size option on the right side.
Step 3: Use the Text Size slider to make font sizes larger in Windows 11. Then click Apply.
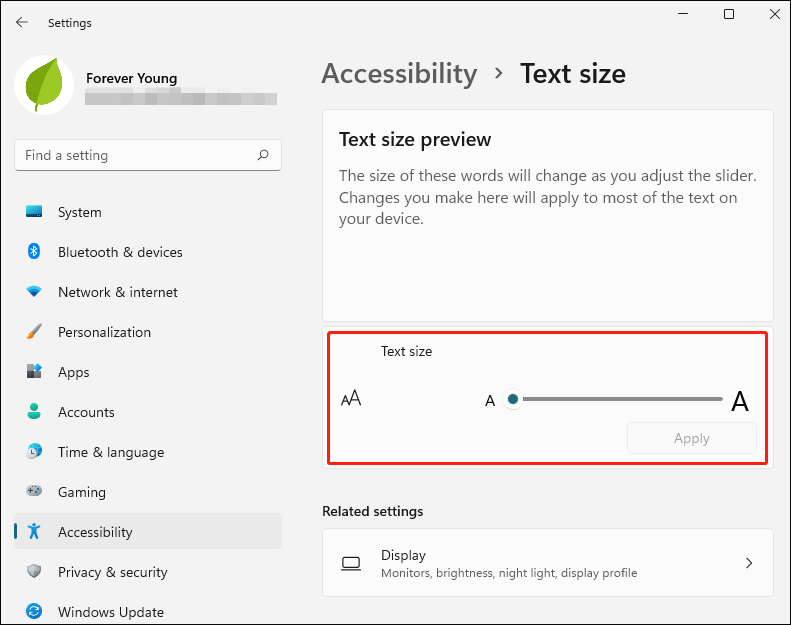
After completing these steps, the screen will flash a “Please wait” message to apply the new text size.
Bottom Line
After you read this article, you have known how to adjust display scale settings in Windows 10/11. Do you have any questions about this content? If you have any questions, please leave them in the comment zone and we will try to answer them as soon as possible.

