Do you know how to add or remove thumbnail previews Windows 11? If you are still searching for a guide, then you come to the right place. This post of MiniTool summarizes 3 simple ways to show or hide thumbnail previews Windows 11.
Since the release of Windows 11, a large number of users have installed this new operating system. However, many of them feel confused about the new changes and features in Windows 11. For instance, the Windows 11 File Explorer stops showing thumbnail previews for folder and file icons. Don’t worry. There are 3 simple ways on how to add or remove thumbnail previews Windows 11. Now, let’s start trying.
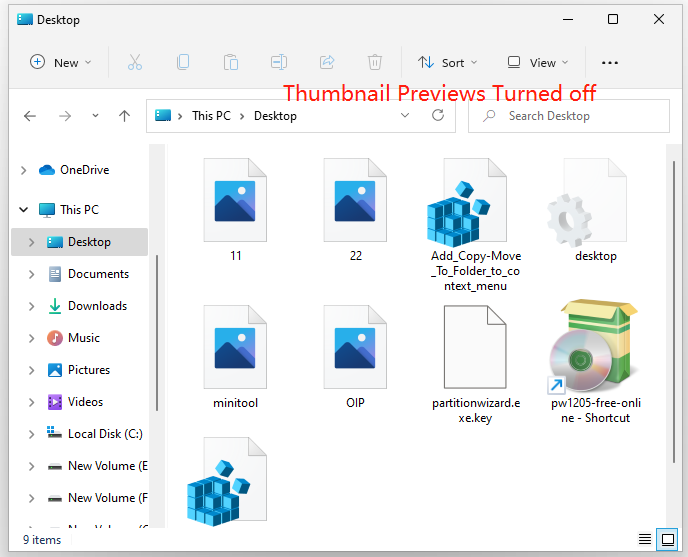
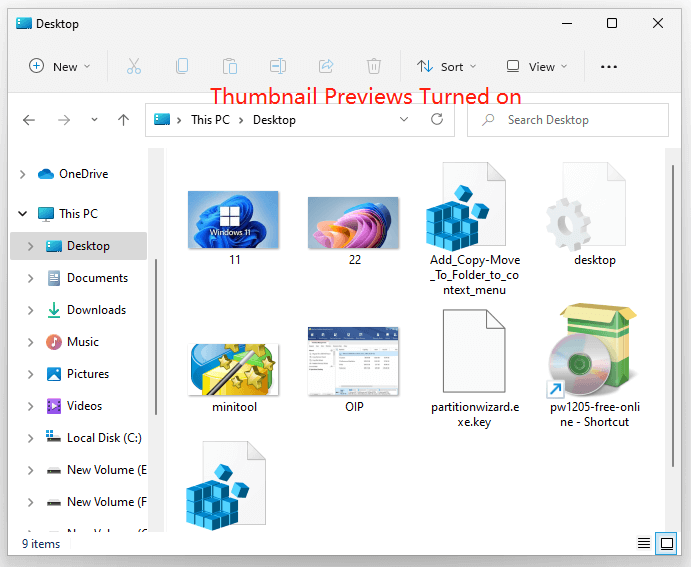
Way 1. Add or Remove Thumbnail previews Windows 11 via Folder Options
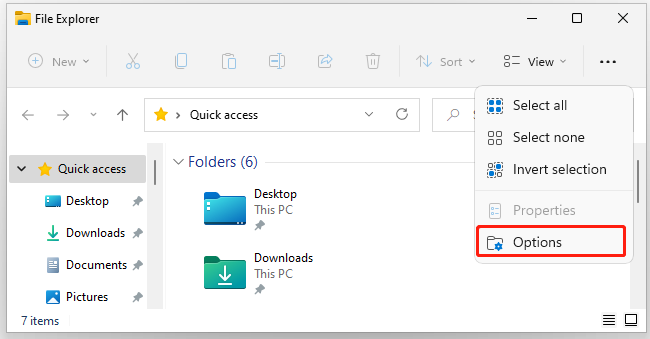
Step 1. Press Win + E keys to open the File Explorer, and then click on the three-dots icon at the top menu and select Options.
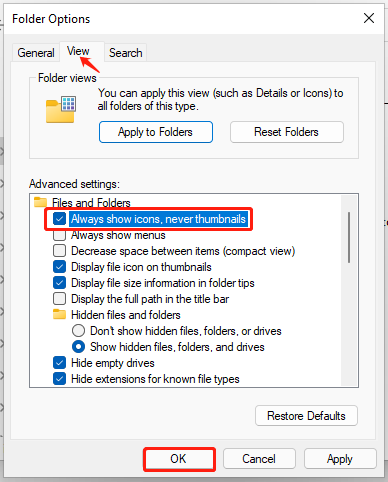
Step 2. In the Folder Options window, go to the View tab and then tick (Off) or untick (On – default) the box for Always show icons, never thumbnails, and click on OK to save the change.
Now, you should see the thumbnail previews Windows 11 is enabled or disabled.
Way 2. Add or Remove Thumbnail Previews Windows 11 via Group Policy
Before performing the steps below, make sure that you sign in to an administrator. Besides, the Local Group Policy Editor is only available in Windows 11 Pro, Enterprise, and Education editions.
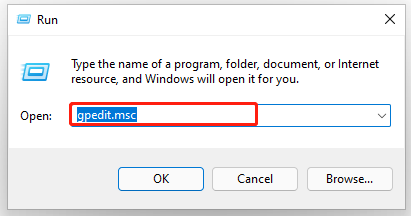
Step 1. Press Win + R keys to open the Run dialog box, and then type gpedit.msc in it and hit Enter.
Step 2. In the pop-up window, locate the following path from the left navigation bar.
User Configuration/Administrative Templates/Windows Components/File Explorer
Step 3. With the File Explorer folder selected in the left pane, double click the Turn off the display of thumbnails and only display icons from the right area to edit its value.
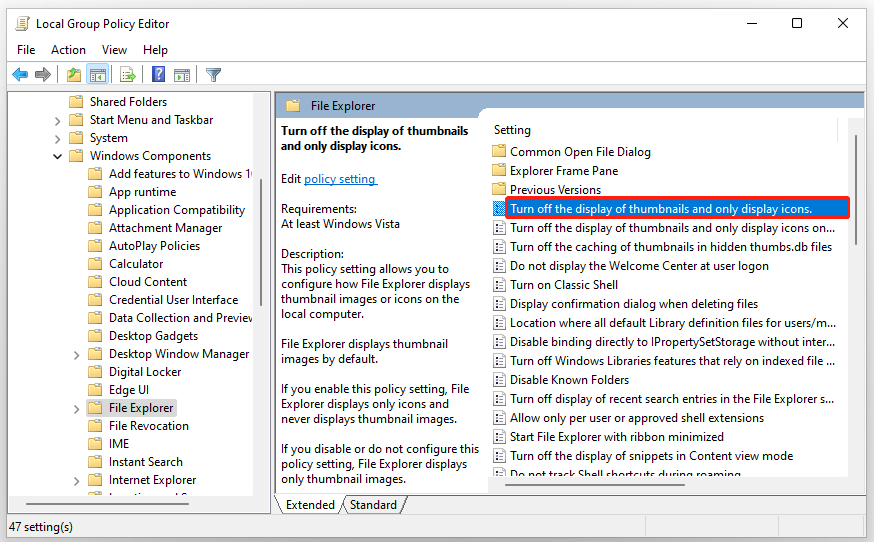
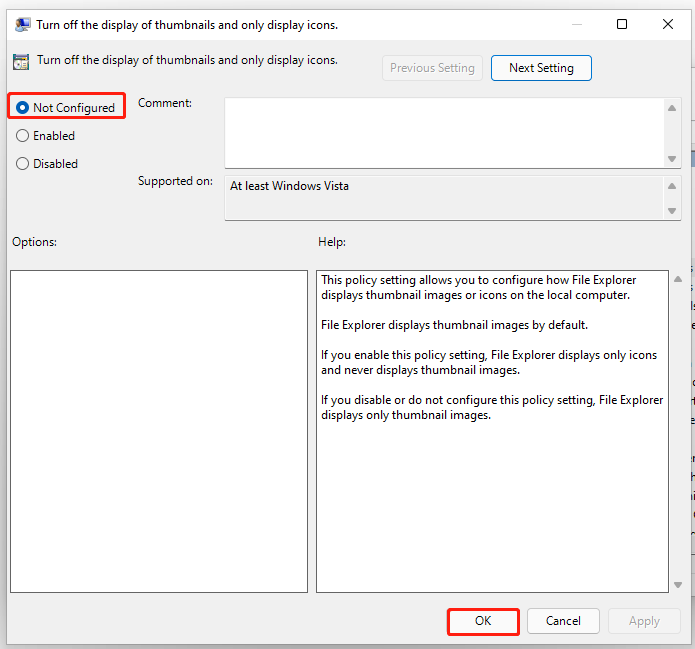
Step 4. If you want to add thumbnail previews in File Explorer Windows 11, select Not Configured. If you want to remove thumbnail previews Windows 11, select Enabled.
Step 5. Click on OK to save the change and close the Group Policy Editor.
Way 3. Add or Remove Thumbnail previews Windows 11 via Visual Effects Settings
In addition, you can add or remove thumbnail previews in Windows 11 for the current user via the Visual Effects settings.
Step 1. In the File Explorer window, right-click This PC and select Show more options > Properties.
Step 2. In the pop-up window, scroll down the right side and click on System advanced settings.
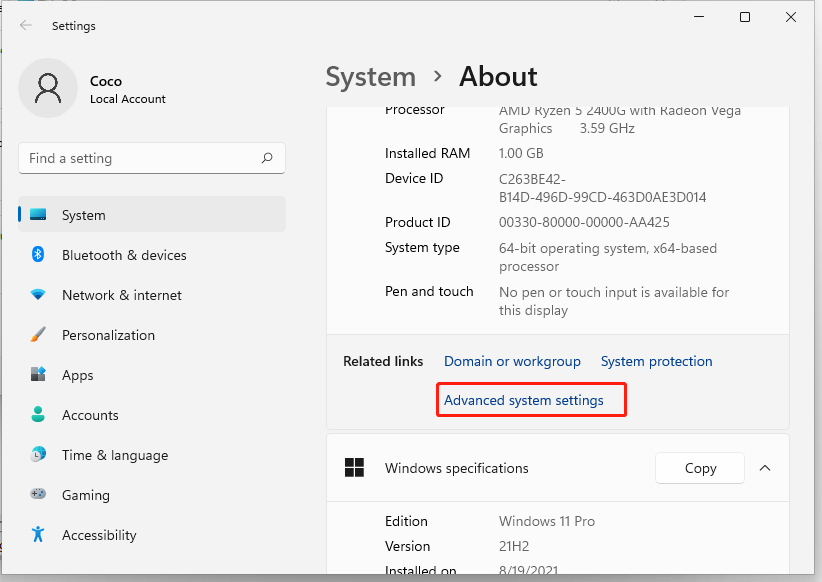
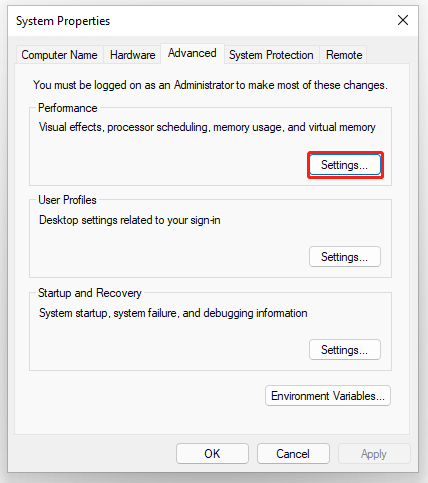
Step 2. Go to the Advanced tab and click on Settings under the Performance section.
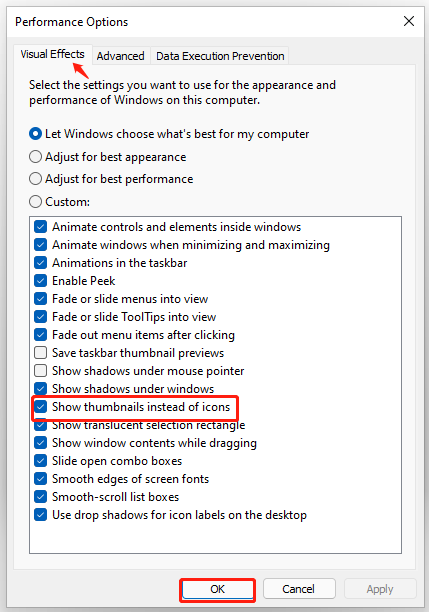
Step 3. In the Performance Options window, go to the Visual Effects tab, and then tick (On – default) or untick (Off) the Show thumbnails instead of icons and click on OK.
How to enable or disable thumbnail previews Windows 11? The top 3 methods have been illustrated. Now, it’s your turn to have a try.

![How to Map a Network Drive in Windows 11? [Step-by-Step Guide]](https://images.minitool.com/partitionwizard.com/images/uploads/2021/10/how-to-map-a-network-drive-in-windows-11-thumbnail.jpg)
User Comments :