If you are facing the “a socket error occurred during the upload test” error, don’t miss this tutorial from MiniTool Partition Wizard. Here, you will learn about several solutions to this problem, and you can try them one by one according to the given instructions.
Recently, many users are reporting that they receive the socket error message while they are trying to run a speed test on the internet connection. In most cases, this error appears while users are using SpeedTest, but it has been also reported to occur on many other online speed test tools.
The complete error message reading:
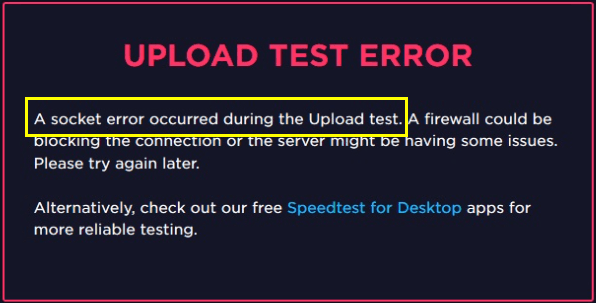
Upload test error
A socket error occurred during the Upload test. A firewall could be blocking the connection or the server might be having some issues. Please try again later.
The upload test error could be caused by many factors, but you don’t need to worry. Here are some fixes you can have a try.
Fix 1: Enable Connected Devices Platform
The “Connected Devices Platform – Wi-Fi Direct Transport (TCP-Out)” outbound rule is a known factor that can cause the socket error. To solve the problem, you need to make sure it is enabled.
Step 1: Press Windows + S, input control panel, and click the search result to open it.
Step 2: Navigate to System and Security > Windows Defender Firewall and click Advanced settings in the left pane.
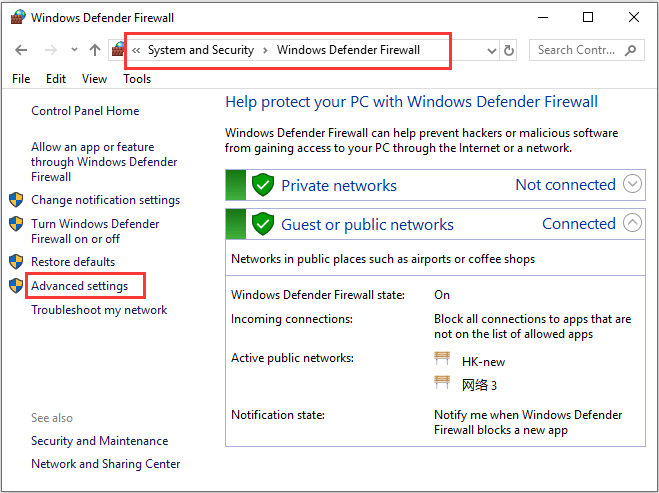
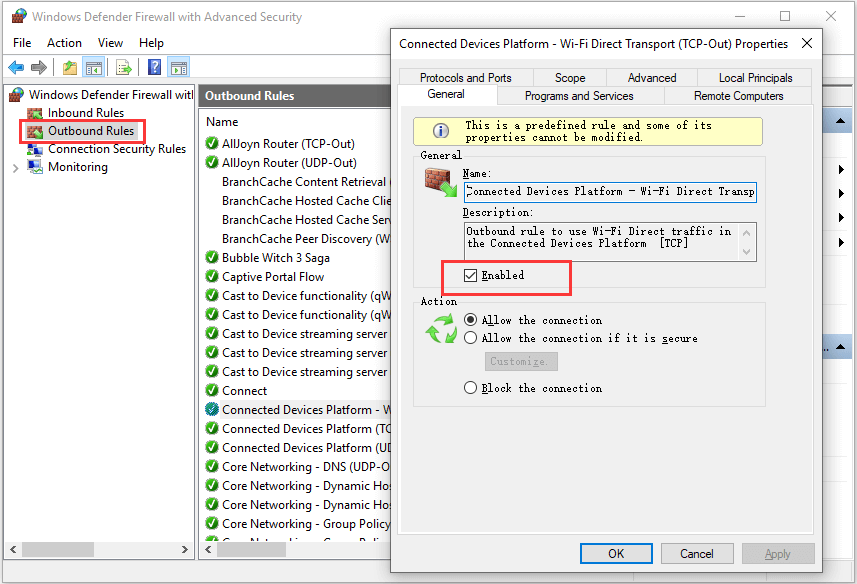
Step 3: Click Outbound Rules and find Connected Devices Platform – Wi-Fi Direct Transport (TCP-Out). Double-click it to open its properties.
Step 4: Under the General tab, make sure the Enabled option is checked. Then, click Apply and OK.
After that, restart your computer and check if you can perform the speed test without the socket error message.
Fix 2: Pause OneDrive Syncing
It is reported that the background cloud solution syncing can take up almost all the available bandwidth and thus trigger the “a socket error occurred during the upload test” when you are performing a speed test.
Therefore, you can try pausing the syncing of your cloud solution like OneDrive or Google Drive. As for OneDrive, you can follow the steps below:
Step 1: Right-click the cloud icon associated with OneDirve from the taskbar.
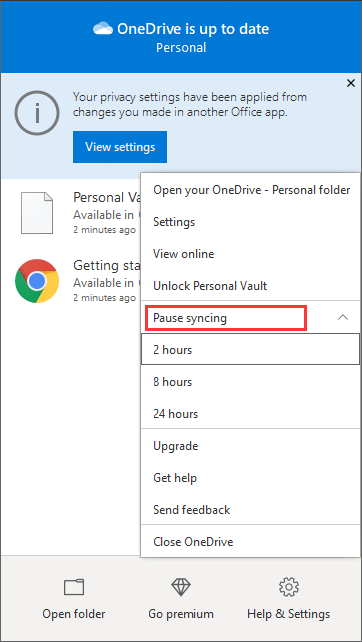
Step 2: Click Pause syncing from the context menu.
Step 3: Select 2 hours from the drop-down options. You don’t need to choose other options to pause it for a longer time, as 2 hours is enough for you to repeat and complete the speed test.
Fix 3: Add an Exception for SpeedTest in Your Antivirus
In some cases, your security software like Avast and the built-in Windows Defender may over-protect your computer. As a result, they may regard the speed test as suspicious activity and block the communication between your PC and SpeedTest server, ending up with this annoying upload test error.
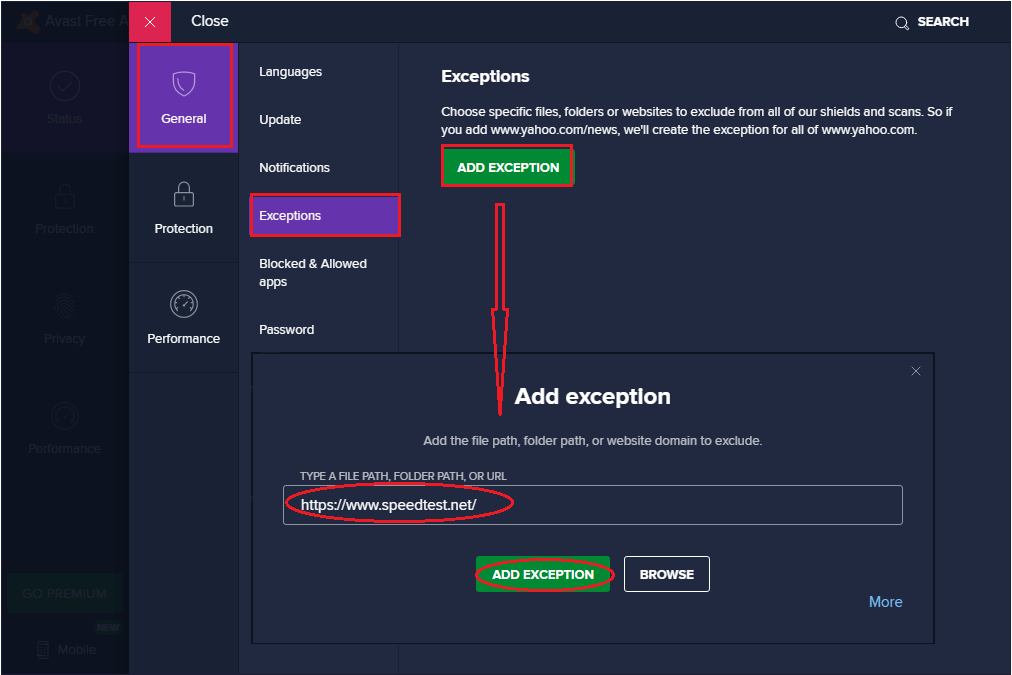
To fix the problem, you can add an exception for SpeedTest in the installed antivirus. Take Avast as an example, you just need to:
Step 1: Open your Avast client, click Menu on the top right corner, and choose Settings.
Step 2: In the General section, switch to Exceptions and click ADD EXCEPTION.
Step 3: In the pop-up window, type the URL of SpeedTest https://www.speedtest.net/ and click ADD EXCEPTION to save changes.
Fix 4: Disable or Uninstall Your Third-Party Antivirus
If adding an exception in antivirus doesn’t solve the socket error, perhaps the problem lies in your security application itself and you might need to disable or uninstall it.
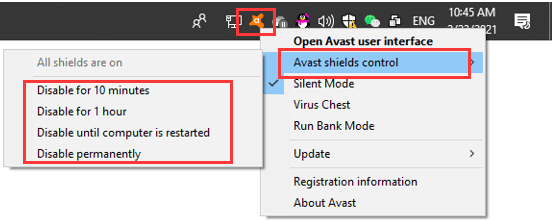
To disable avast, you can simply right-click its taskbar icon and choose Avast shields control. Then, choose an option to disable its read-time protection as your needs. To disable the built-in Windows Defender Antivirus, you can refer to this article.
Can you run the speed test smoothly now? If not, you might need to uninstall the third-party security software or try another online speed test tool.

User Comments :