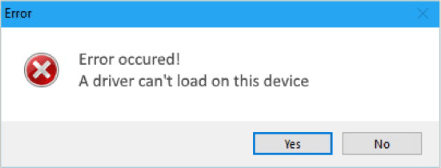
Some of you may encounter error "A driver can’t load on this device" if you have installed device drivers manually. How to solve this problem? In this post, MiniTool offers you 2 ways. Just keep reading to get them.
A Driver Can’t Load on This Device Error
Windows want their users to update their device drivers form official sources through the Windows update system. But sometimes, you may need to get the latest driver versions of some devices. In this case, you want to install drivers manually.
However, if you have installed device drivers manually, you may get the driver loading issue, including “A driver can’t load on this device”. This error means that the driver can’t be loaded to work and the functionality the driver supports does not work any longer, which could have consequences ranging from negligible to severe.
The main reason for this issue is Microsoft Windows Memory Integrity feature. This feature, also known as HyperVisor Protected Code Integrity, can make use of hardware Virtualization and Hyper-V to protect the Windows Kernel-Mode from getting attacked by all sorts of Malware.
This feature is good. If you enable the Memory Integrity option in Windows, the code integrity service will run under the hypervisor protected area created by the Core Isolation, preventing malware and unverified code from tempering with code integrity checks and making way to the Windows Kernel. But, it may also prevent certain device drivers from loading on a device.
How to Fix This Error
Here are two ways for you to solve this problem. Keep reading to get them.
Fix 1. Update Device Drivers
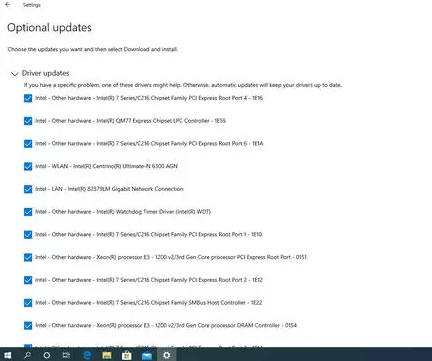
The driver is blocked by Windows. You should replace it with another legal driver. You can do that by using Windows update or downloading verified device drivers from the manufacturer’s website.
If you plan to install drivers via Windows update, please refer to the following steps:
- Press “Windows + I” keys to open Settings window.
- Navigate to Update & Security > Windows Update.
- Under the optional updates section, find the latest version of Windows. Driver updates should be included. You should confirm the optional update before installation.
If you want to reinstall drivers manually, please refer to the following steps:
- Download verified device drivers from the manufacturer’s website and save them on desktop.
- Press “Windows + X” keys.
- Select Device Managerin the pop-up menu.
- Expand directories to find corresponding drivers.
- Click Uninstall deviceto uninstall the problematic drivers.
- Open the new drivers’ folder and double-click the setup file to install it.
Fix 2. Turn off Memory Integrity Setting
The second method is to turn off memory integrity setting so that the driver can load on your computer smoothly. But it is always advisable to use safe device drivers for your own safety. If the drivers are not approved by the device manufacturer, they may be a threat to your privacy and security.
Here is the tutorial on how to turn off the memory integrity setting:
Step 1: Open Settings window again and then navigate to Update & Security > Windows Security.
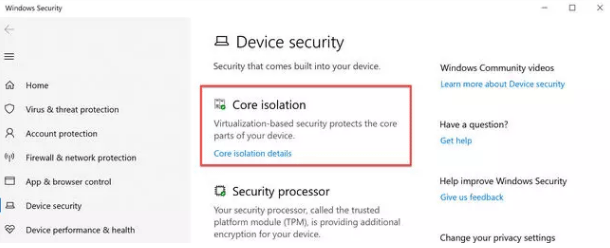
Step 2: From the right-hand pane, select Device Security. This will open another window. Then, click on Core isolation details under Core isolation section. Next, toggle Memory integrity to Off.
Step 3: Restart the computer for the changes to take effect. After rebooting, all the device drivers will be loaded into the memory without any restrictions.

User Comments :